
I need help getting the TIC 500 Stepper Motor Controller working correctly with an Arduino MKR WiFi 1010. I believe that the issues are with my coding as uploaded to the Arduino via the Arduino online editor, Arduino Create.
Scenario:
Now that my wife is in a wheelchair, we needed a way for her to open the bedroom door remotely. I have already had this setup working with another controller and a stepper that was too small to open the door against HVAC pressure in the bedroom. So I bought a new larger stepper and controller from Pololu.
Setup:
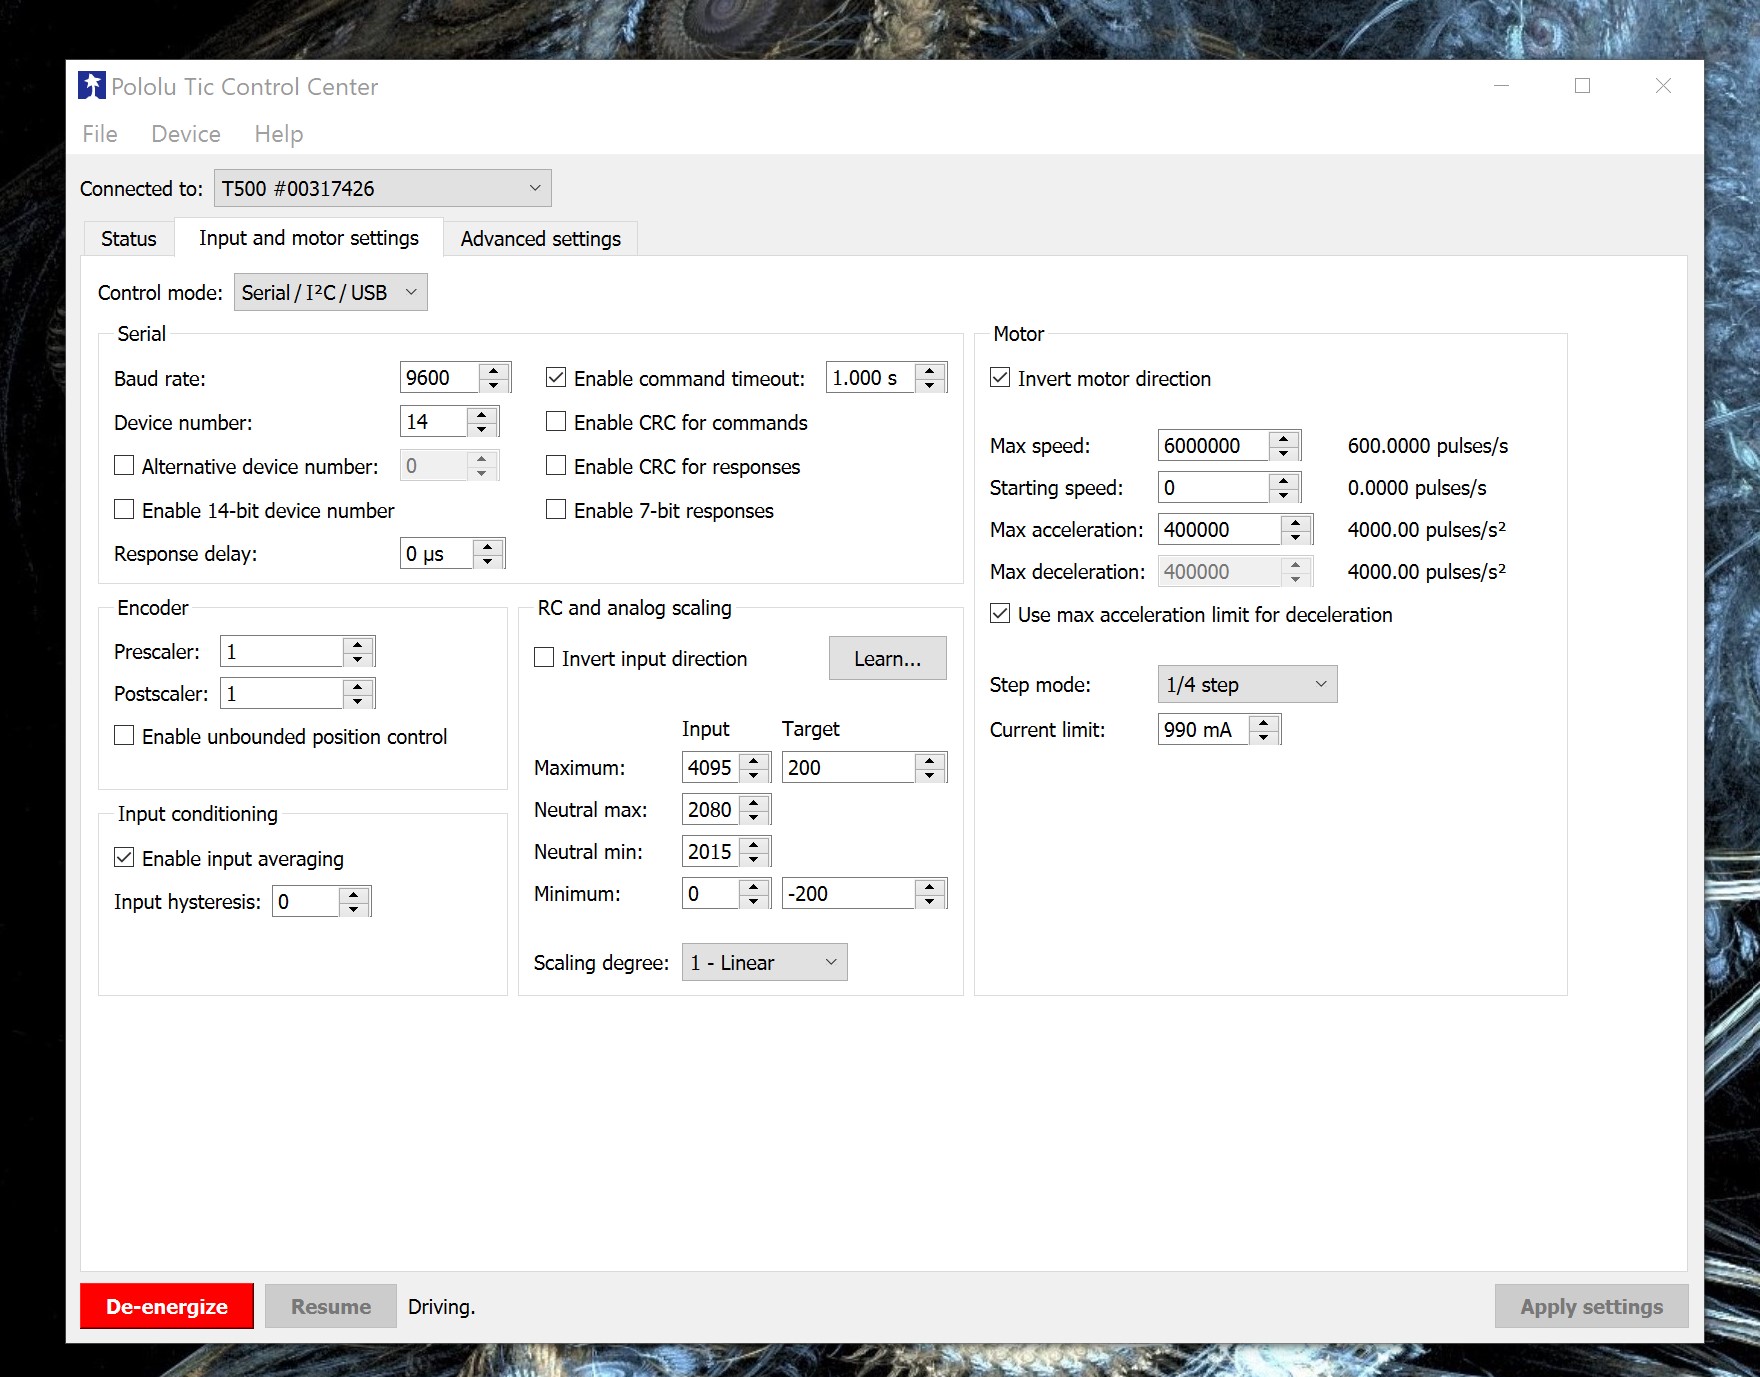
I am using the Pololu Tic Control Center and a Tic T500 both with the latest version of software and firmware.
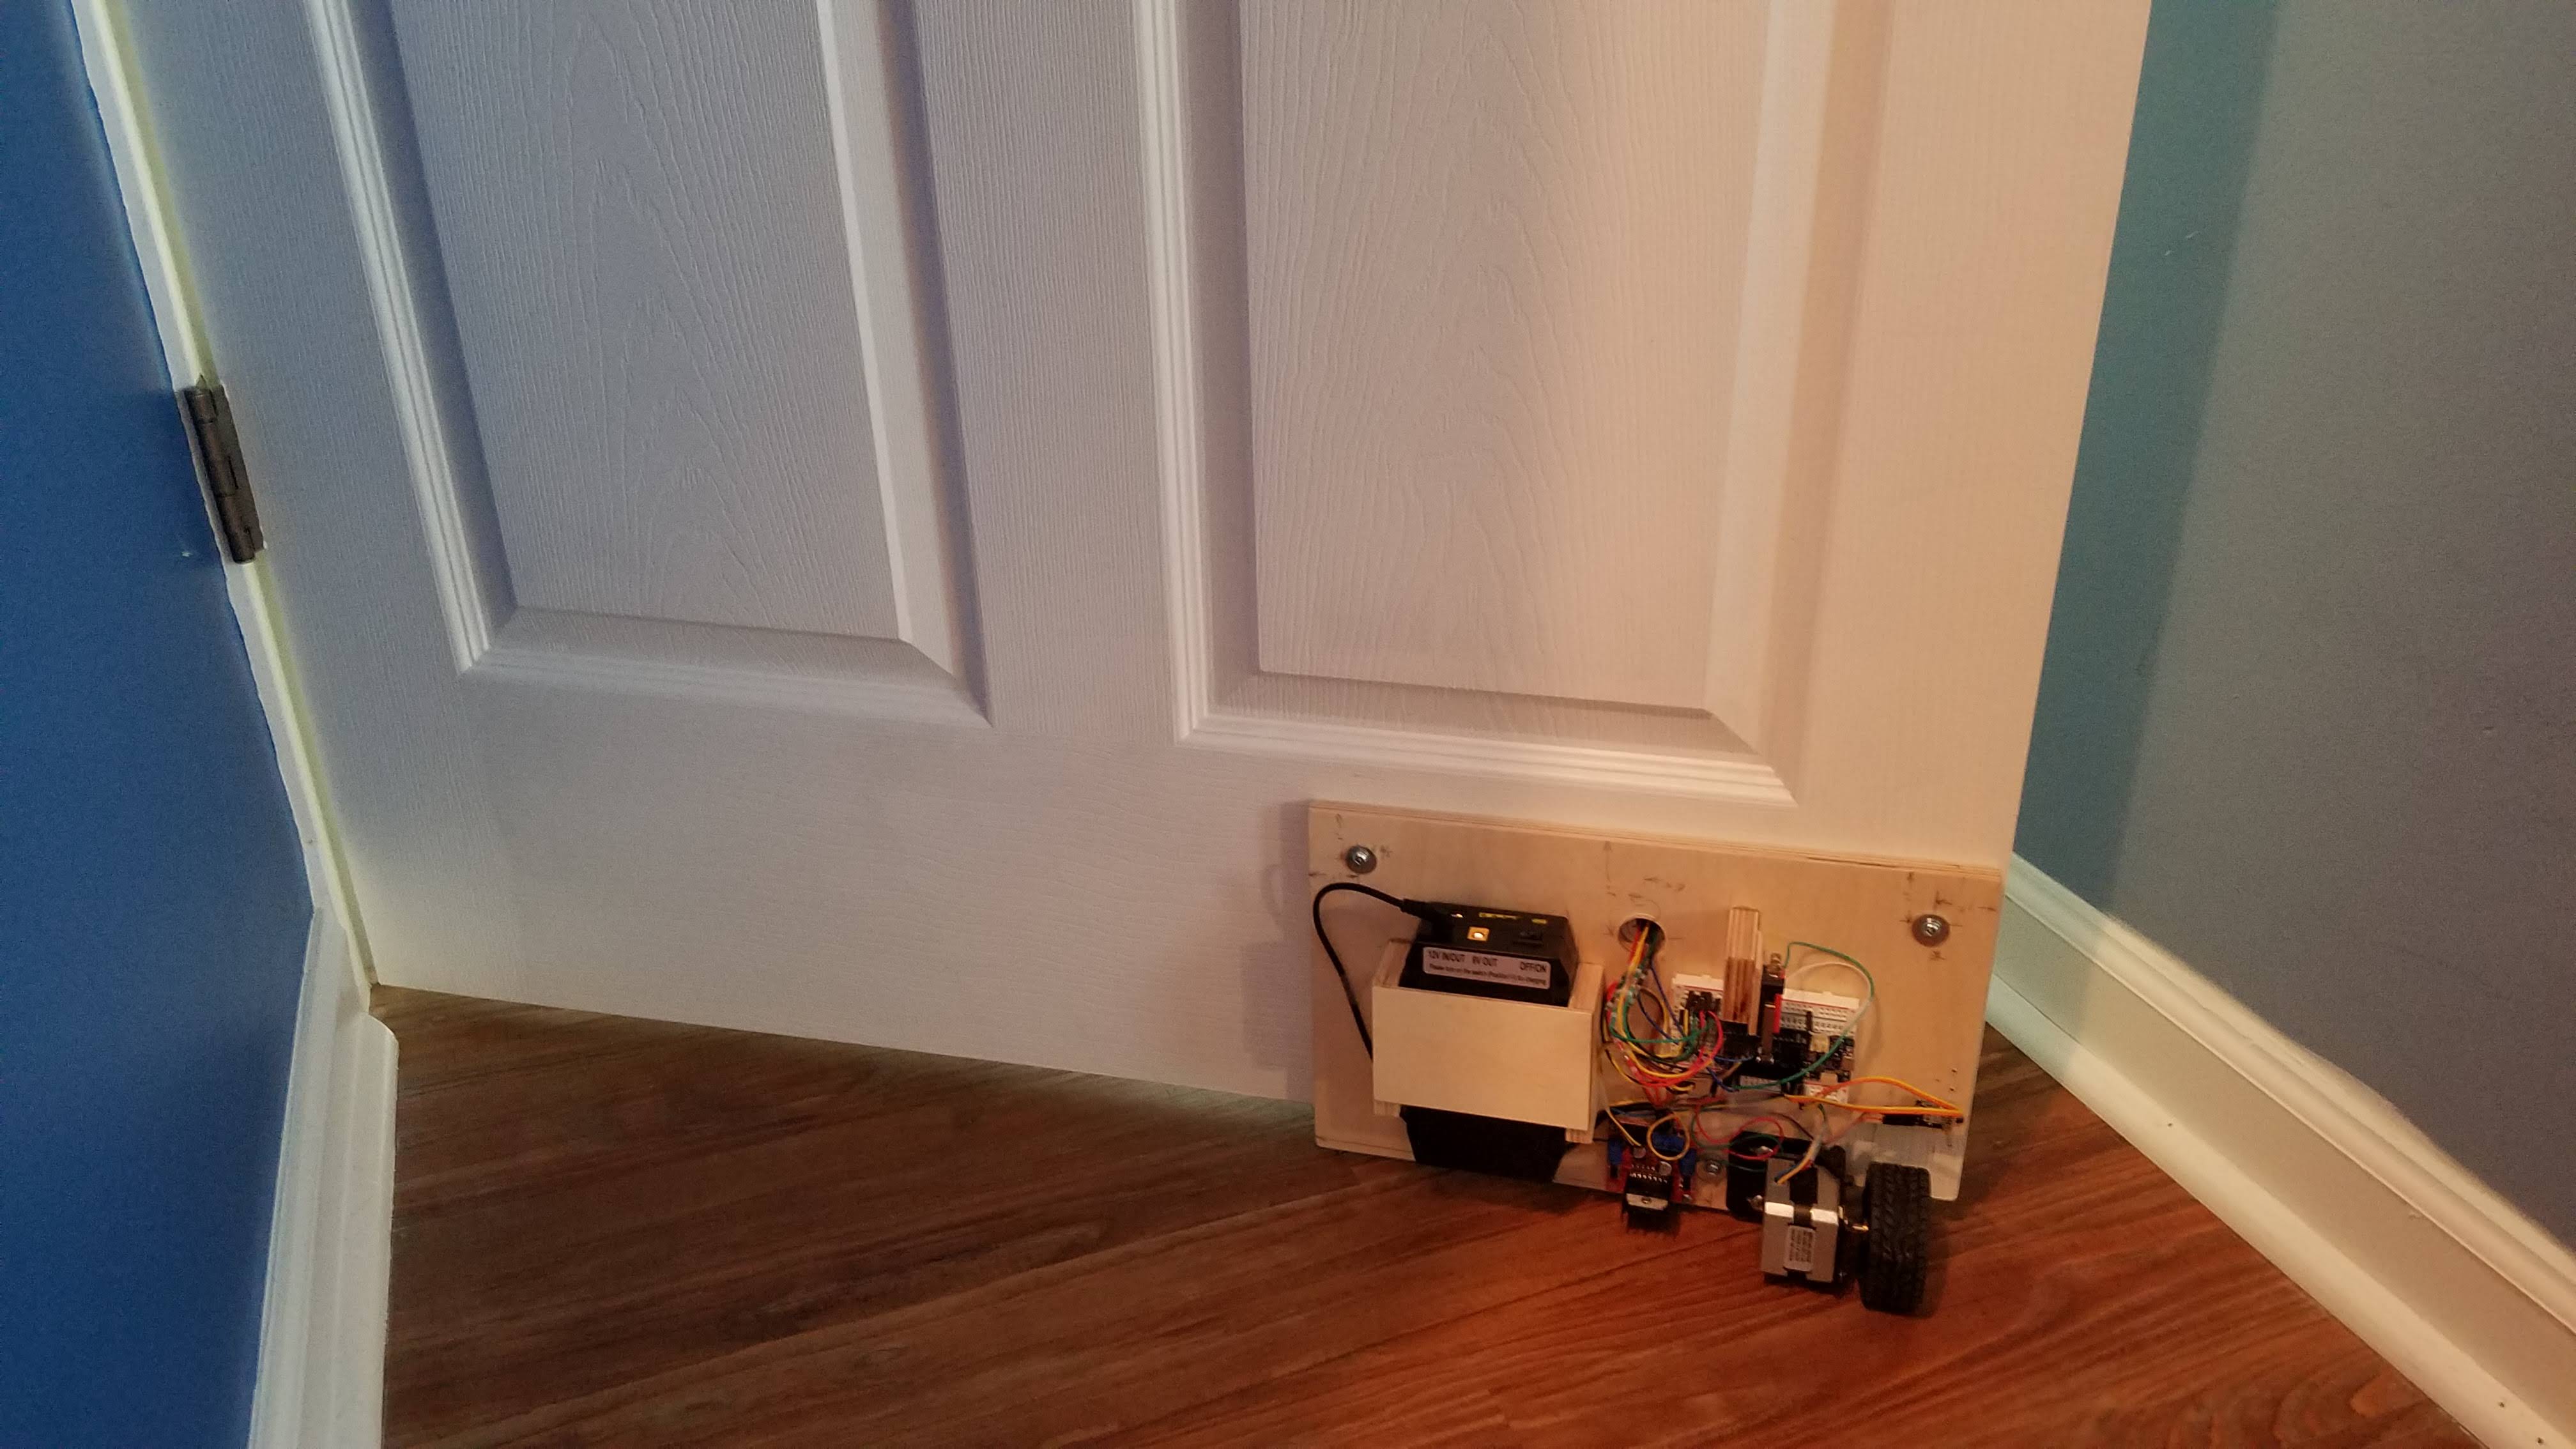
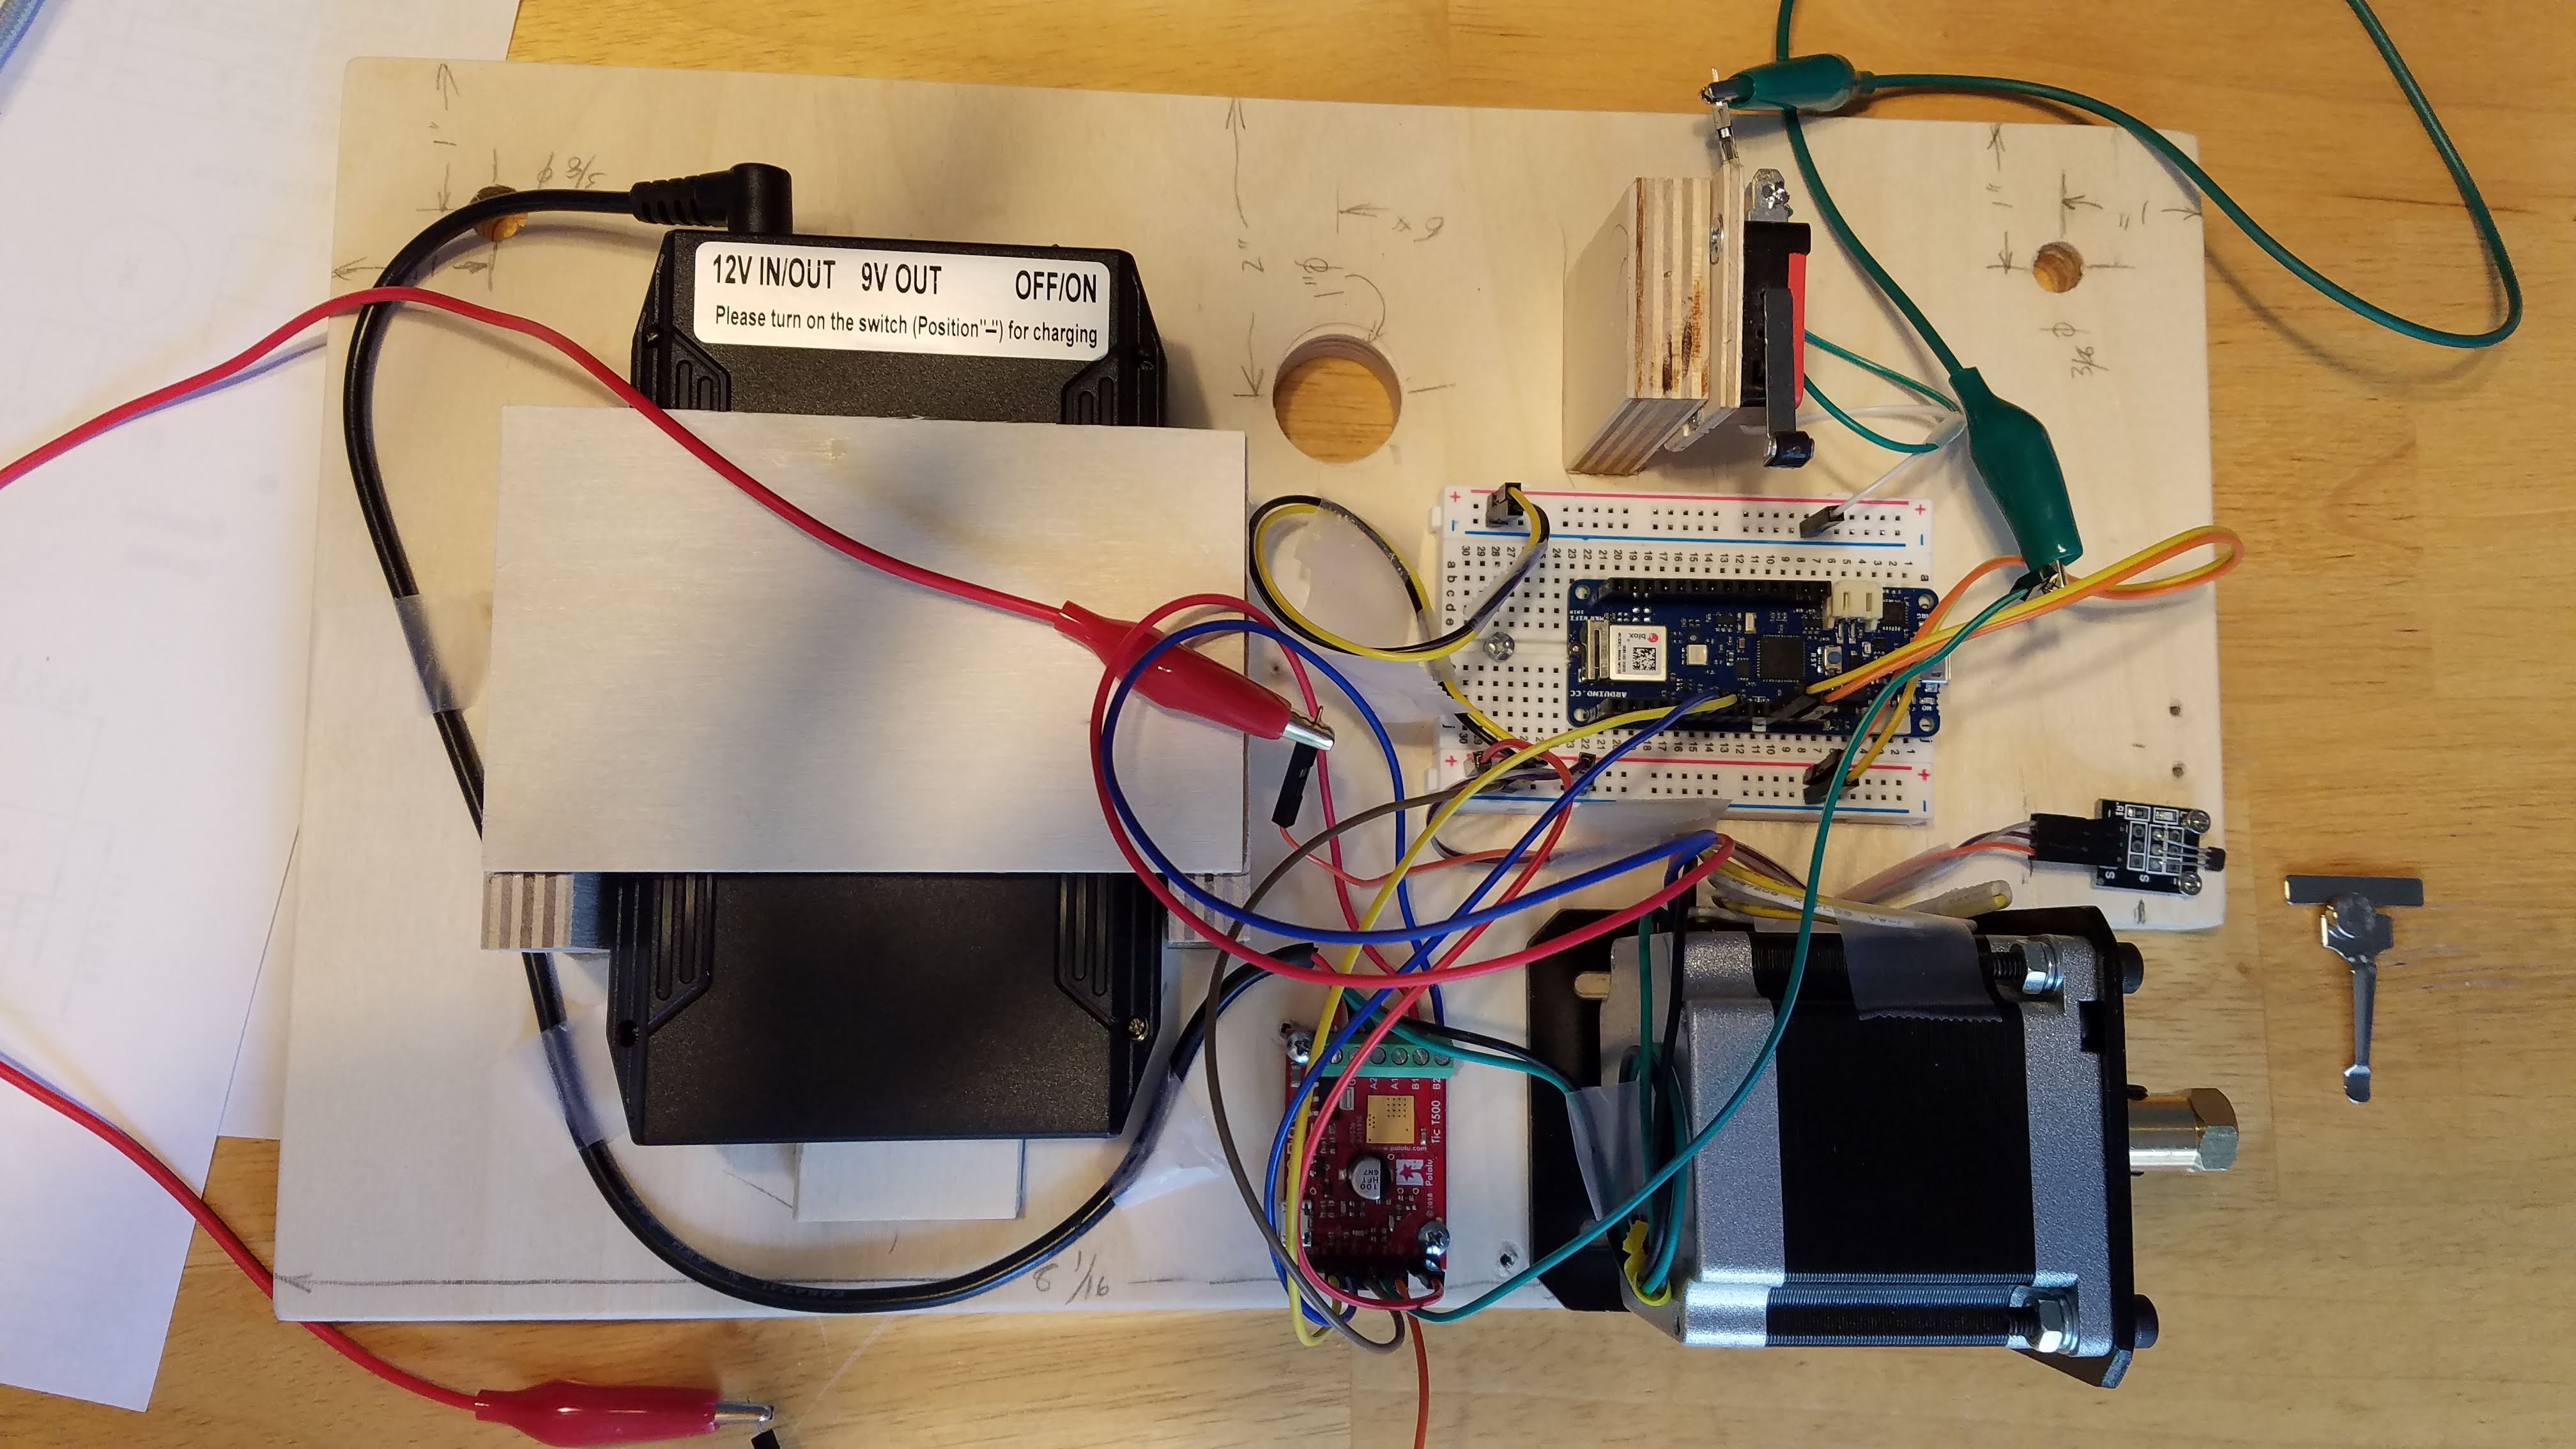
I have mounted the stepper motor (#1472 (SY57STH56-1006A)) along with the Tic T500 controller to a small piece of plywood that I mounted to the door. I have mounted a typical limit switch (for home Forward) to the plywood for the open sensor and a hall effect sensor (for home Reverse) mounted to the plywood senses a rare earth magnet imbedded in the door frame for the close sensor. I will attach a picture or two to help visualize the setup.
When I saw that the T500 included limit switch homing, I hoped that I could use these built-in functions to open and close the door. I will attach the relevant code to this post but essentially the logic I used was to first ensure that the door opens in the case of power-up as in a house power outage so I put a ‘tic.goHomeForward();’ command in the void setup section.
Then the switch code in the void loop section relies on a ‘doitNow’ variable which can be manipulated with the Arduino IoT Cloud (code for Cloud left out for clarity) to open or close the door.
Symptoms:
Once all this is hooked up and programmed and I apply power to the system, the stepper makes a bump sound that seems like it had the power applied then no movement whatsoever after that sound. Also I can turn the motor freely with my fingers.
Observations:
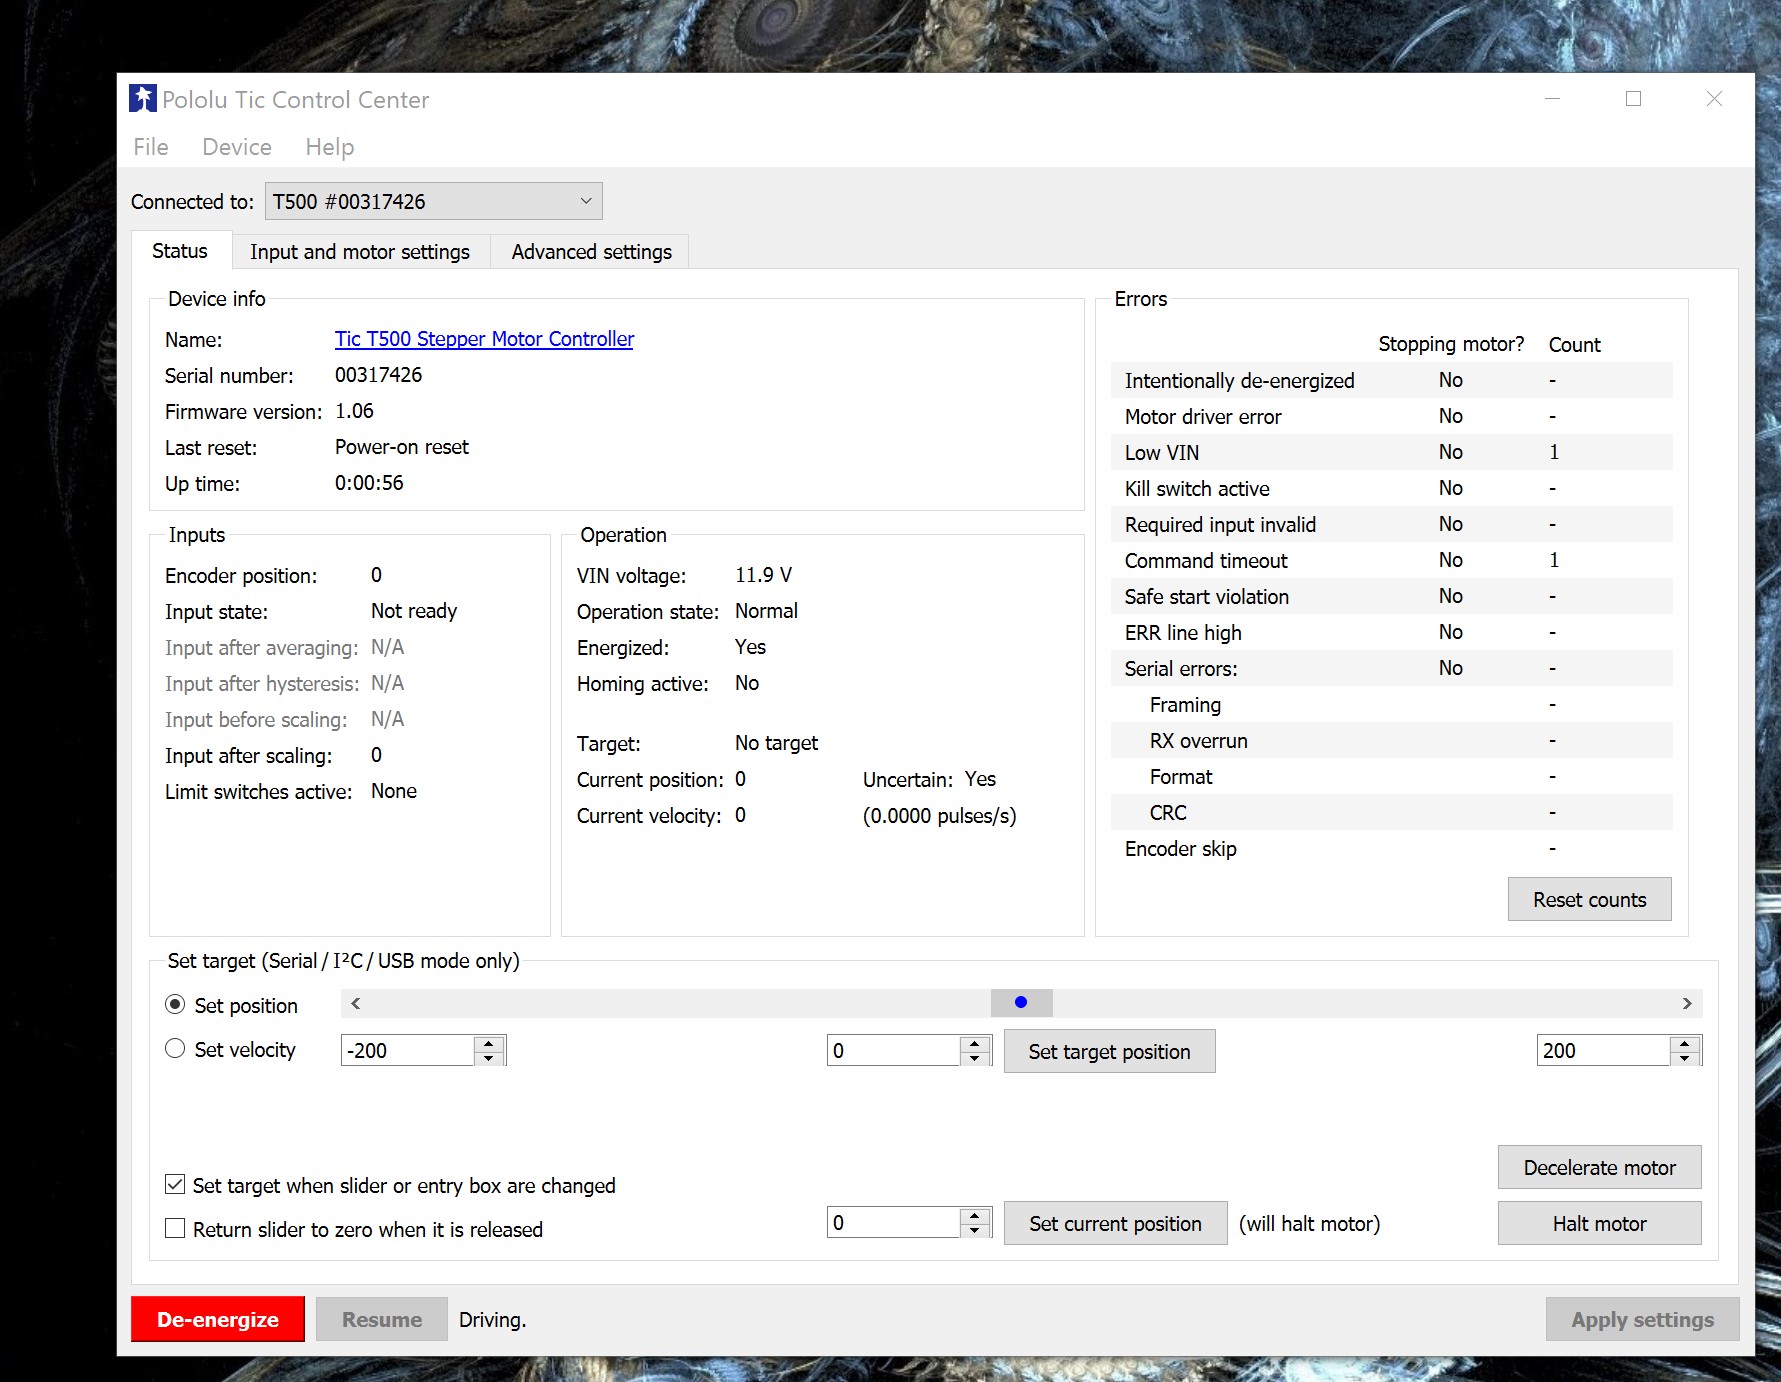
While plugged into the Pololu Tic Control Center I can cause the motor to run forward and the limit switch stops it and the Control Center shows the Forward limit switch activated. I can also run the motor in reverse and activate the hall effect sensor and likewise the motor stops. If I release/deactivate either limit switch the motor resumes running in its original direction until the limit switch is activated again.
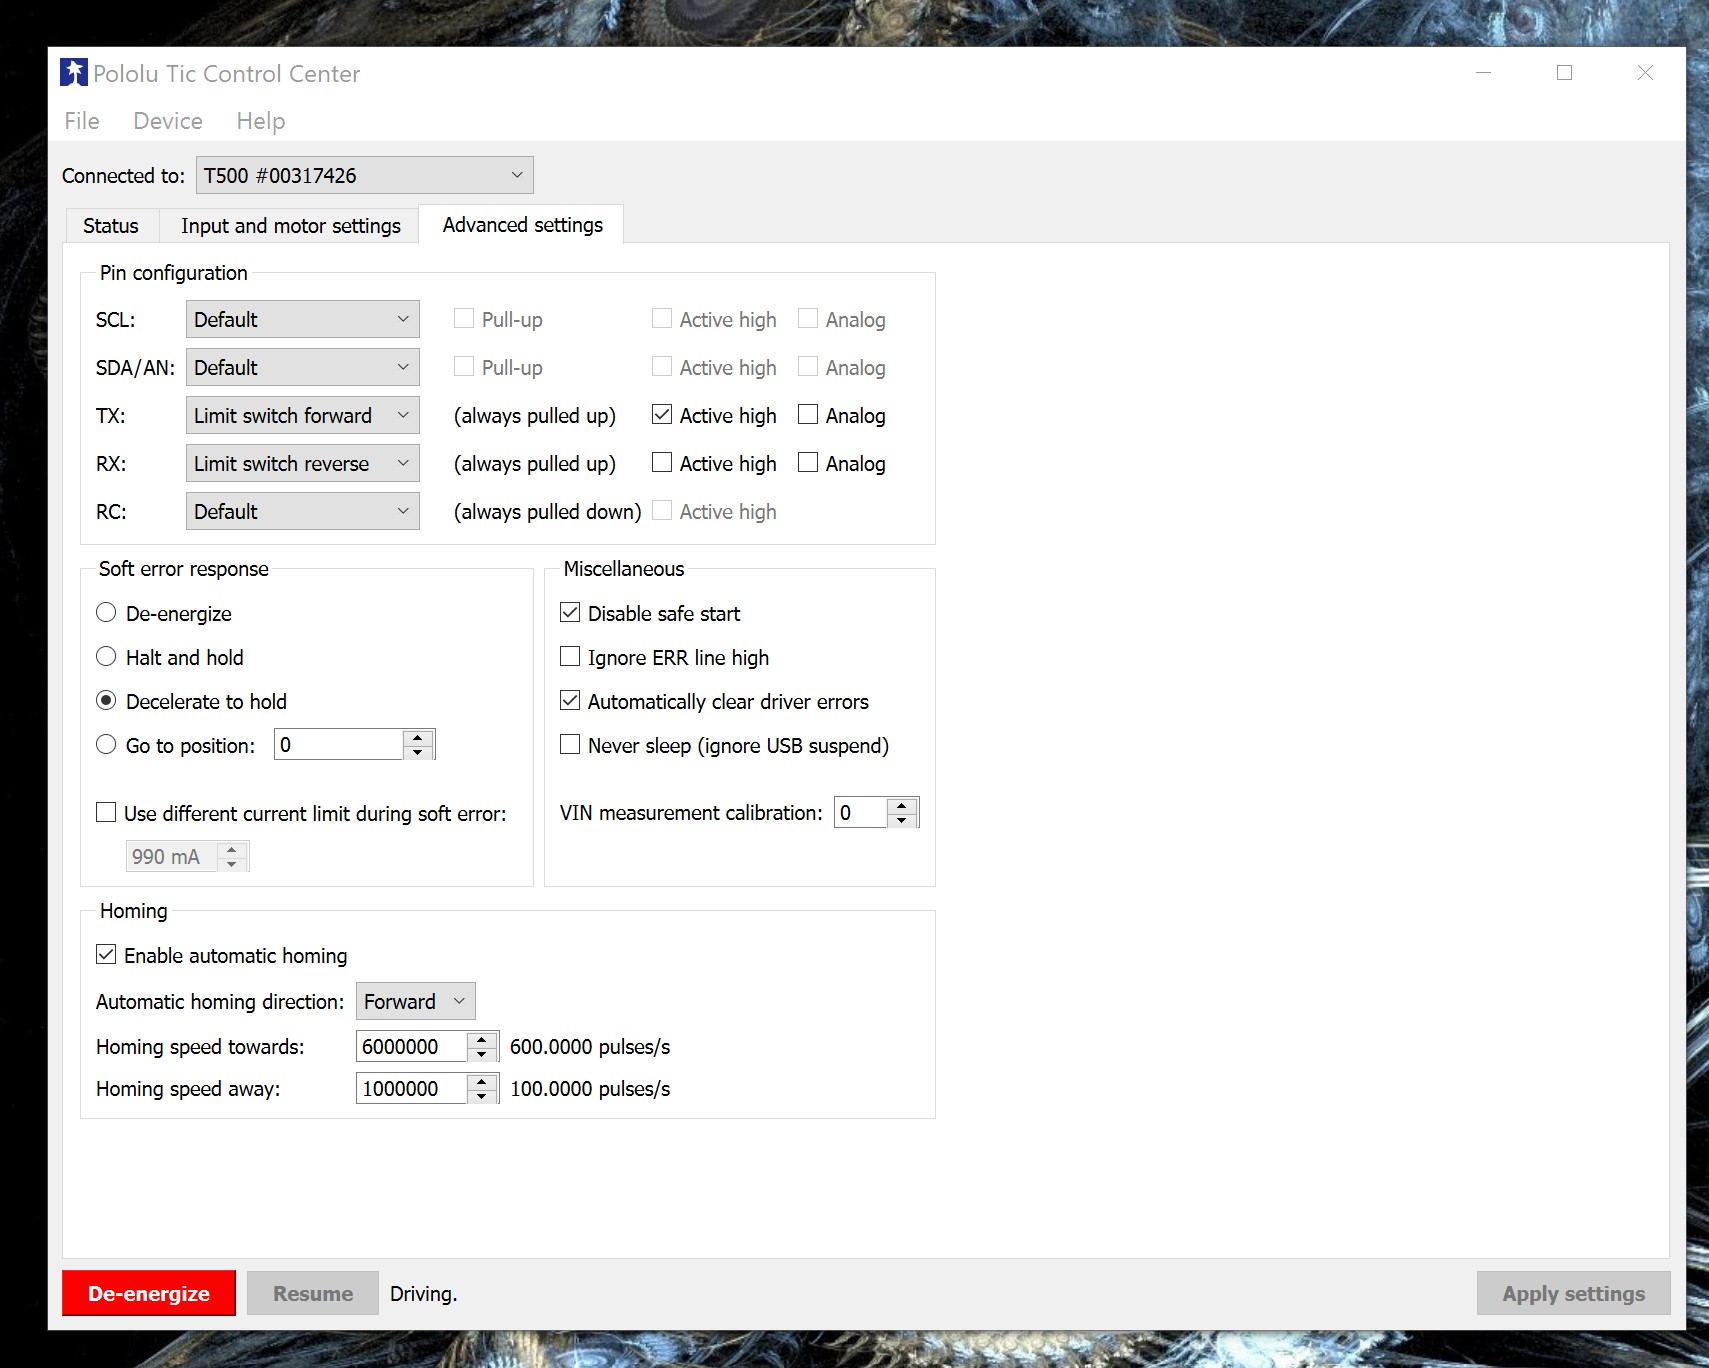
I think the problem is in my coding as this is the first time I have used a TIC controller. The only thing I can observe in actual observation during testing is that after uploading the code to the Arduino and starting up the system I can move my USB connection to the computer over to the T500 and the Control Center indicates a Safe Start error which I thought the ‘tic.exitSafeStart();’ command in void setup would have taken care of already.
Photos: Note the Door Mounted ones show the former, smaller stepper motor

!
Screenshots:
Code:
// ....
// Tic - Version: Latest
#include <Tic.h>

TicI2C tic;

// Define the current limit, in milliamps, to use while moving
// the motor.
const uint16_t currentLimitWhileMoving = 1000;

// Define the current limit, in milliamps, to use while stopped.
const uint16_t currentLimitWhileStopped = 0;

bool doitNow = true ;  // true is open it - false is close it

void setup() {

  // Specify what type of Tic we are talking to.  This affects
  // how the setCurrentLimit command works.
  // tic.setProduct(TicProduct::T825);
  // tic.setProduct(TicProduct::T834);
  tic.setProduct(TicProduct::T500);
  // tic.setProduct(TicProduct::T249);
  // tic.setProduct(TicProduct::Tic36v4);

  // Set up I2C.
  Wire.begin();

  // Give the Tic some time to start up.
  delay(20);

  // Tells the Tic that it is OK to start driving the motor.  The
  // Tic's safe-start feature helps avoid unexpected, accidental
  // movement of the motor: if an error happens, the Tic will not
  // drive the motor again until it receives the Exit Safe Start
  // command.  The safe-start feature can be disbled in the Tic
  // Control Center.
  tic.exitSafeStart();

  // open the door on power up
  tic.goHomeForward();

}  // for the void setup

void loop() {

  delayWhileResettingCommandTimeout(1000);

  switch (doitNow) {
    case true:
      // Set the current limit and wait a little bit for it to take effect.
      tic.setCurrentLimit(currentLimitWhileMoving);
      delay(10);
      tic.goHomeForward();
      tic.setCurrentLimit(currentLimitWhileStopped);
      delayWhileResettingCommandTimeout(1000);
      break;
    case false:
      tic.setCurrentLimit(currentLimitWhileMoving);
      delay(10);
      tic.goHomeReverse();
      tic.setCurrentLimit(currentLimitWhileStopped);
      delayWhileResettingCommandTimeout(1000);
      break;
    default:
    // Optional
    break;
  }  //  for the switch

} // for the void loop


// Sends a "Reset command timeout" command to the Tic.  We must
// call this at least once per second, or else a command timeout
// error will happen.  The Tic's default command timeout period
// is 1000 ms, but it can be changed or disabled in the Tic
// Control Center.
void resetCommandTimeout()
{
  tic.resetCommandTimeout();
}

// Delays for the specified number of milliseconds while
// resetting the Tic's command timeout so that its movement does
// not get interrupted by errors.
void delayWhileResettingCommandTimeout(uint32_t ms)
{
  uint32_t start = millis();
  do
  {
    resetCommandTimeout();
  } while ((uint32_t)(millis() - start) <= ms);

}