ok Brandon,
First I hope the reply finds you all well??
Great news!
The switch is wired and the parameters go from Less than 3 to 255 as suggested
now I have the switch on channel 0 as an input and the servo on channel 6
I just can no get it to move at all.
I want it to go extreme left toggled one way and extreme right toggled the other way.
took a break for now awaiting your suggestion and I read threw the code and had to stop wasn’t getting it yet.
but I will eventually
Thanks again John!
Hello, John.
It sounds like you got the switch working now (hopefully nothing was broken when it was not working properly).
You will essentially want your script to check the switch, then use an “if” statement to send the servo to one of the positions based on the switch reading. The main commands you will use to do this are as follows:
BEGIN
GET_POSITION (to read the switch)
IF, ELSE ENDIF
SERVO (to command the servo)
REPEAT
You can read more about these commands in the “Command Reference” section of the Maestro user’s guide. I suggest trying it out yourself by using the “Script” tab of the Maestro Control Center. The “Step Script” button at the bottom is very useful for stepping through the code one line at a time and getting a sense for what each command is doing.
Brandon
hello Brandon,
Sorry for lag time I am an essential employee in food distribution been a little busy,
Glad to hear everyone safe though.
since we last talked the switch is working but have been hours and days trying to figure out this code to get one servo to work on command with the switch cant seem to find it
any help would be great.
All the on line articles and places on Pololu.com you’ve sent me are making no sense sorry.
I just know it can be done just can’t see it yet.
John
To make sure things were working properly and I didn’t do damage to the maestro for kicks I copied in the “Example Scripts” the moving servo to 5 different positions and got that to work
So if could just add a toggle switch to that and make it go one way and stop toggled left and the other way and stop toggled right would be great
Also wiring to switch and resistor was getting week so I redid it cause maybe resistor was week after heating it up a few times don’t have a bread board
Sorry if this is so primitive I’ve never done anything remotely close to this such a novice
Don’t want to give up though, I keep thinking I’m so very close.
Thanks John
HAPPY EASTER!
Brandon,Staff, and Forum!
1 Like
Hello, John.
Happy Easter to you as well!
For a script that just moves 1 servo to one of two positions based on a switch, you can probably start with something that doesn’t use any subroutines (to keep it easy to follow).
The first part you will need to set up is the main BEGIN/REPEAT loop, which just looks like this:
begin
   #your code goes here
repeat
Then, you can add the code for reading the channel you have your switch connected to. If you have it connected to channel 0, that would look something like this:
begin
  0 get_position 500 less_than  #check if switch is on or off

    #do something with that reading

repeat
The final step would be using that reading to control the servo with an if statement. For a servo on channel 1, that would look like this:
begin
  0 get_position 500 less_than

  if  4000 1 servo		#if switch is off, move servo 1 to position 4000 (1000us)
      else 8000 1 servo	#otherwise, move servo 1 to position 8000 (2000us)
  endif			#close the if statement

  200 delay		#small delay

repeat
Note that you can change the 4000 and 8000 values in the code above to the actual positions you want the servo to go to based on your setup.
Brandon
Good Day Brandon,
At this point I rewired a new switch and resistor to the Maestro.
Just to be on the safe side before I try the code you sent me.
I sometimes smell the resistor , and it seems to be getting a little hot,
Is this normal?
Maybe the resistor is not big enough?
Thanks for taking the time to write the code,
John
It is a little concerning that the resistor is getting hot enough to smell; what value resistor are you using? Could you post some pictures showing how you have it connected?
Brandon
Hello Brandon,
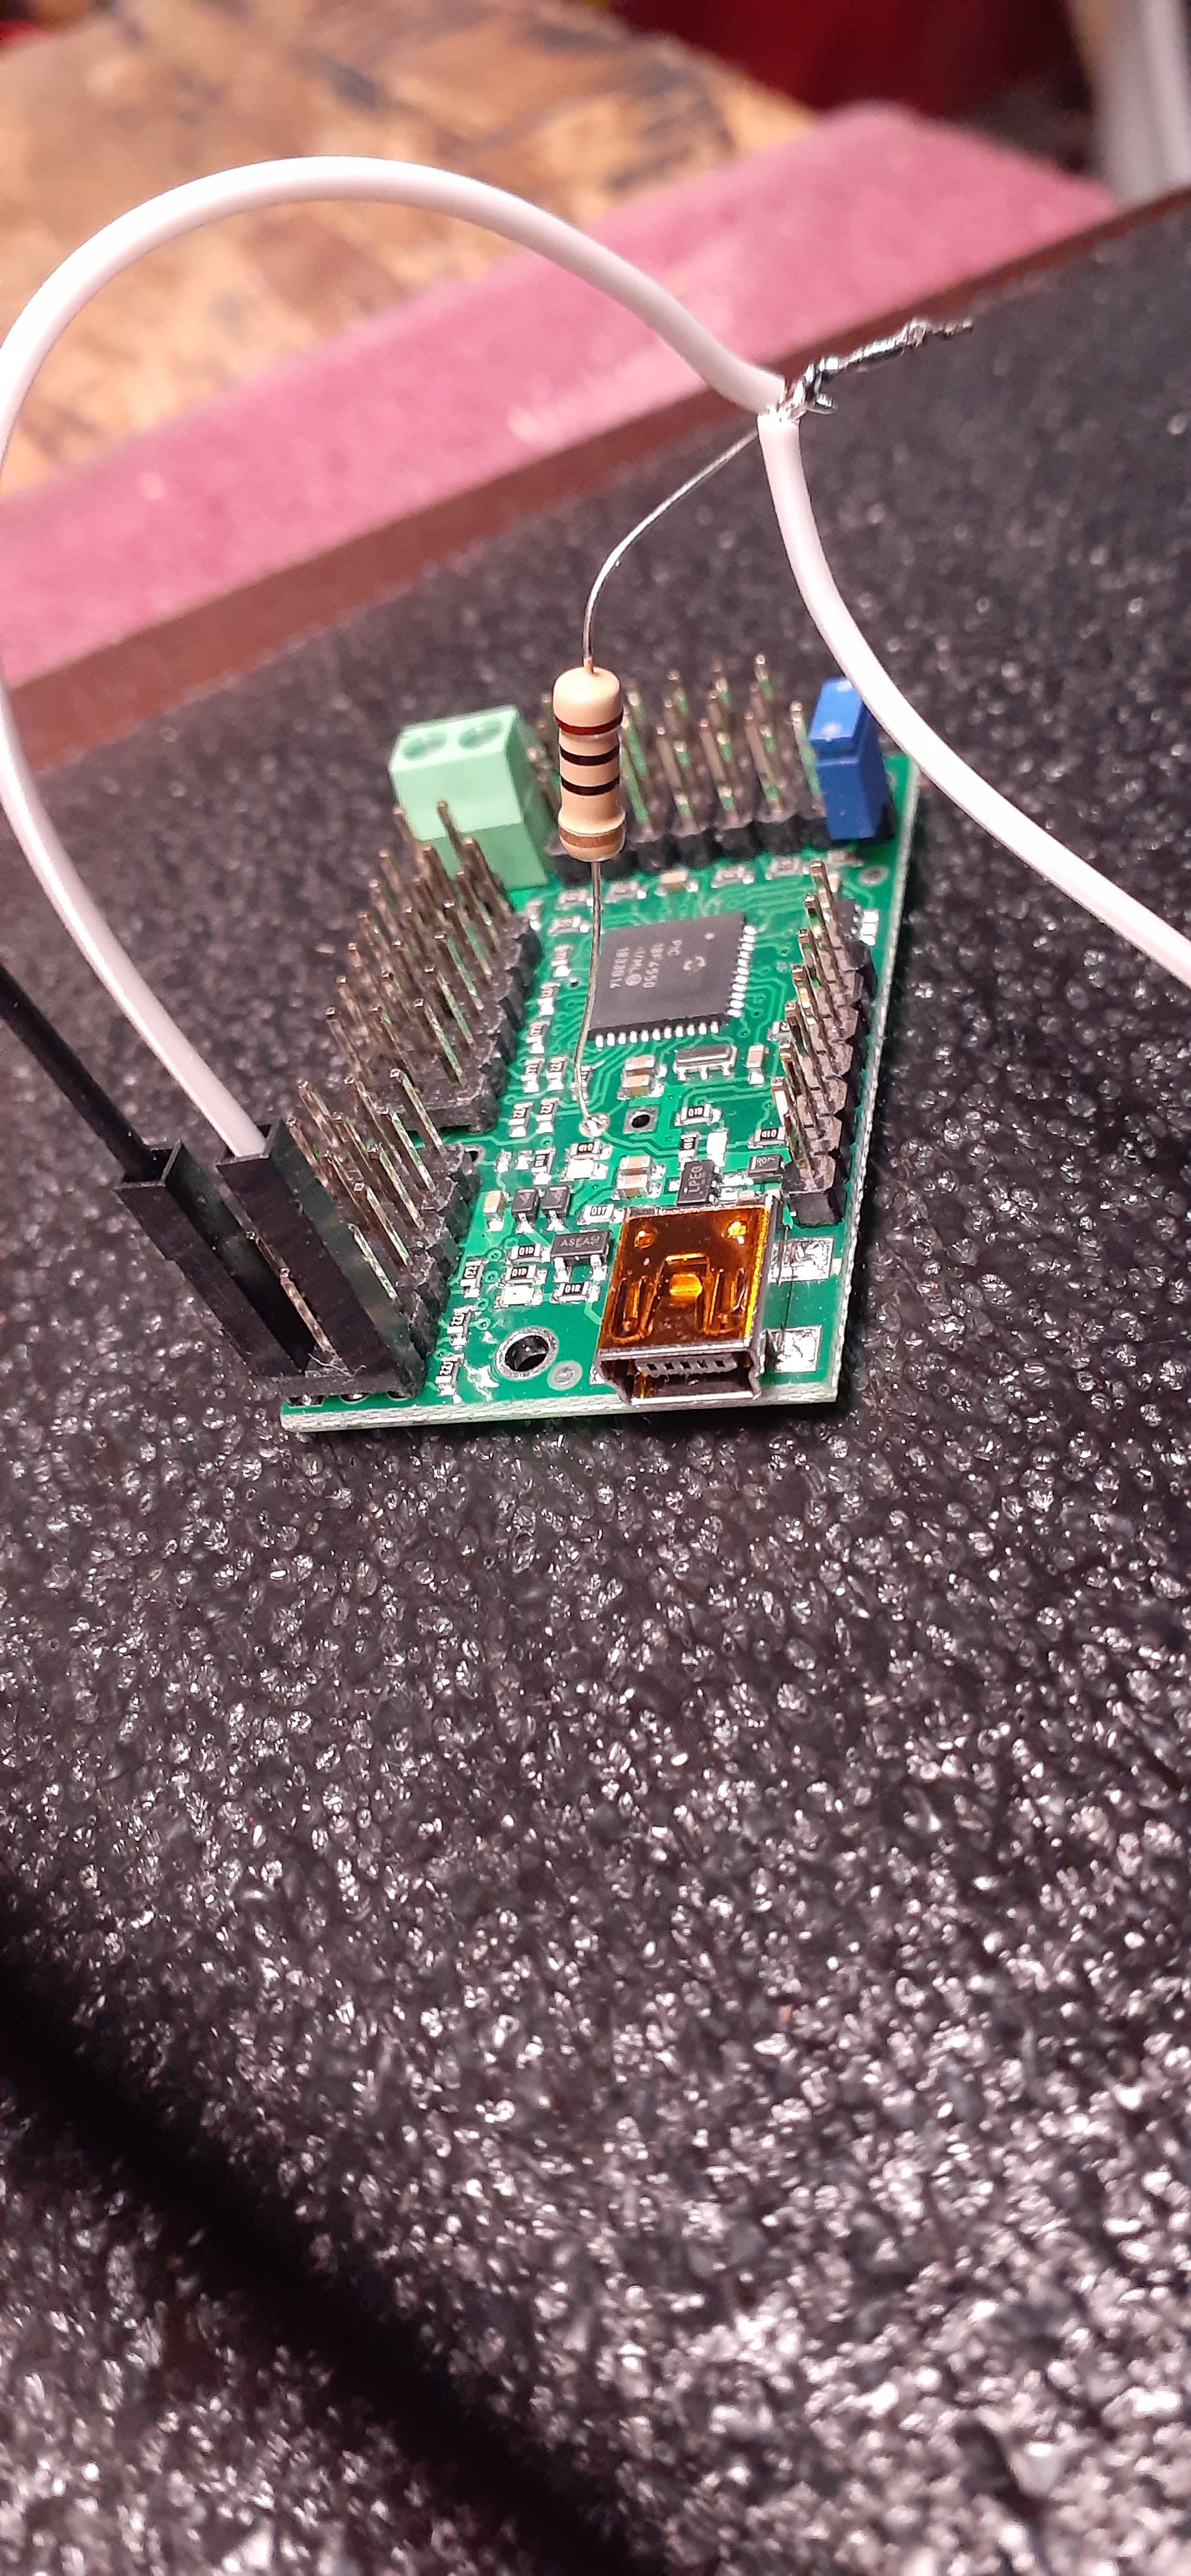
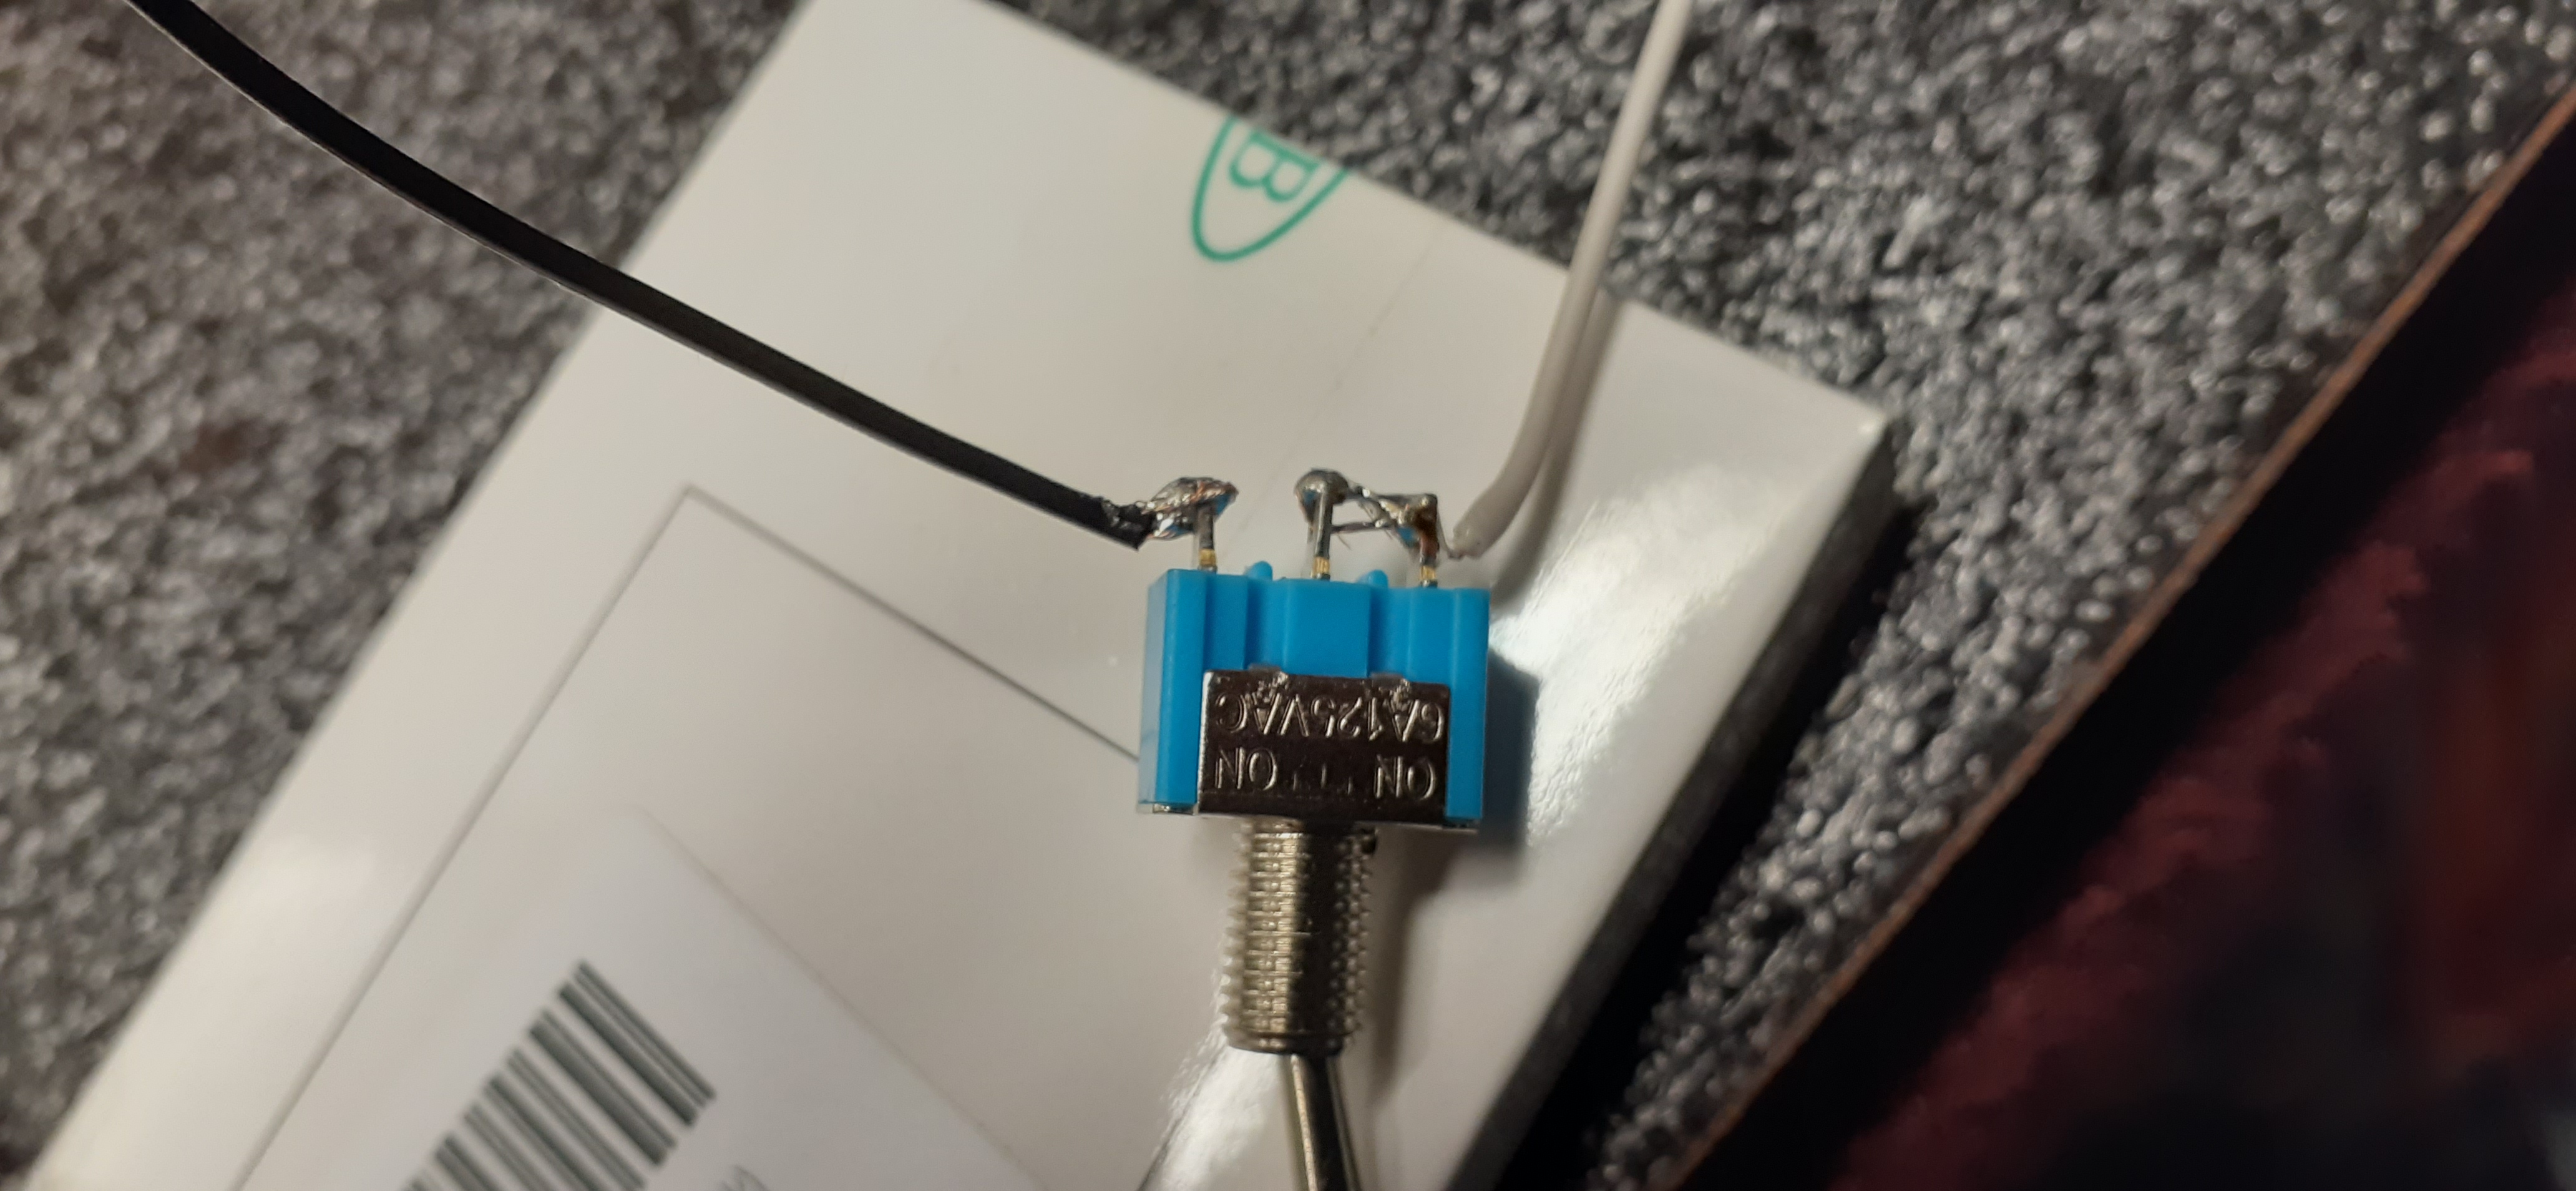
OK I’m using a 10 ohm resistor that you may have suggested in an earlier post.
In the switch picture the white wire is connected to the middle position only
and in between Is where the resistor is
it is soldered to the maestro to the 5v slot on the maestro
then white wire plugged into (I think is called) the Control position
The black wire is then connected to the maestro in the ground position
Keep in mind the program is showing a solid 3 on the low end and a solid 255 on the high end
with no jumping
It’s just the resistor is getting hot and I don’t know why? Confusing…
Maybe I need to use the 1 – 100 ohm resistor?
Thank you for the pictures. It sounds like you misread the resistor that I recommended earlier. That resistor should be between 1kΩ (1000Ω) and 100kΩ (100000Ω). Using the larger resistor (something like 10kΩ) will reduce the current through the resistor by several orders of magnitude, so that should fix the heating up problem; it looks like you have the connections made in the right locations.
Brandon
Sorry you’re probably right I have no idea what I’m reading when you told me the size of the resistor like I told you from the beginning when it comes to these many electronics I am a mega novice so I will try a larger resistor and hopefully that will solve our problem and then I will try the code that you sent and we’ll go from there thanks again for getting back to me.
John DiGiacomo
1 Like
Brandon
Hope this finds you well?
OK so here we are
May 2 Great News “It Works”
and its not getting hot using a 10k ohm resistor.
I have been fooling around with the settings and
Slowing it down
Thank You for all your Help
and most of all being Patient
Now the task of getting 9 switches and 9 servos to work independently
I think I know what to do
Need to organize my project and get started
any and all wire organization suggestions always welcome
Think I’m going to use a bread board no sure have to keep it labeled and organized
Thanks Again
John
1 Like
Hello Brandon
I’m assuming that the reason the servo I have only moves in a limited motion is because it’s not a 360 servo??
Are thay all different and fo that all have specific movements and restrictions?
Thanks John
Every servo has it’s own range of motion specifications; generally speaking, you can usually get about 90 degrees of movement over the standard 1ms to 2ms pulse width range, but that pulse width range could correspond to 100 degrees on one servo and 80 degrees on another servo. you can extend the pulse width range you are using to try to get some extra range of motion, but this should be done cautiously as commanding a servo beyond its limits could cause it to damage itself. You can find one method we suggest for finding the maximum range of your servo in the “FAQs” tab of the Maestro product pages.
In my experience, it is fairly uncommon to get much more than 180-degrees from a standard servo. If you need more than that, you might consider getting special full-turn or multi-turn servos (sometimes called “sail winch” servos). Note that these are different from continuous rotation servos, which sacrifice position control for endless rotation.
Brandon
Hello Brandon
So If i wire each servo and switch independently
A. will each switch need it’s own resistor?
B. will each switch and servo work on it’s own independently?
Thanks John
 John DiGiacomo
Hello, John.
Each switch will need it’s own resistor to work independently from the others.
How the switches and servos interact is up to your script. The script I walked through in my earlier post only reads one switch (on channel 0) and controllers 1 servo (on channel 1). In order to have additional switches control additional servos, you would need to expand on that example.
Brandon
Okay great Brandon
When I experimented with it I moved the switch to a different position and a Servo to a different position and then change the script and it worked well I just thought maybe I could put one resistor and Bank all the switches together but wasn’t sure I appreciate the feedback thanks again John
John DiGiacomo
Hello Brandon
So next I would like maybe to add a small LED bulb to show which position the switch was in
Where might I add that?
I’m guessing in line with the switch lead?
Thanks John
You could probably put it in-line (series) with the switch or in parallel with the switch (which would light at the opposite switch positions); however, in either case it would be in series with the 10kΩ pull-up resistor, so it might be pretty dim.
Brandon