So as for the POT sketch, would something like the below work, I WON"T use it, I promise - just using it as a reference!
int potPin = A0;    // select the input pin for the potentiometer Anologe A0 in arduino
int stepPin= 7;   // Same as the stepPin defined and currently being used
int val = 0;       // variable to store the value coming from the sensor

void setup() {
  pinMode(stepPin, OUTPUT);  // declare the stepPin as an OUTPUT
}

void loop() {
  val = analogRead(potPin);    // read the value from the sensor
  digitalWrite(stepPin, HIGH);  // turn the stepPin on
  delay(val);                  // stop the program for some time
  digitalWrite(stepPin, LOW);   // turn the stepPin off
  delay(val);                  // stop the program for some time
}
The A4988 and A4983 are functionally equivalent for all intents and purposes, so everything I’m saying about the A4988 also applies to the A4983, but thank you for pointing out the discrepancy (if they were not functionally equivalent, part confusion could have led to trouble).
You seem to have the general idea down. Note that you will probably have to do something slightly more complicated than:
val = analogRead(potPin);
A more accurate equation might be:
val = scale * analogRead(potPin) + offset;
Where scale and offset are constants you choose to get the range of speeds you want.
Don’t forget that you still need to set the enable and direction pins appropriately. Also, I suggest only make the high-step delay variable and leave the low-step delay a fixed, minimum 2 us duration:
digitalWrite(stepPin, LOW);  // turn the stepPin on
delayMicroseconds(2);                  // stop the program for some time
digitalWrite(stepPin, LOW);   // turn the stepPin off
delay(val);                  // stop the program for some time
Finally, make sure you’re aware that you have switched to using delay() instead of delayMicroseconds(). The former delays for 1000 times longer than the latter when provided with the same parameter, so need to be careful not to use them interchangeably. If you are mostly running the stepper motor at slow speeds, you can probably get by with just using delay(). If you want good speed resolution at higher speeds, then delayMicroseconds() becomes important.
Thanks Ben, yes I am switching over to delay(); for the slower steps.
Still very new here, does this mean something like this pinMode(enablePin, OUTPUT); in the void setup() function for each pin?
Are we combining both Sketches at this point, or are we writing a seperate POT sketch? SIlly question, I know
Am I remotely in the right direction below?
//#define stepPin 7
//#define dirPin 6
//#define enablePin 5


int potPin = 0;    // select the input pin for the potentiometer Anologe A0 in arduino
int stepPin= 7;   // Same as the stepPin defined and currently being used
int dirPin = 6;       // dir pin
int enablePin = 5;       // enable current to motor pin
int val = 0;       // variable to store the value coming from the sensor

void setup() {
scale = val; // holder for scale value from POT
offset = val; // holder for offset value from POT

 // We set the enable pin to be an output
  pinMode(enablePin, OUTPUT);
  pinMode(stepPin, OUTPUT);
  pinMode(dirPin, OUTPUT);
  pinMode(potPin, OUTPUT);
  // then we set it HIGH so that the board is disabled until we
  // get into a known state.
  digitalWrite(enablePin, HIGH);
  Serial.begin(9600);
  Serial.println("Starting stepper exerciser.");
}

void loop() {
  val = scale * analogRead(potPin) + offset;    // read the value from the sensor
  digitalWrite(stepPin, HIGH);  // turn the stepPin on
  delay(val);                  // stop the program for some time
  digitalWrite(stepPin, LOW);   // turn the stepPin off
  delay(val);                  // stop the program for some time
  Serial.println(val);             // debug value
}
Quick question - Ive started getting a very high pitched squeal at low speed from the Motor!
Has the inevitable happened, and ive destroyed or am destroying something?
The squeal stops once this kicks in at the end of the steps defined digitalWrite(enablePin, HIGH); no current to motor.
I was mostly assuming you would now add some potentiometer code the previous code we’ve been working with. You left out several key pieces from that program when you came up with your new one, such as the parts that set the enable pin and the direction pin. Note that almost every part of your previous sample program is required for successful use of your motor driver, so it’s a bit disconcerting to me that you first just dropped them and then didn’t fully restore them in your attempt above (notice how you never set the enable pin low, which is required to enable the driver?). Your leaving them out makes it seem like you still don’t quite understand what that program is doing or why.
There are three other immediate problems I see with your program:
pinMode(potPin, OUTPUT);
Here you are seemingly trying to make the pin connected to your potentiometer an output. This is wrong on two levels: it is definitely not what you want, and it actually makes a completely different pin (digital pin 0) an output. Why did you add this line?
Serial.println(val);
Printing serial values is relatively slow, and putting this in your main loop will affect your step timing. I suggest you comment out this line and instead just use the speed of the stepper motor itself for feedback.
scale = val; offset = val;
Why are you doing this? Do you understand what the point of these variables is? Do you notice that the result of this is that both of these variables are given the value zero, which in turn means val will always be zero?
Here is the Sketch that ive been using - I did tinker a little with attempting to get the POT going, as you can see they by the comments.
I was able to get the serial monitor to show the steps as they ran, as well as the numeric position of the POT (POT position, only at end of sketch though).
Then what happened was I set the //digitalWrite(potPin, HIGH); to LOW and the motor ran quiet, and the high pitched squeal began and got more intense.
It is now a consistant noise, it almost sounds like electrical current that it building up - quite scary, sounds like it is gearing up to explode heheh.
OH and also on Arduino, the TX LED was flashing and not stoppping, after uploading Sketches.
#define stepPin 7
#define dirPin 6
#define enablePin 5
//#define potPin A0


void setup()
{
  // We set the enable pin to be an output
  pinMode(enablePin, OUTPUT);
  // then we set it HIGH so that the board is disabled until we
  // get into a known state.
  digitalWrite(enablePin, HIGH);
  Serial.begin(9600);
  Serial.println("Starting stepper exerciser.");
  pinMode(stepPin, OUTPUT);
  pinMode(dirPin, OUTPUT);
 // pinMode(potPin, INPUT); // ??? hmmm
  //digitalWrite(potPin, HIGH);
}

int analogValue = 0;  // variable to hold the steps
//Have the execution of the for-loop be based conditionally on some external event
unsigned char takeSteps = 1;  // global variable

void loop()
{
  //analogValue = analogRead(7); // gather POT position
  analogValue = analogRead(A0);
  int j;
  digitalWrite(dirPin, HIGH);  // set step direction

  if (takeSteps)
  {
    digitalWrite(enablePin, LOW);  // enable driver
    delayMicroseconds(2);
    takeSteps = 0;
    for(j=0; j<=200; j++) // j being the number of steps to take TOTAL - number of steps j is set to zero, run this
    {
      Serial.println(j); // show me each step as a number
      digitalWrite(stepPin, LOW);
      delay(2);
      digitalWrite(stepPin, HIGH);
      // delayMicroseconds(2000);
      delay(100); // higher delay means less torque and slower steps
    }
    Serial.println(analogValue);// shows high 1023 and low 0 POT values once loop has stopped
    // 1023 max to the right - PotPin A0
    // 0 max to the left - potPin A0
    digitalWrite(enablePin, HIGH);  // HIGH disable driver - this is basically a stop delivering current command
    Serial.println("Enable Pin = HIGH - no current to motor.");
  }
}
I Have a fair understanding of the progam, it is making more and more sense to me as we go along here Ben - youre awesome mate!
Your questions answered:
I was a little confussed about how to lable the A0 pin on the Arduino… I did set this to input afterwards, my login being that the POT is sending info to the driver.
I agree, I did notice a change there. Logic for this was the eventual counting of steps to keep track of its movement.
I understand that these have to be values sent from the POT, right? Thus the driver uses those values to driver the motor - once again, I was hashing things out here.
The whole point is that it is very unlikely that your potentiometer reading can be used directly as a delay time to get the speeds you want. You will need to manipulate this value by scaling it and offsetting it). For example:
val = analogRead(potPin) / 10 + 20;
Since analogRead(potPin) will range from 0 to 1023 as you turn your pot from one extreme to the other, val will now range from 20 to 122, which means your delay times will range from 20 to 122 ms. I chose scale and offset randomly; you should decide what range of delay times you want (i.e. what range of speeds you want), and pick the scale and offset that result in that range.
Thanks Ben, ill work on the POT program afre ive figured out why the motor is making the noise.
See my reply after your post above please.
Do you have any ideas why its doing this? Ive done some readin on it and it could be a bad connection or wire - how would you trouble shoot this?
Hi there Ben, seems you’ve gone quiet on me there - I don’t blame you!
There is lots to comprehend and learn with all of this, i’ve come a long way with your help - so thanks again.
I managed to eliminate the squeal, by re-wiring everything, combined with a tweak on the sketch (see below).
The POT is working now, in one direction from 0-1024 for speed. Motor stops after 200 steps which is obvious, so the plan is once ive rigged the motor up to the track all I have to do is figure out how many steps it takes for the dolly to travel the 3` length.
Next step is to tell the sketch what to do after it has traveled the full lenth and number of steps in one direction, so that I can send it back in the the reverse direction for the next pass.
Any ideas on this? What happens if I store a step count - sketch being run and dolly being at the end of the trask (not the start), turn the power off and then back on again? I assume the sketch reloads and continues in the direction defined first right?
Is it possible to wire a forward/reverse switch at this point, to force direction?
#define stepPin 7
#define dirPin 6
#define enablePin 5
#define potPin A0 // set pullup on analog pin 0

//pot
//int analogPin = A0;     // potentiometer wiper (middle terminal) connected to analog pin 0
// outside leads to ground and +5V
int val = 0;           // variable to store the value read
// end pot

void setup()
{
  Serial.begin(9600);
  Serial.println("Starting stepper exerciser.");

  // We set the enable pin to be an output
  pinMode(enablePin, OUTPUT);
  // then we set it HIGH so that the board is disabled until we
  // get into a known state.
  digitalWrite(enablePin, HIGH);
  pinMode(stepPin, OUTPUT);
  pinMode(dirPin, OUTPUT);
}


//Have the execution of the for-loop be based conditionally on some external event
unsigned char takeSteps = 1;  // global variable

void loop()
{

  // POT

 // Serial.println(val);             // debug value
  // end pot
  int j;
  digitalWrite(dirPin, HIGH);  // set step direction

  if (takeSteps)
  {

    digitalWrite(enablePin, LOW);  // enable driver
    delay(2);
    takeSteps = 0;
    for(j=0; j<=200; j++)
    {
      val = analogRead(potPin);    // read the input pin
      // left turn higher value 1024 max = longer delay
      // right turn high pot value 0 min = shorter delay
      digitalWrite(stepPin, LOW);
      delay(2);
      digitalWrite(stepPin, HIGH);
      delay(val);
      Serial.println(val); // debug value
    }
    digitalWrite(enablePin, HIGH);  // HIGH = current on
   // LOW = No current - disable driver - this is basically a stop delivering current command
    Serial.println(val); // debug value
  }
}
If you cut power to your Arduino, all of your variables stored in RAM are cleared and program execution will start from the beginning of your sketch once your Arduino turns back on. However, the Arduino’s microcontroller has some non-volatile memory called EEPROM that persists even when power is removed. If you need your program to be able to pick up where it left off when power was disconnected, you will need to store your state in EEPROM and have your program load its state from EEPROM when it first starts running.
Thanks Ben, ive been doing some reading on all of this.
Quick question, is it worth using the a4983 if I wanted to power and run a DC geared motor from this setup, and not the stepper?
Or can I run a DC motor with POT control from this board using the step pin for speed using the POT var, and the 1a and 1b pins as the output?
This driver will not work with DC motors in any meaningful way. You should take a look at our motor drivers (excluding the A4988 and A4983 ones, which are for stepper motors) and motor controllers if you want to control a DC motor. The appropriate driver/controller depends on what kind of interface you want and the specifics of your motor (voltage and current).
can I join your discussion? I am working on similar problem. I get my steppermotor runnig by Bens’ code (thanks for that).
Where I am lost is that my motor starts stepping right away when I power up the arduino, seemingly at a low speed. after 8 seconds or so, the motor starts running at the code from the ‘for’ loop. When I load a completely different script on the arduino (for instance ‘blink’ from the examples). but keep the Stepper connected the motor starts stepping at the same rate
It seems the arduino is generating pulses before the script is booted, if you can call it that way. Do you know a way to prevent this from happening?
as i was writing this message the problem seemed to have solved itself, however when my laptop needed a powersource the problem returned. The motor started stepping as soon as I connected the 5v power. Something to do with the earth connection? my macbook power adpater is not attatched to the earth.
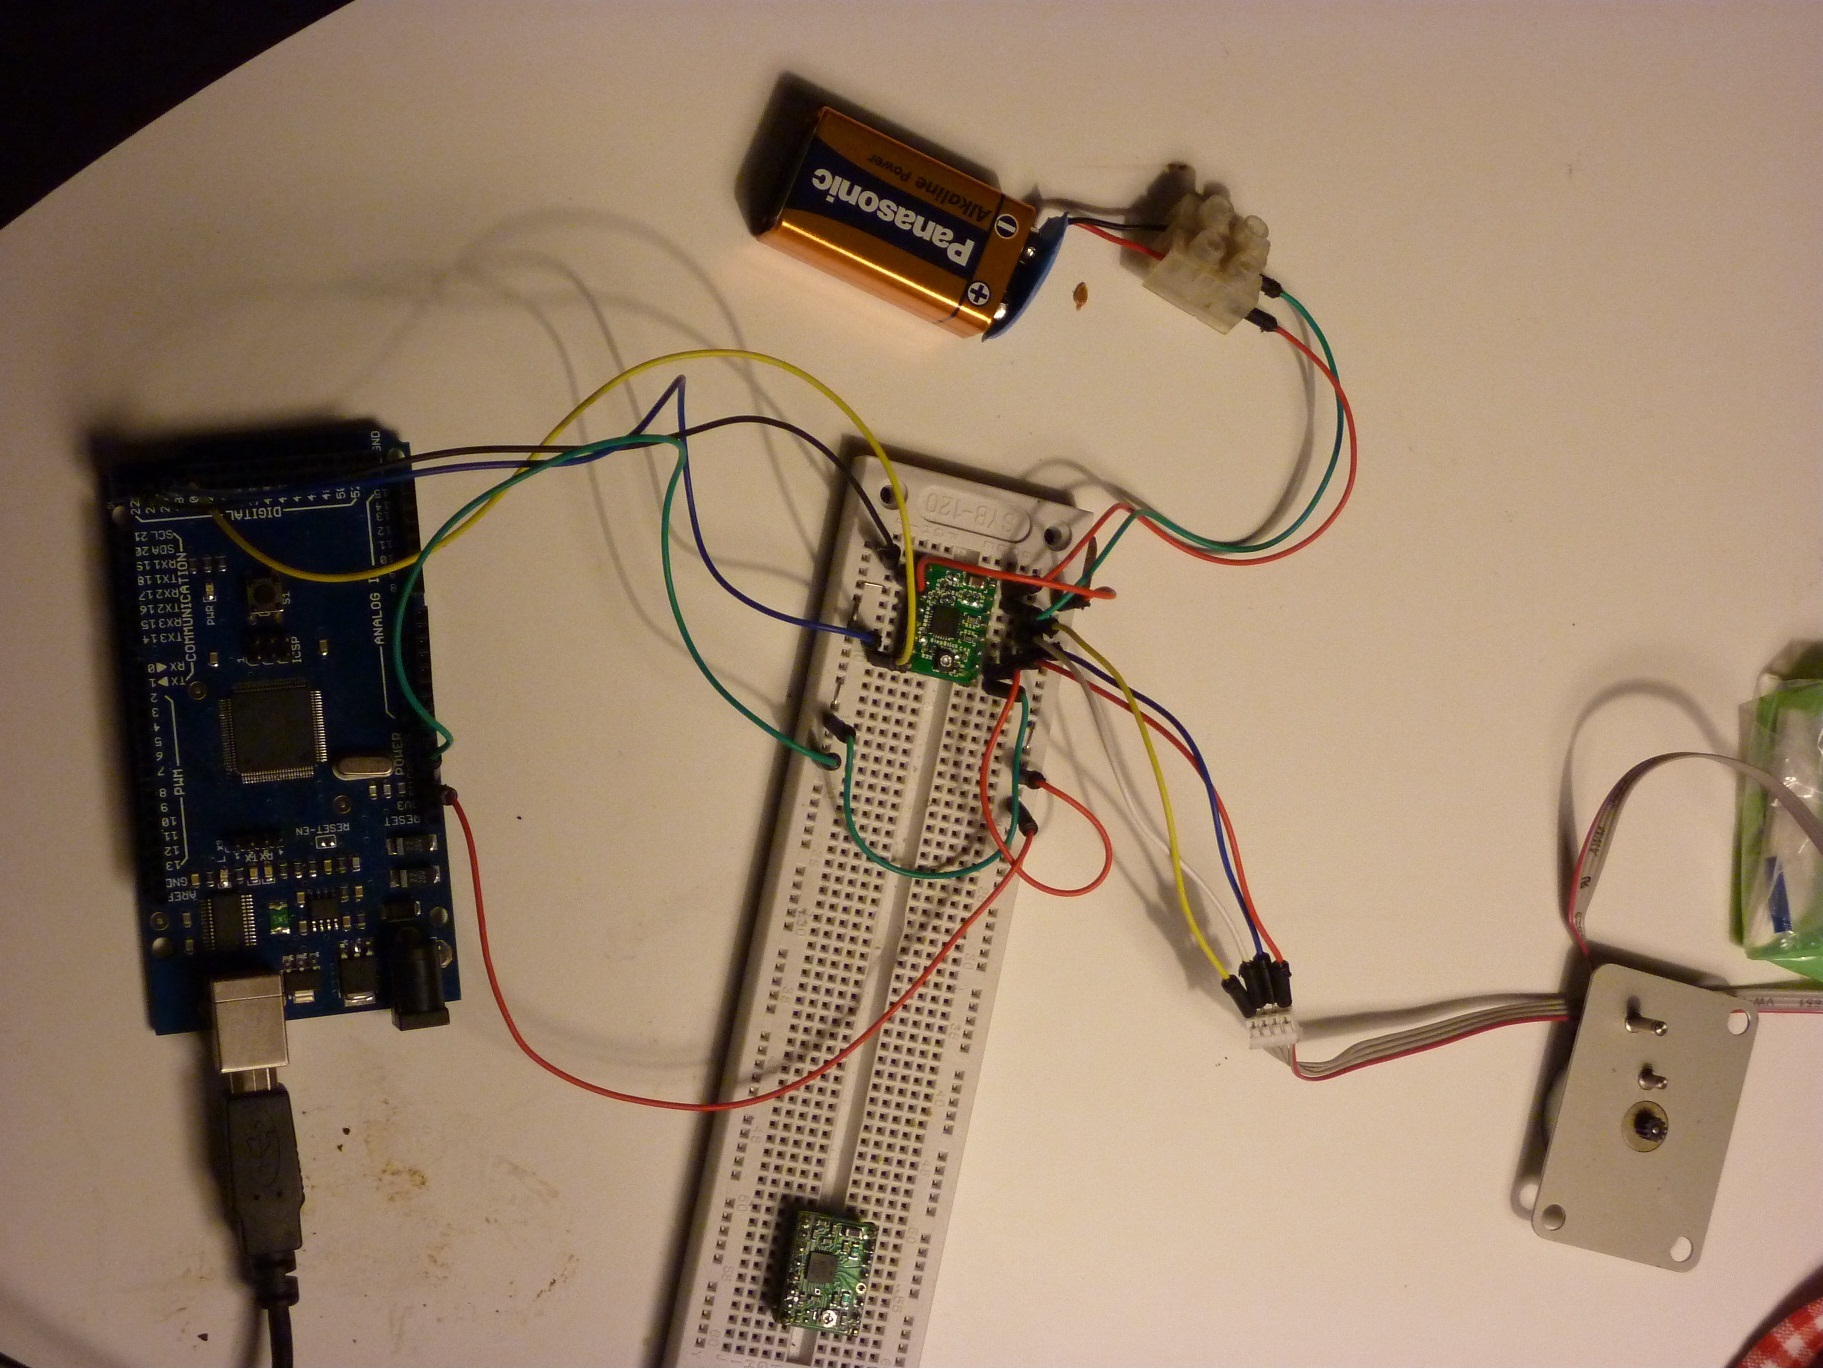
The driver you have connected in your picure is not a Pololu product, so I cannot really give you any advice about why it may or may not be working properly. It looks like you have a disconnected Pololu stepper motor driver at the bottom of the picture, however. Does that board work?
In general, it sounds like you have a problem with your grounds. You should look over your ground connections carefully to see if you have any mistakes (e.g. incorrect connections, loose wires, or bad solder joints).
By the way, a 9V battery is not appropriate for high-current applications like driving motors. I strongly suggest you use a more suitable power source, and I think it isn’t worth spending much time troubleshooting until you do.
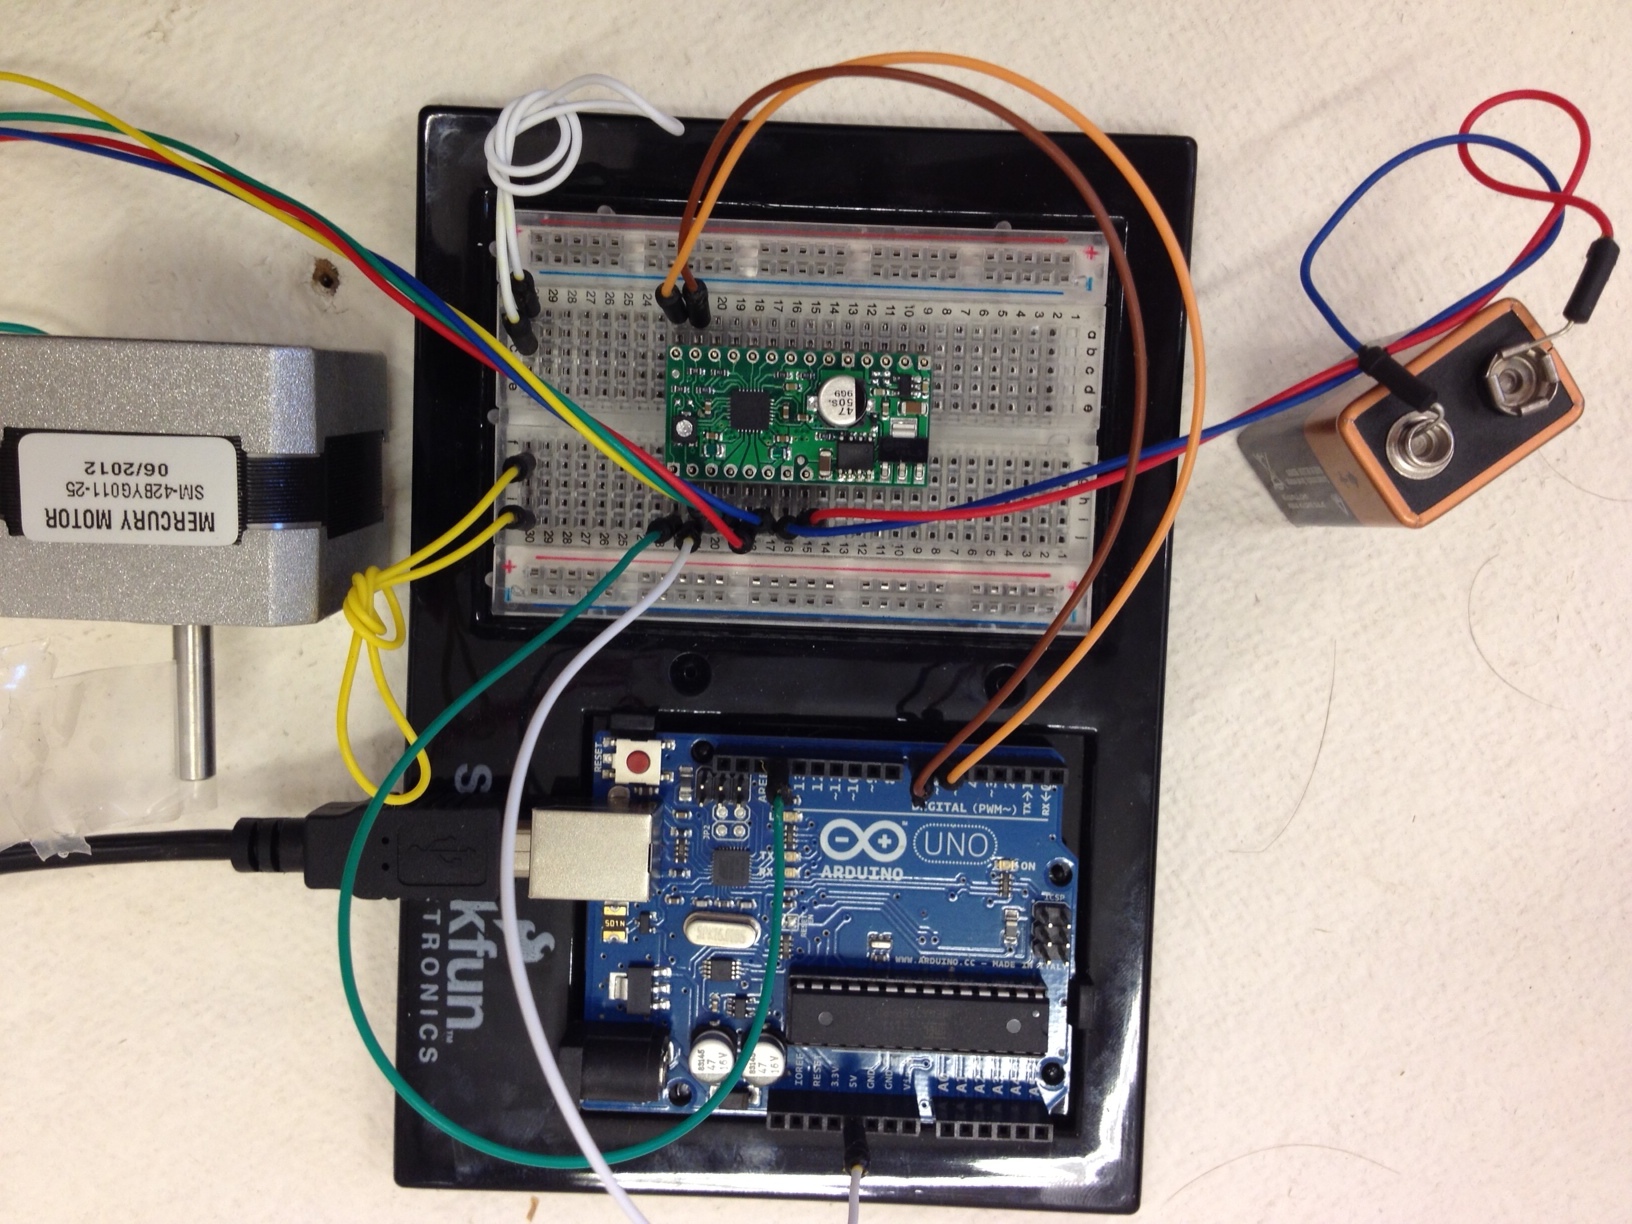
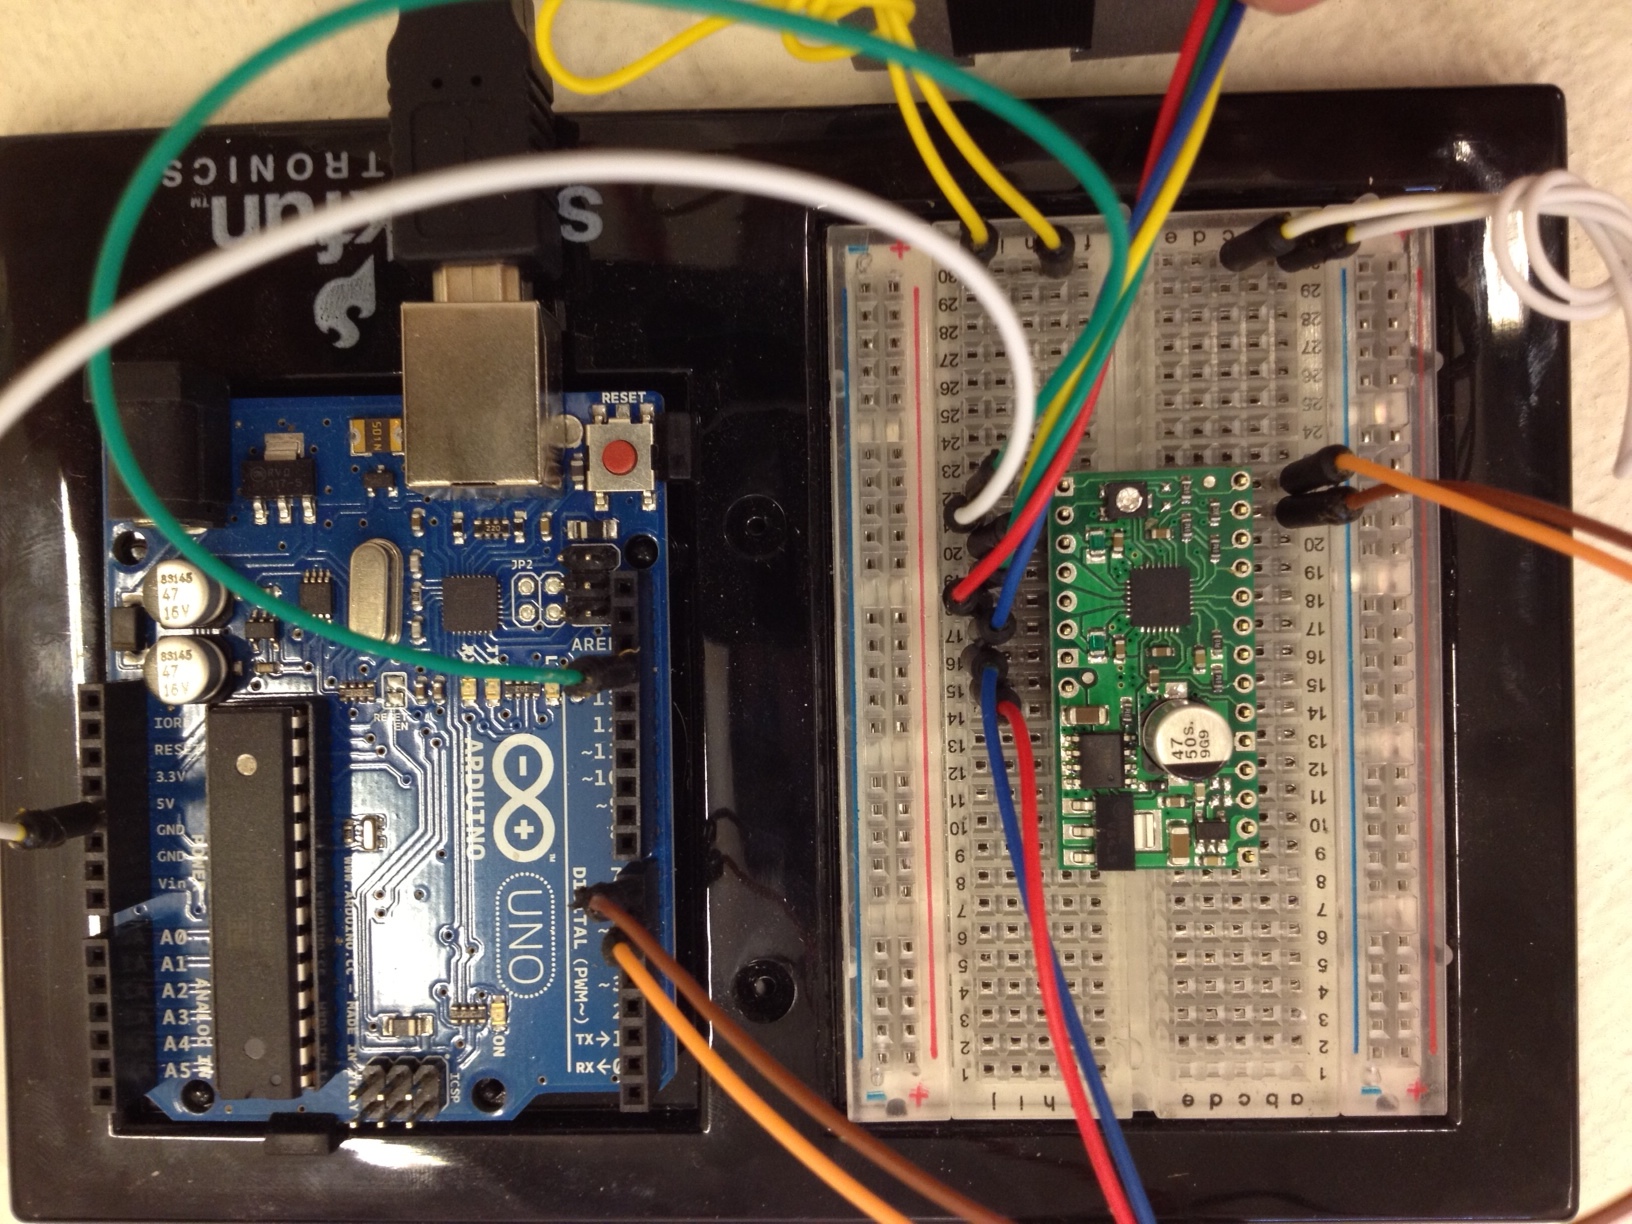
Hi
I follow this post but i cant understand why its not working, i am using the same hardware and the same code.
here some pic for you to look at…
please help
Itamar
    // Stepper
    #include <Stepper.h>

    // steps value is 360 / degree angle of motor
    #define STEPS 200

    // create a object on pins 6 and 7
    Stepper stepper(STEPS, 6,7);

    void setup()
    {
    }
    void loop()
    {
    ///// Turn the stepper 200 steps with a 1 sec delay between steps at 60rpm
    /// then reverse the direction and do 50 steps at 20rpm with a 1sec delay between steps
    stepper.setSpeed(1);
    stepper.step(200);
    //delay(1000);
    //stepper.setSpeed(20);
    //stepper.step(-50);
    //delay(1000);
    }