Just wanted to show you what I achieved today with my Zumo.
Anyone that has one of these great beginner’s robots (although I think it is VERY capable, actually) will know that it is not not easy to add any other shields, and if you are wanting to add an LCD shield like I wanted to, it’s simply not possible. Well, except when someone says it’s not possible - and then of course it has to be possible, right?
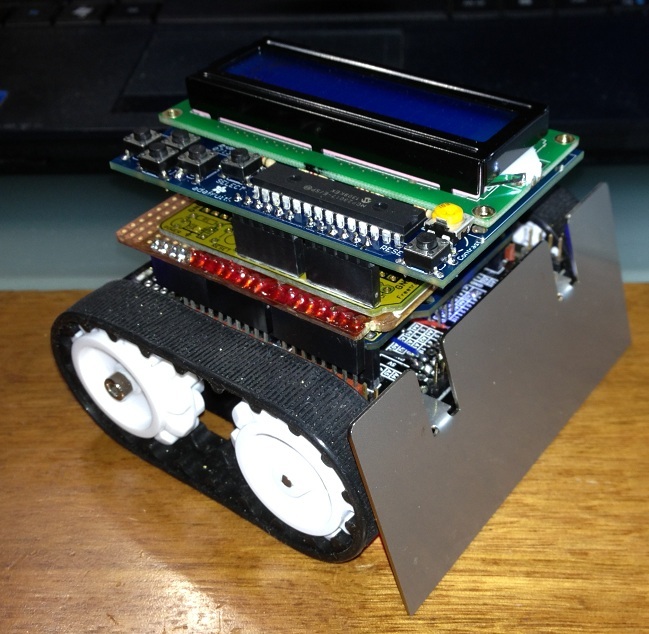
Take a look at the picture. Basically I created an “adapter shield” that basically “flips over” the upside-down pins and rights them back up so you can plug any shield as per normal. In my picture, I have a 2 pin LCD Shield plugged in and working perfectly.
If anyone is interested in seeing the steps, I did take more pictures and can explain further.
Pololu - you did a GREAT job with the Zumo! Now bring out a Zumo Stacks On shield.
My 11 y.o. son finds it easier to see what is going on with the LCD shield on than running it to the serial monitor and holding the Zumo up while motors are running.
Hi All,
I never could understand why the Arduino’s did’ent have pins underneath!! I am new to the Arduino and have a couple of Uno’s. But I came from using the Picaxe, where their shield and my own 20 pin version used raised socket with the usual long square pins, so you could plug the shield in to a board, as well as a board in to the shield. So the Uno? etc could be anywhere in the stack!!
It just seems to make sense, you can buy a Leonardo without headers so I might do that and add my own. It don’t seem right pluging your Uno in upsidedown!! My Zumo’s chassis is on order but I will be making my own simpler shield “with HEADERS”
At present once your Uno’s on there, you can’t add anything else…