I have the Mini Maestro 12-Channel USB Servo Controller and some servo’s and switches all analog.
I like to turn a switch to left or to the right pressing a button.
so one servo should go to position right after I push the button and stays there until I push the button again. when I push the button again the servo should go to the other position (left). with the 12 channels I should be able to steer 6 train switches. I looked thru the q&a’s but I am still struggling about how to connect the button to one servo channel and the built up of the programme. can you help me? thanks
If each train switch takes 1 button and 1 servo output to operate, you should be able to control 6 of them with a 12 channel Maestro; however, I recommend getting 1 working first.
Have you already successfully connected and controlled a servo using the channel slider in the “Status” tab of the Maestro Control Center?
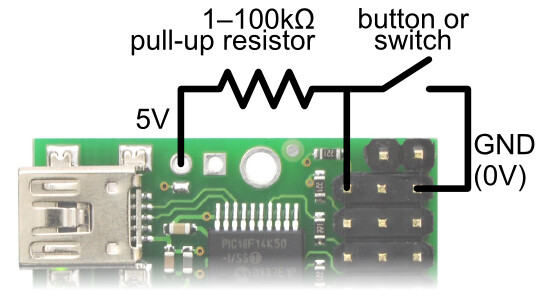
To get the button set up, you will first need to select the Maestro channel you want to use and configure it as an “Input” in the “Channel Settings” tab of the Maestro Control Center. After that, you can connect your button with a pull-up resistor as shown in the “Button or switch” heading of the “Attaching Servos and Peripherals” sub-section in the Maestro user’s guide. We typically recommend a 10 kΩ pull-up resistor, but anything in the 1-100 kΩ range should be fine.
If that is connected correctly, you should be able to see the channel slider respond in the “Status” tab of the Maestro Control Center (e.g. move to the left when you press the button and stay to the right otherwise).
Once both the servo and button are set up and working, we can write a simple script that moves the servo when the button is pressed.
thanks in advance for the feedback. I tried the servo and I can move the servo. afterwards I connected the switch and this is also working I can see the slider moving from one side to the other side. I connected the servo on channel 0 and the switch on channel 1. I was thinking if I have one couple working I can copy the script for the other switch/servo couples. In the script I have problems to see where the coupling takes place between the channels so when does servo 0 react on switch (channel 1). I am from the Netherlands so forgive me the language mistakes. If you have a script for me it would be nice. The servo should go to position 1335 (appr) when using the switch and stay there until I use the switch again then it should go back to position 992. The position numbers are more or less if I have the script I can change these positions for the finetuning.
You already did the next step I was going to suggest, which is figuring out the position values you want to switch the servo between. That’s great!
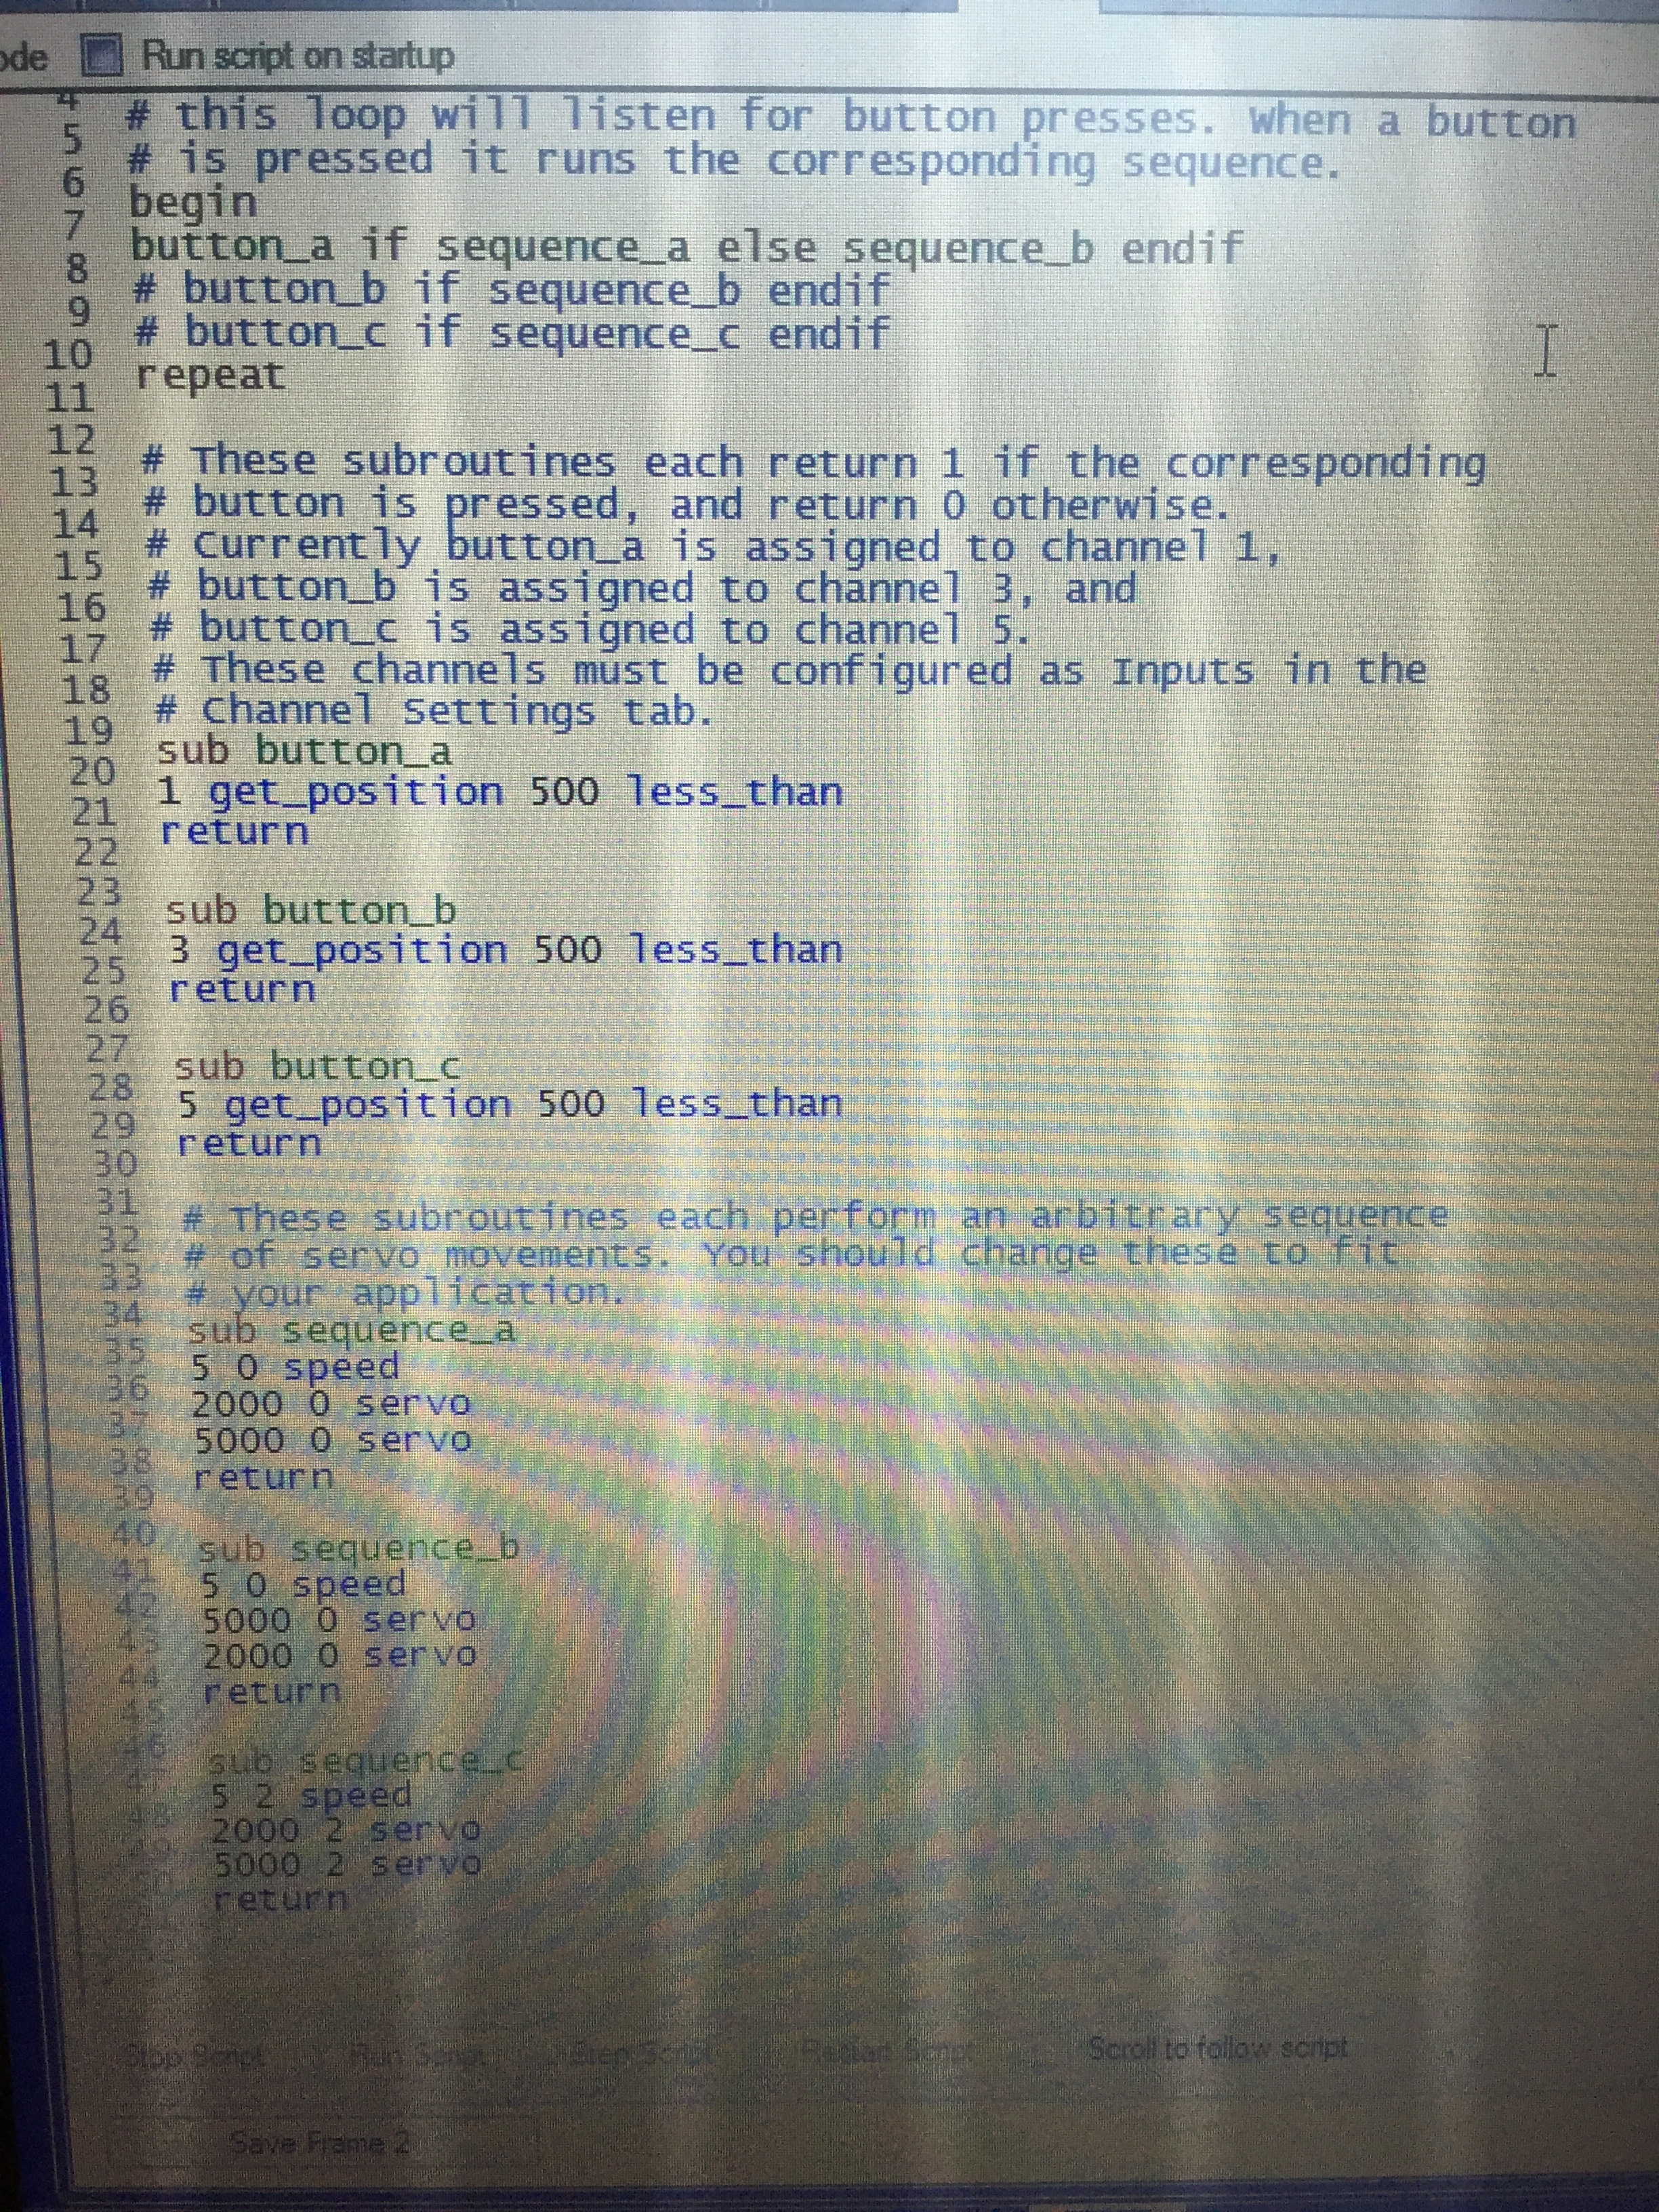
Since you are planning on adding more buttons and servos later, you can start by copying the “Using multiple buttons or switches to control servos” example from the “Example Scripts” section of the Maestro user’s guide. Since it uses different channel numbers (and multiple buttons) you can make the following modifications to make it work for your setup:
begin
  button_a if sequence_a endif
#  button_b if sequence_b endif   #comment out lines 6 and 7 by putting a `#` in front of them
#  button_c if sequence_c endif
repeat
sub button_a
  1 get_position 500 less_than   #change the 0 to a 1 in the button_a subroutine (line 18)
  return
sub sequence_a
  4000 0 servo 1000 delay  #change the 3 to a 0 in the sequence_a subroutine (lines 33 and 34)
  6000 0 servo 500 delay
  return
Additionally, you can change the 4000 and 6000 in sequence_a (lines 33 and 34) to your servo positions. However, note that the script uses units of quarter-microseconds, so you need to multiply your values by 4 (which should be 3968 and 5340 for 992 and 1335, respectively).
If you got that far without errors, you should be able to run the script and press the button to make the servo go to the first position for 1 second, then move to the other position. This isn’t quite what you wanted, so next, we can make the script check what position the servo is in and moves it to the other, instead.
now the servo goes to one position after pushing the button, after releasing the button the servo goes back to the start position. this is a solution I can life with, better solution was the servo goes back to the start position if the button was pressed again.
But like I mentioned if I mount on-off switches this will work as well
greetings,
It looks like you are close to having it switch between two positions with a button press. The main obstacle is making the button press do different things each time it is pressed. There are multiple ways you could do this, such as using a state variable, but since you are only swapping between two positions you could have your script look at the current position and change it based on that. For example, you can change sequence_a to:
sub sequence_a
  5 0 speed
  0 get_position    #check the position of channel 0
    2000 equals if    #if it equals 2000
      5000 0 servo   #change it to 5000
    else                    #otherwise
      2000 0 servo  #set it to 2000
  endif
300 delay   #300ms delay
return
Then, your main code for calling the sequence can just be:
begin
    button_a if sequence_a endif
return
Since there is no button debouncing, I added a small delay (300ms) at the end of the subroutine to help prevent it from happening multiple times from a single button press, but note that it will continue to trigger the subroutine if you hold down the button, flipping the servo position every 300ms. If this is a problem for your application, let me know and we can work on fixing that next.
Many thanks for the help it runs like I wanted!
First the servo did not move at all, I checked the control and find out I could move the servo by moving the point on the bar so everything was still working.
Afterwards i tried other connections but it did not help. Somewhere I came up with the idea to change the positions so the program part about the checking of the positions looks now like this:
I know this post was from 2 years ago but wanded to know if you could use the Mini Maestro 12-Channel useing 5V logic. I see it can be done with a mechanical swith but could the samething be done with a 5V logic switch?
The Maestro uses 5V logic. To clarify, in the setup described in this thread, the signal on the Maestro’s input pin is connected to 5V through a pull-up resistor, so it reads high when the button is not pressed. Then, when the button is pressed, it connects the Maestro’s input pin to ground, driving it low. You can find more details about this in the “Attaching Servos and Peripherals” section of the Maestro user’s guide.
If you are unsure about how to connect your switch, you can post more information about the switch you are referring to and I would be happy to take a look.
Sorry my question was not clear. I have a I/O card that is controlled by my PC the card has pins that can switch from 5volts or 0volts. is there a way to wire that to an input channel of the Mini Maestro to control the servo from position a to position b and then back again.
It is fine to connect 0-5V logic signals directly to Maestro channels configured through the Maestro Control Center software as inputs; you will just need to make sure you have a common ground between the two devices.
As far as using those signals to control servos, it should be very similar to using a button, except you shouldn’t need to worry about debouncing since it isn’t coming from a mechanical switch. So, you should be able to still use the “Example Scripts” section of the Maestro user’s guide as a reference. If you have trouble getting it to work how you want, you can post your script with a description of the problem, and I would be happy to take a look.