Does the standard encoder like ky-040 work different than Pololu wheel encoders?
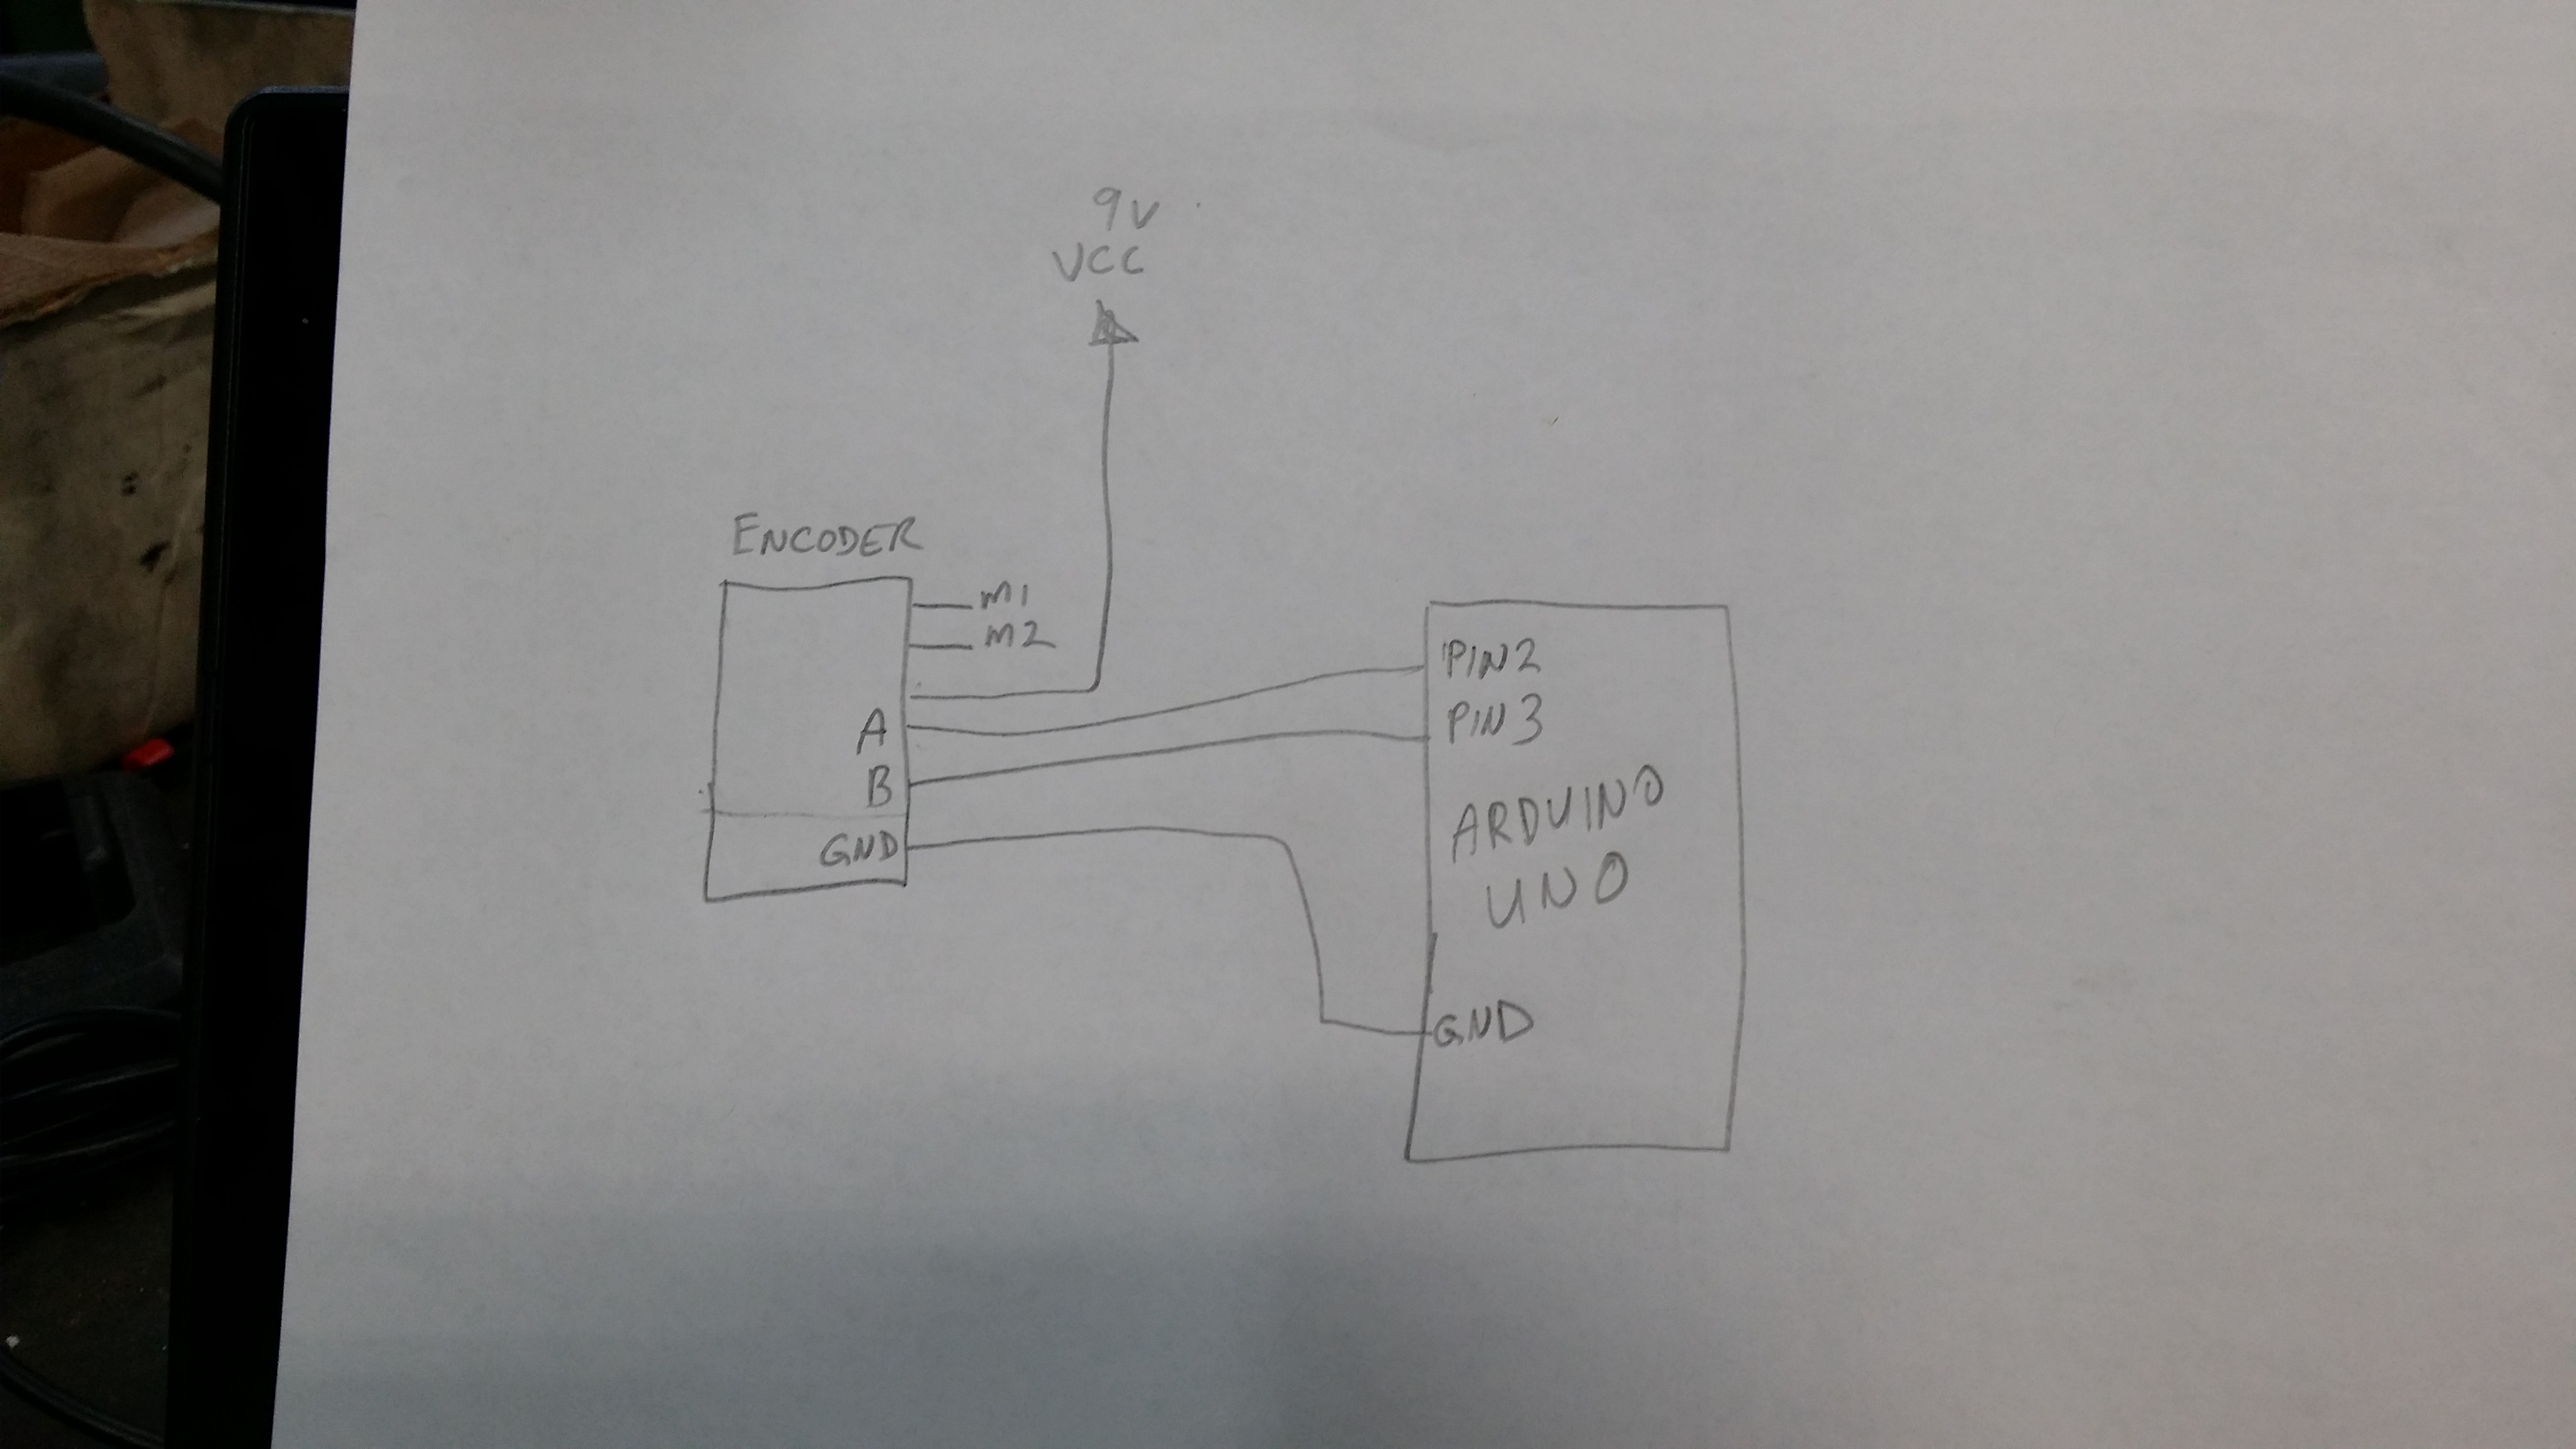
when I hook up a volt meter to the output of a ky-040 I can get the 5v pulse when manually turning it. when I do the same to the romi encoder I get nothing or floating type readings. Also it will not work with this code.I’m trying to program an Ardunio.
// read RPM

volatile int rpmcount = 0;//see http://arduino.cc/en/Reference/Volatile
volatile int rpmcount1 = 0;
int rpm = 0;
int rpm1 = 0;
unsigned long lastmillis = 0;
unsigned long lastmillis1 = 0;
void setup(){
 Serial.begin(9600);
 attachInterrupt(0, rpm_fan, FALLING);//interrupt cero (0) is on pin two(2).
attachInterrupt(1, rpm_fan1, FALLING);
}

void loop(){

 if (millis() - lastmillis == 500){  /*Uptade every one second, this will be equal to reading frecuency (Hz).*/

 detachInterrupt(0);    //Disable interrupt when calculating


 rpm = rpmcount * 10;  /* Convert frecuency to RPM, note: this works for one interruption per full rotation. For two interrups per full rotation use rpmcount * 30.*/

 Serial.print("RPM =\t"); //print the word "RPM" and tab.
 Serial.print(rpm); // print the rpm value.
 Serial.print("\t RPM1=\t"); //print the word "Hz".
 Serial.println(rpm1); /*print revolutions per second or Hz. And print new line or enter.*/
   rpmcount = 0; // Restart the RPM counter
 lastmillis = millis(); // Uptade lasmillis
 attachInterrupt(0, rpm_fan, FALLING); //enable interrupt

  }
if (millis() - lastmillis1 == 500){  /*Uptade every one second, this will be equal to reading frecuency (Hz).*/

 detachInterrupt(1);    //Disable interrupt when calculating

  rpm1 = rpmcount1 * 10;

// Serial.print(C); //print the word "RPM" and tab.
// Serial.print(rpm1); // print the rpm value.
// Serial.print("\t Hz=\t"); //print the word "Hz".
// Serial.println(rpmcount1);
 rpmcount1 = 0; // Restart the RPM counter
 lastmillis1 = millis(); // Uptade lasmillis
   attachInterrupt(1, rpm_fan1, FALLING); //enable interrupt
  }
}


void rpm_fan(){ /* this code will be executed every time the interrupt 0 (pin2) gets low.*/
  rpmcount++;
}
void rpm_fan1(){ /* this code will be executed every time the interrupt 0 (pin2) gets low.*/
  rpmcount1++;
}
// Elimelec Lopez - April 25th 2013