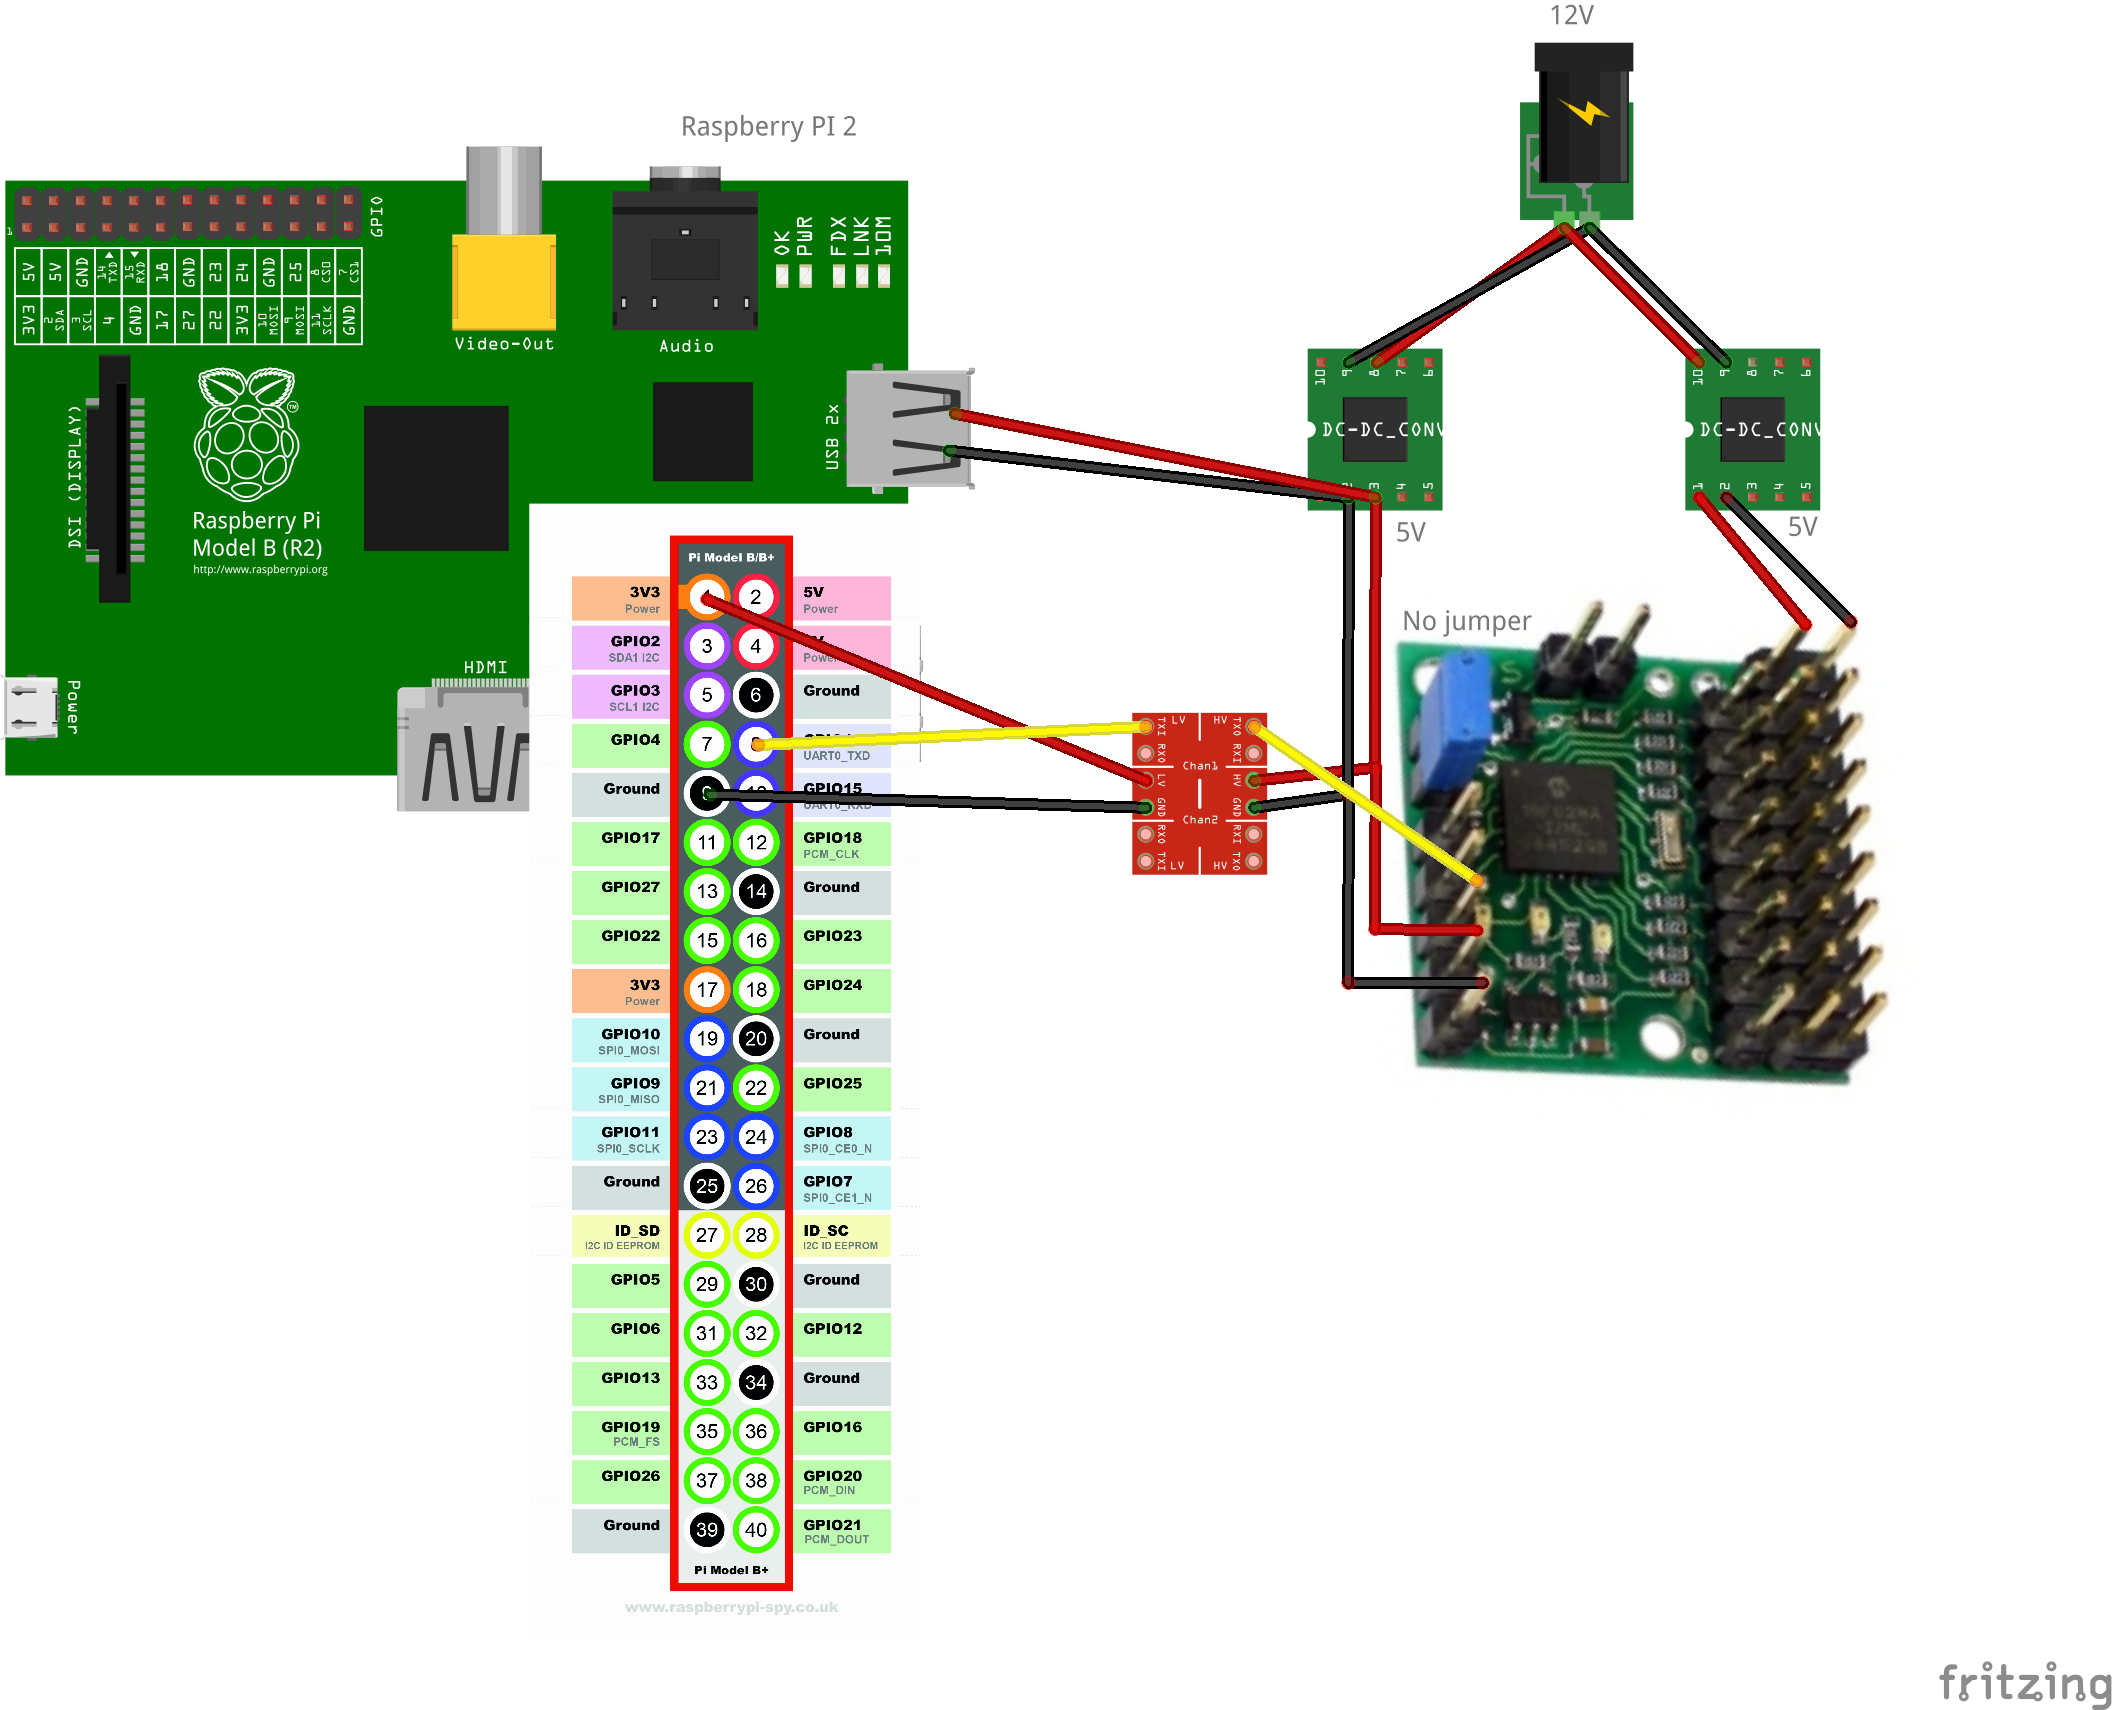
I am trying to control the scc03a servo controller using the uart on my raspberry. I have attached a picture with my setup. Obviously, it does not work:( I also tried using a USB-Serial Converter with a little more success. I have spend a week on this and already ordered the micro maestro today, but it bugs me;(
I am using Linux and I send the following command:
echo -e "\xFF\x00\x69" > /dev/ttyAMA0   #On PI
echo -e "\xFF\x00\x69" > /dev/ttyUSB0   #On PC
I also have written a code in C and Perl, with the same results! I have confirmed, that the UART on the PI is working by connecting it to my PC using a max3232!
Raspberry PI 2 → Logic Level Converter → sc003a (logic-level serial input - Pin): Mini SSC II Mode
When I turn on the Power of the attached circuit, the yellow light is on for a second, but then the servos are turned on and the yellow led is off.
If I execute the command above, nothing happens.
So I turned on the circuit with the logic level line unplugged, since some signal was send by the Pi at boot. The yellow led is on, waiting for a command. I then reconnect the line again as soon as the PI has booted and send the command with the two available baud rates:
Baud 9600 & 2400
After executing the command a couple of times, the yellow led turns off, but that’s it. I can not control the servos.
PC → USB-Rs232-Converter → sc003a (RS-232 serial input - Pin): Mini SSC II Mode
Baud: 9600
Yellow → On
Red → Flashing
This error is not decribed in the manual! But red is bad, I guess:)
Baud: 2400
Working great???
To be honest, this is my first electronic (roboter) project and I am still a little unsure about electric circuits. It is the only reason I can think of?
Edit: In the picture it says no jumper, but it is actually plugged in. I tried the Pololu mode first.
Your descriptions are very difficult to follow, so it is hard to help you troubleshoot the issue. Can you post photographs of your system that show all your connections? How are you setting the baud rate on the Raspberry Pi’s UART as well as on the servo controller? Also, can you post a list of exactly what bytes you sent to your servo controller from your Raspberry Pi (in order) at startup?
When you supply power to your servo controller, the yellow LED should turn on and stay on until the controller sees activity on the serial line. It is possible that your servo controller received some garbage data from the Raspberry Pi, which would cause the yellow LED to turn off. The Raspberry Pi tends to transmit large amounts of data to its serial port while booting up. Instead of unplugging and replugging your Raspberry Pi to your servo controller, I recommend using the reset pin on the servo controller so that you can guarantee that your data always gets sent after a reset. You can connect an I/O line to the reset line, make it low, and then make it high. The low part can be just a few us, but doing something like one millisecond is typical and fine. After the reset, you should wait a few ms before sending your first serial data.
It is unclear to me if the commands you sent before the yellow LED turned off were successful or not. Can you please clarify?
A red LED flashing is an indication of a major problem with the serial data, which could result from things like the baud rate changing or the serial input getting disconnected. However, the LED indicator state you are describing, solid yellow and flashing red, is not one of the two baud rate error indications. If you got this behavior after sending a series of commands to the servo controller, can you try sending one byte at a time to see which byte causes the problem?
Usually, the problem is that the serial data is not what you think it is. If you have an oscilloscope, can you look at what you are sending to your servo controller?
By the way, echo by default outputs a newline character. Although it might not be causing the issue you are seeing, you might consider using ‘-n’ option to suppress it:
while connecting the reset line I realised, that I was using a wrong picture of the Pi GPIO’s. I actually did not have 3V on the low side of the logic level converter:(
But sadly, I have a new problem. Now the servo controller indicates, that the baud rate is too high by turning on the red led and flashing the green one, after sending the first byte. I tried the two baudrates, 2400 and 9600, again.
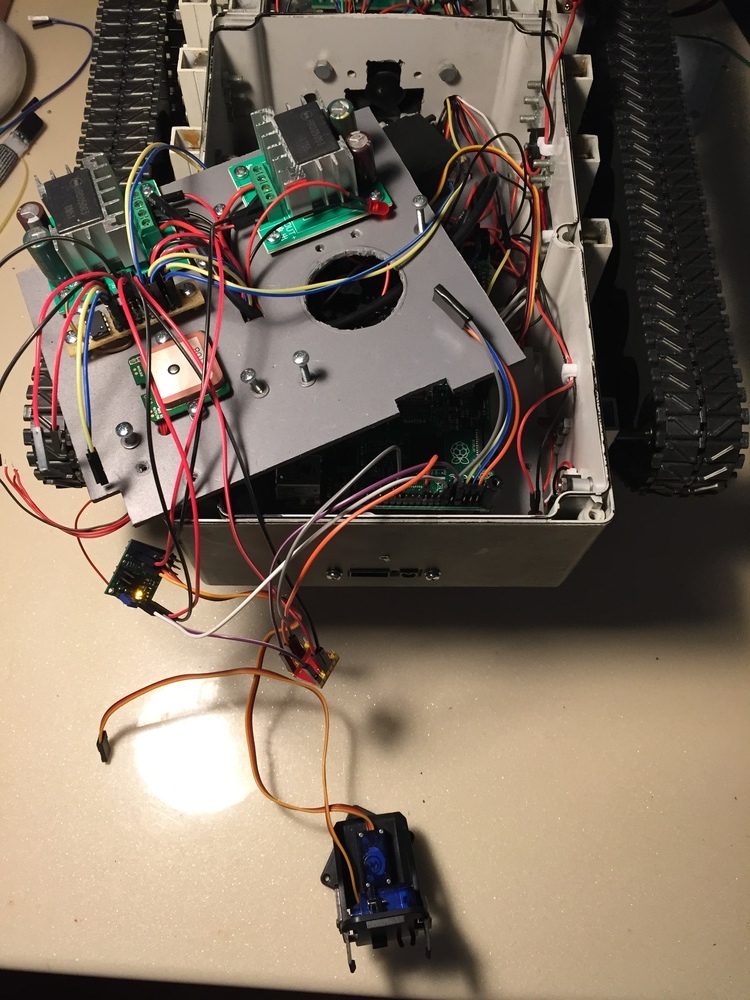
I have also attached a picture of the circuit - Cable colors:
red: 5v
orange: 3v
black/gray: gnd
white: reset
purple: tx pi
blue: sda
yellow: sdc
I was never able to make the servo move using the PI! Only with rs232 from a PC and a baudrate of 2400. Sadly I don’t have an oszilloskop, but sending data to a PC works!
Very strange. When I open a second shell and do a “cat /dev/ttyAMA0”, it works??? I tried connecting the output to the RX Pin of the pi. But even without that connection, it works when I read the UART! So I have a Linux/PI/Programming issue. The controller works great.
It seems to be a common problem with the pi. I was not able to find a soloution, but to execute: ‘cat /dev/ttyAMA0 & >/dev/null 2>&1’ before I start my robot daemon solves the problem for now. Also I have to reset the scc03a after booting the pi, so that helped a lot. I can now use the pi’s tx to control the servos and rx to read the GPS, as hoped for.
I will monitor this thread, and/or post a soloution, if you/me find a better way!