The company I work for supplies us with desks that have a crank on them that can be raised or lowered. It has been a running joke for some time that we are going to automate the raising and lowering with a motor.
So im working on it. Its trial and error so far. Lots of cool things im learning about. I’m beyond proof of concept and now trying to get all the pieces to work together.
Im using a SMC. The motor is a 12v Geared motor (81 RPM). I have a 24t sprocket on the motor to a 16t driven sprocket. I’m not sure how that will work yet. Im waiting for some parts to arrive before I put the electronics under load.
I will post some progress pictures and details as I go along. Your comments/suggestions are welcome.
Pics to come!
Thank you for sharing your project. We love to see all the different ways our products get used; I am excited to see pictures!
-Brandon
I started a blog with details and pictures. Please check it out and let me know what you think!
http://c0d3wr1t3r.blogspot.com/2015/10/project-motorized-desk-height.html
I like how detailed and informative your updates are; thank you for sharing your blog. I can’t wait to see the finished desk!
-Brandon
Thanks for checking out the Blog Brandon! This weekend will be about wiring it up. Got the parts in the mail today. Will also mount up the Simple Motor Controller. This time I am putting a fuse before it 
Also, I will finish fabrication on the switch mounts for the forward and reverse limiter switches. Im excited to see how that will work. hopefully it is easy to configure.
Brandon,
I am having some issues setting up the forward and reverse limit switches. Basically what I need is to allow movement in one direction until the limit switch is hit then it can ONLY move in the opposite direction until that switch is open.
I wired both of the switches up to be NO. Also I had some issue figuring out what pins on the board to attach the switches to. I attached an image with the test setup. Can you please get me pointed in the right direction 
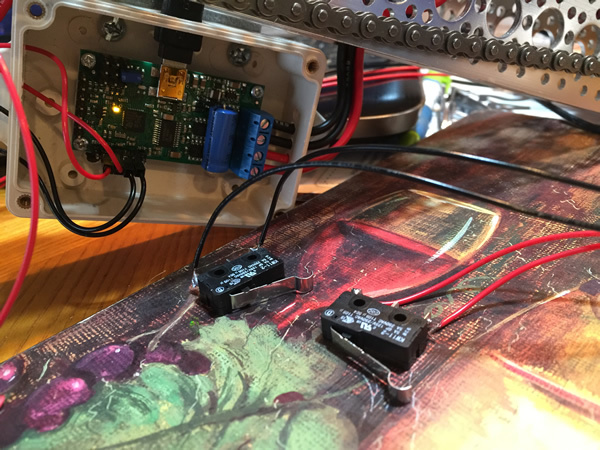
Instructions for setting up limit switches can be found in the “Configuring a Limit or Kill Switch” section of the Simple Motor Controller user’s guide. Since your switches are set up as normally open, you can connect one side of one switch to Analog Channel 1 (labeled “A1”) and the other side to the nearby ground pin (labeled “-”). The second switch can be wired in the same fashion, but to Analog Channel 2. Then in the “Input Settings” tab of the Simple Motor Control Center, you can set one of the channels as a “Forward limit switch” and one as the “Reverse limit switch”. Also, make sure you select the “Enable pull-up resistor” option for both channels. You can then use the “Current channel value” that is displayed in the lower right-hand side of that input settings box to make sure each limit switch is being read correctly The “Learn…” button to calibrate each switch’s scaling parameters.
-Brandon
Thanks Brandon! Thats exactly what I did and it worked perfect. Check out my blog for pics and video of the desk working.
I am curious about another feature but im not sure how feasable it is. I have LED light strips. I was wondering if there was a way to connect on to the SMC that powers the LED ONLY when the motor is moving. This is not a critical feature but it would be cool to have red LEDs light up when the motor is in motion in either direction.
Thanks for all your help!
The desk looks really cool! I love the mechanical aspect of having the gear and chain exposed.
You might be able to connect some LEDs between the motor output pins (OUTA and OUTB), as long as they are current limited appropriately (e.g. with an appropriate resistor).
-Brandon
