I’ve been working with the 3pi for a few weeks now without problems and I’ve been having lots of fun. The project I’ve now started working on requires that I gather some IR sensor data from the 3pi serially, so I can graph it on my computer. Unfortunately, either my PC isn’t receiving the data or my 3pi isn’t transmitting. I’m running Windows 7 and to the best of my knowledge, all of the Pololu USB AVR Programmer (which I am using) drivers have been successfully installed. Here’s what I know and what I’ve tried.
Identified the TTL Serial Port as “COM5”
Using a baudrate of 9600
Neither puTTY nor the Pololu Serial Transmitter v1.3 receive any serial data from my program (which is below this list), using the settings described above
Sending the 0x81 byte via the PST does not generate a response
I am using version 1.07 of the USB AVR Programmer firmware
I’ve simplified the code I am using to the following (which I have tested without success).
	char *message = "hello\r\n";
	serial_set_baud_rate(9600);

	while(1)
	{
		serial_send(message, 7);
		play(BUTTON_SWITCH);       // just a constant I've defined elsewhere
		delay_ms(1000);
	}
I’m totally baffled why this doesn’t work, and I can’t seem to find a solution. Could someone give me a hand?
Ah, I didn’t realize I had to do this. I actually have the PGM03A, so there is no jumper for switching between programmer or USB-to-serial mode. I take it all I have to do is connect the TX and RX lines from the PGM03A to the PD0 and PD1 pins on my 3pi, respectively? What is the easiest way to do this?
Your proposed connections are correct, but you also need to make sure the programmer’s GND is connected to the 3pi’s GND. The GND is part of the 6-pin ISP cable so if you just leave the cable plugged in, that is sufficient.
There are several ways you can make the physical connection. I would use a male-male jumper wire: pololu.com/catalog/category/68
The PGM02B is sufficient; this is all you need to program the 3pi.
The purpose of connecting the RX and TX lines from the programmer to the robot is just for serial communication (which is not needed to program the robot).
What happens when you try to program your robot, exactly?
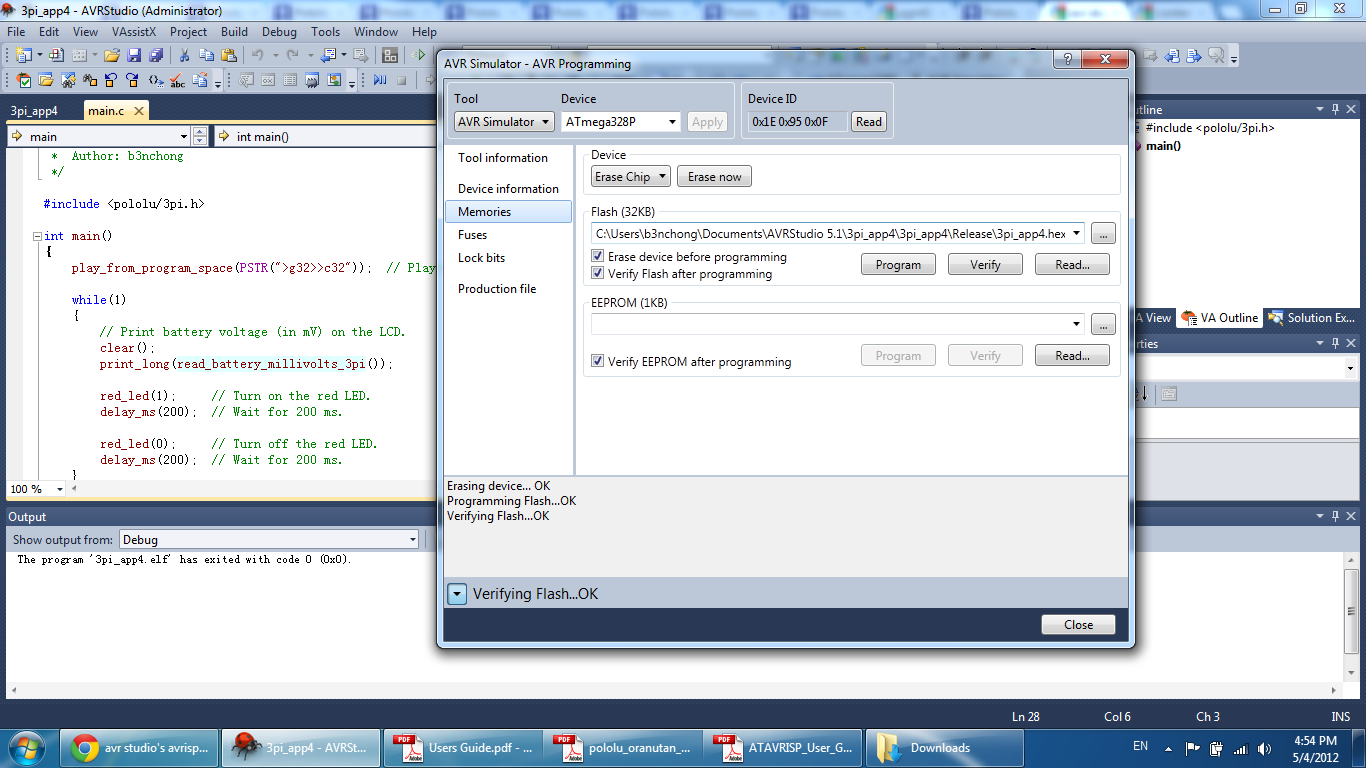
Also, I believe the following #include is necessary to put data into program space:
The USB AVR Programmer’s Guide indicates that you should select “STK500” to program the robot, I believe. Is this what you tried before? I noticed in your screenshots that you selected the “AVR Simulator”.
I’m not sure what that means. Perhaps one of the Pololu employees could lend a hand here…
From https://www.pololu.com/docs/0J6/all, it stated that The platform should be AVRISP. But then i still facing the problem as stated in my previous post, anyone could give me advice on this?
Could you please tell me exactly what steps you did that caused the error message? What version of AVR Studio do you have? What files did you open and what buttons did you click? Any other information you have about what you did could be useful too.
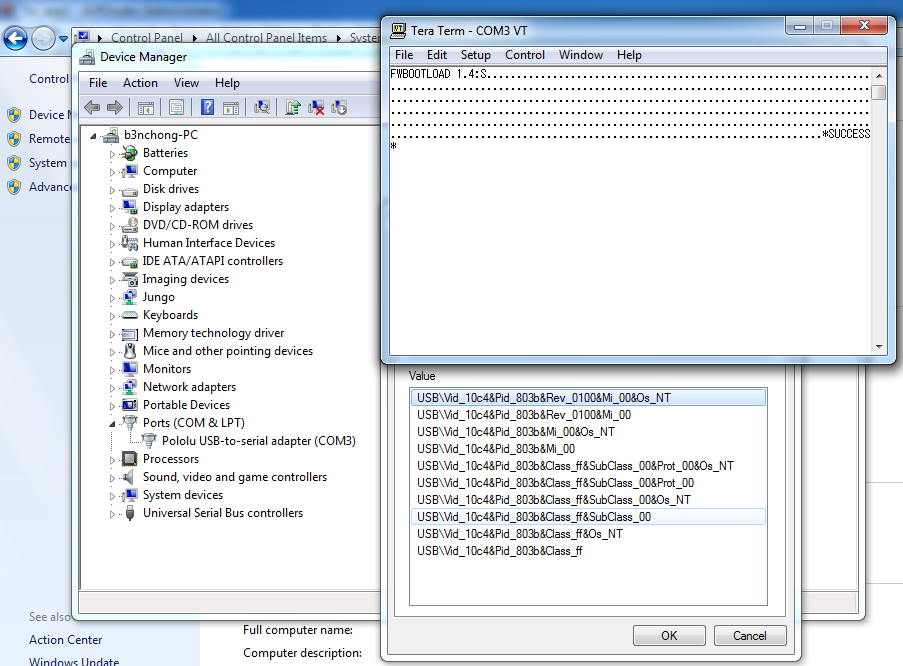
Before that, i updated the firmware but seems nth happened. The REV number is still 0100 although i updated to pgm02b_firmware_v1.4.pgm as u taught me in the other post. https://www.pololu.com/docs/0J6/all#8
#define F_CPU 20000000UL // Orangutan and 3pi frequency (20MHz)
#include <pololu/3pi.h>
#include <avr/pgmspace.h>
#include <avr/eeprom.h>

int main()
{
	play_from_program_space(PSTR(">g32>>c32"));  // Play welcoming notes.

	while(1)
	{
		// Print battery voltage (in mV) on the LCD.
		clear();
		print_long(read_battery_millivolts_3pi());

		red_led(1);     // Turn on the red LED.
		delay_ms(200);  // Wait for 200 ms.

		red_led(0);     // Turn off the red LED.
		delay_ms(200);  // Wait for 200 ms.
	}
	return 0;
}
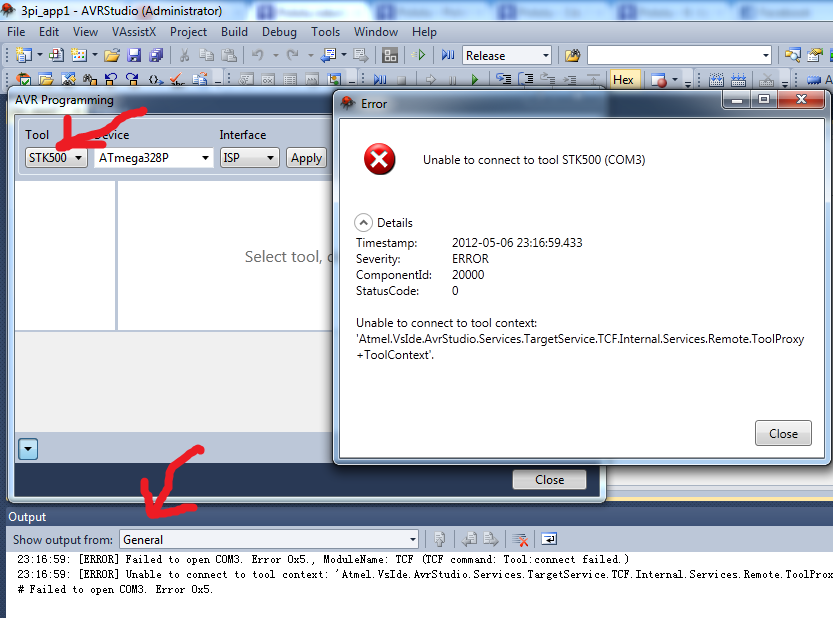
Build it, Clicked the AVR Programming button, select “SDK500”, select “ISP”, an Error occured after i clicked “Apply”,
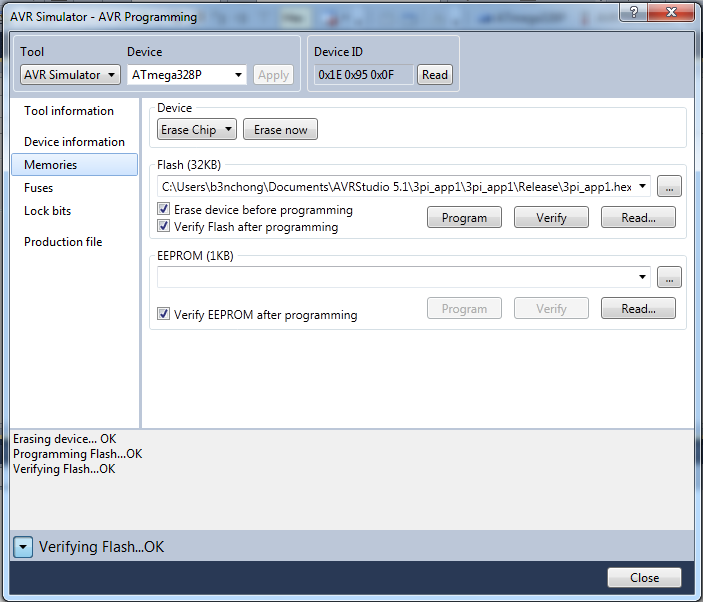
The Green LED dim a little bit(not bright as in the Demo program initially loaded) instead of the Red LED. Besides, i try to erase by clicking “Erase now” but nth happen.
I really need a hand. Please do help me on this David. Thanks a lot!!!
You have the older one which is called the “Orangutan USB Programmer”. The document you linked to (the Pololu AVR Programming Quick Start Guide) does NOT support the older programmer. In fact, the older programmer will not work with AVR Studio 5 at all.
Besides, before i’m getting the Pololu Programmer tomorrow, i have some doubt reading through the documents in Pololu USB AVR Programmer User’s Guide.
In upgrading the firmware section, it stated that “Get your programmer into bootloader mode”, “this can be done by clicking the “Start Bootloader” button in the lower left corner of the configuration utility.” What does the configuration utility means?
The Pololu USB AVR Programmer Configuration Utility is a free piece of software you can download from our website. You can find it in the “Installing Windows Drivers and Software” section of the user’s guide and there is a screenshot of it in the “Configuring the Programmer” section.