
Hello, I am new to the Pololu forum, so please redirect me if my question appears to have been answered elsewhere. Currently, my goal is to control servos by sending accelerometer based commands from my Android phone to my mini Maestro 18 channel board. I have seen other users do so with Arduino, and I believe that it is possible with Maestro and a serial Bluetooth module. Recently, I found a tutorial that demonstrates how to make a Bluetooth controlled hexapod robot; and purchased a serial Bluetooth module with an appropriate logic shifter to accomplish the task. This is the module I purchased: https://www.amazon.com/gp/aw/d/B01N4P7T0H/ref=mp_s_a_1_1?ie=UTF8&qid=1493996886&sr=8-1&pi=AC_SX236_SY340_QL65&keywords=DSD+TECH+SH-HC-08+Bluetooth+4.0+BLE+Slave+Module+to+UART+Transceiver+for+Arduino+Compatible+with+iOS&dpPl=1&dpID=51kBqBUIxQL&ref=plSrch. You can view the tutorial here: http://blog.sigfpe.com/2011/02/build-yourself-bluetooth-controlled-six.html?m=1. While I am not planning on connecting everything that the project requires (I wanted to test the concept out with one servo) I wanted to see if I could control anything through Bluetooth. Unfortunately, because I am relatively new to coding, I can’t seem to figure out where to upload each piece of code to. If someone could help me understand how to write some code that would allow me to control servos via an Android app, I would greatly appreciate it. Also, if you need any additional information, please let me know. Thank you so much for your help in advance!
Hello.
Considering you are new to programming and that this project contains multiple parts, I recommend focusing on getting one portion of the system working before implementing the other. We are not familiar with developing applications for Android, so we cannot offer much help. (However, you should be able to find tutorials on the Internet on how to develop an Android application to communicate with a Bluetooth serial device.)
With the Maestro, I suggest reading the “Serial Interface” section of its user’s guide to get a clear understanding of how to interface with the Maestro via TTL serial. You might consider using the Serial Transmitter utility to get comfortable with sending serial command to control the Maestro.
- Amanda
Hi AmandaS,
Thank you very much for your response. I took your advice and read through the Serial Interface section, which helped me to better understand the language of the Mini Maestro. Above all, the example scripts were great, and it was rewarding to experiment with them. This being said, despite reading the section on TTL, I still don’t fully understand how this interface can communicate with my computer (or Android for that matter) via bluetooth connection. Is there an example line of code that I can try uploading to the board that will allow it to communicate with my bluetooth-ready PC? While I think I almost understand how to use the TTL line, a little more clarification would be greatly appreciated. Thank you again for your help and patience!
Based on your question, it sounds like you do not understand how your Bluetooth module works or how to communicate with it from a computer or Android device. Since we do not make those products and are not very familiar with them, those are things you would need to figure out yourself.
You can control the Maestro by sending it serial commands, documented in that (“Serial Interface”) section of the Maestro user’s guide, via its TTL serial interface.
The Bluetooth module you linked to in your first post looks like it can replace a serial communication interface between two devices (e.g. your Maestro and computer or Android device). You would connect the Maestro’s serial interface to the Bluetooth module.
On your computer or Android device, you would need to pair with that Bluetooth module, configure it, and then send bytes to it. The bytes you send should get relayed to the Maestro, and if you send the correct sequence of bytes as specified in the Maestro user’s guide, then the Maestro would interpret those bytes as commands. If possible, you might want to test the connection using our Serial Transmitter utility (for Windows) to send commands to the Maestro. If not, any other serial terminal program that sends raw, binary bytes will work.
Also, you mentioned having trouble understanding how TTL serial communication works. If you ask specific questions, it will help me understand what to clarify.
- Amanda
Thank you again for your response, AmandaS. In the end, I wasn’t able to interface with the Bluetooth module and decided to purchase a Bluesmirf silver instead. So far, I have been able to connect it to my Maestro controller via the TTL line and sync to it with my computer. I tried to communicate with it via the serial transmitter utility; and sent it a three part message using the mini ssc protocol (255, 0, 127). As a result, the servo moved back to its startup position. When I tried adjusting the target however (255, 0, 80), I received no response from the servo. In order to interface with the board, I had kept it plugged into USB, and ensured that it was in UART mode with a fixed bad rate of 9600. After moving the servo using the Maestro control center, and then sending it a command using the utility over Bluetooth, the servo would simply return back to its startup position, regardless of the message I sent. Do you have any suggestions on how I can fix this problem? Thank you for your help!
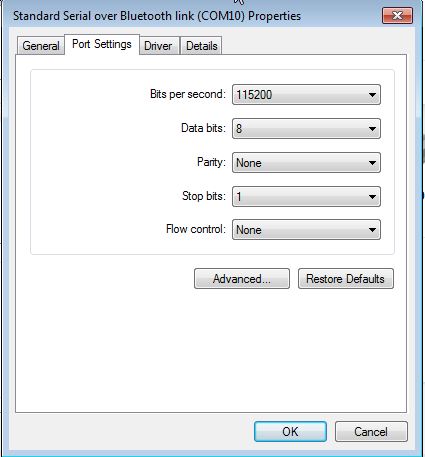
Do you get any errors after sending a command to the Maestro (e.g. the on-board red LED turns on)? If so, can you post a screenshot of the Error tab in the Maestro Control Center while the red LED is on? What baud rate did you configure your Bluetooth module to? According to the datasheet I found on its product page, the module’s default baud rate is 115200 bps.
Can you post pictures clearly showing how you have everything connected in your setup?
- Amanda
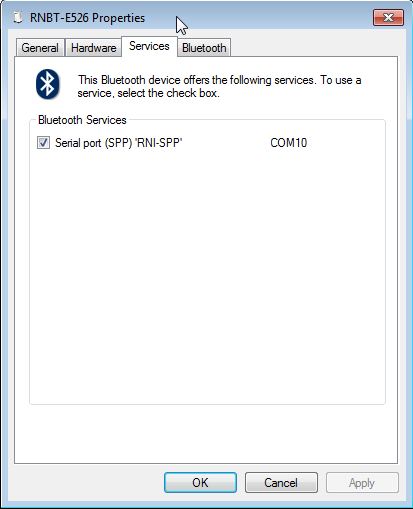
Hello. For some reason, when I tried connecting to the Bluetooth enabled Maestro board today through the serial transmitter, it wasn’t able to open the COMM port. I tried disabling and re-enabling all of my COMM ports in the Device Manager, and set the baud rates on all of the devices to 115200 bps; but still received the same error. For the sake of experimentation, I tried using the serial transmitter to communicate directly to the Maestro over the command port and TTL port (through USB) with no luck. In all of these tests, I would send the same three bytes of data: 255, 0, 127. Upon transmission, I never noticed a change in the on-board LEDs, and there was always a steady green light and a flashing yellow one. The BlueSmirf Silver module was always connected to the Ground, Power, RX, and TX pins, with the RX connected to the Maestro’s TX, and vise-versa. It has a continuously flashing red LED, and remained successfully paired to my PC throughout the testing. In addition, I had the Maestro connected to my computer via USB, and was always able to control a servo connected to channel 0 using the Maestro Control Center. I have included some screenshots of what I have seen on my computer, and will gladly include photos of the board’s connections upon further request. Thank you again for all of your help!

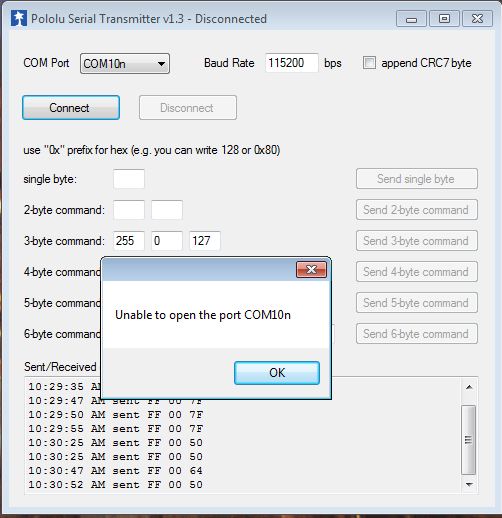
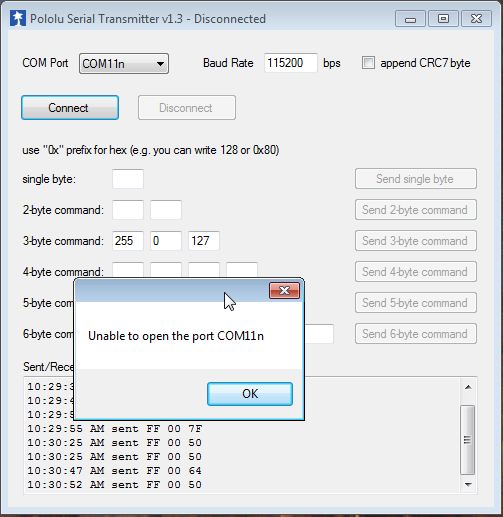
I noticed the screenshots of the Pololu Serial Transmitter utility shows the COM port names ending with an ‘n’. That is not normal. Are those the same COM port names you used when you were able to connect to your Bluetooth module before? Can you try restarting your computer to see if the serial transmitter utility behaves normally again?
Can you verify that your Bluesmirf is working (if you have not already) by doing a loop-back test? To do a loop back test, disconnect the Maestro from the Bluesmirf board and connect the Bluesmirf’s TX and RX line together. Then open the serial transmitter utility or another terminal program (e.g. PuTTY), connect to the Bluesmirf’s receiving COM port, and send characters to the module to see if the same data is echoed back.
Also, please post pictures of your setup clearly showing how you have everything connected and close-up pictures of the connections between your Maestro and Bluetooth module.
- Amanda
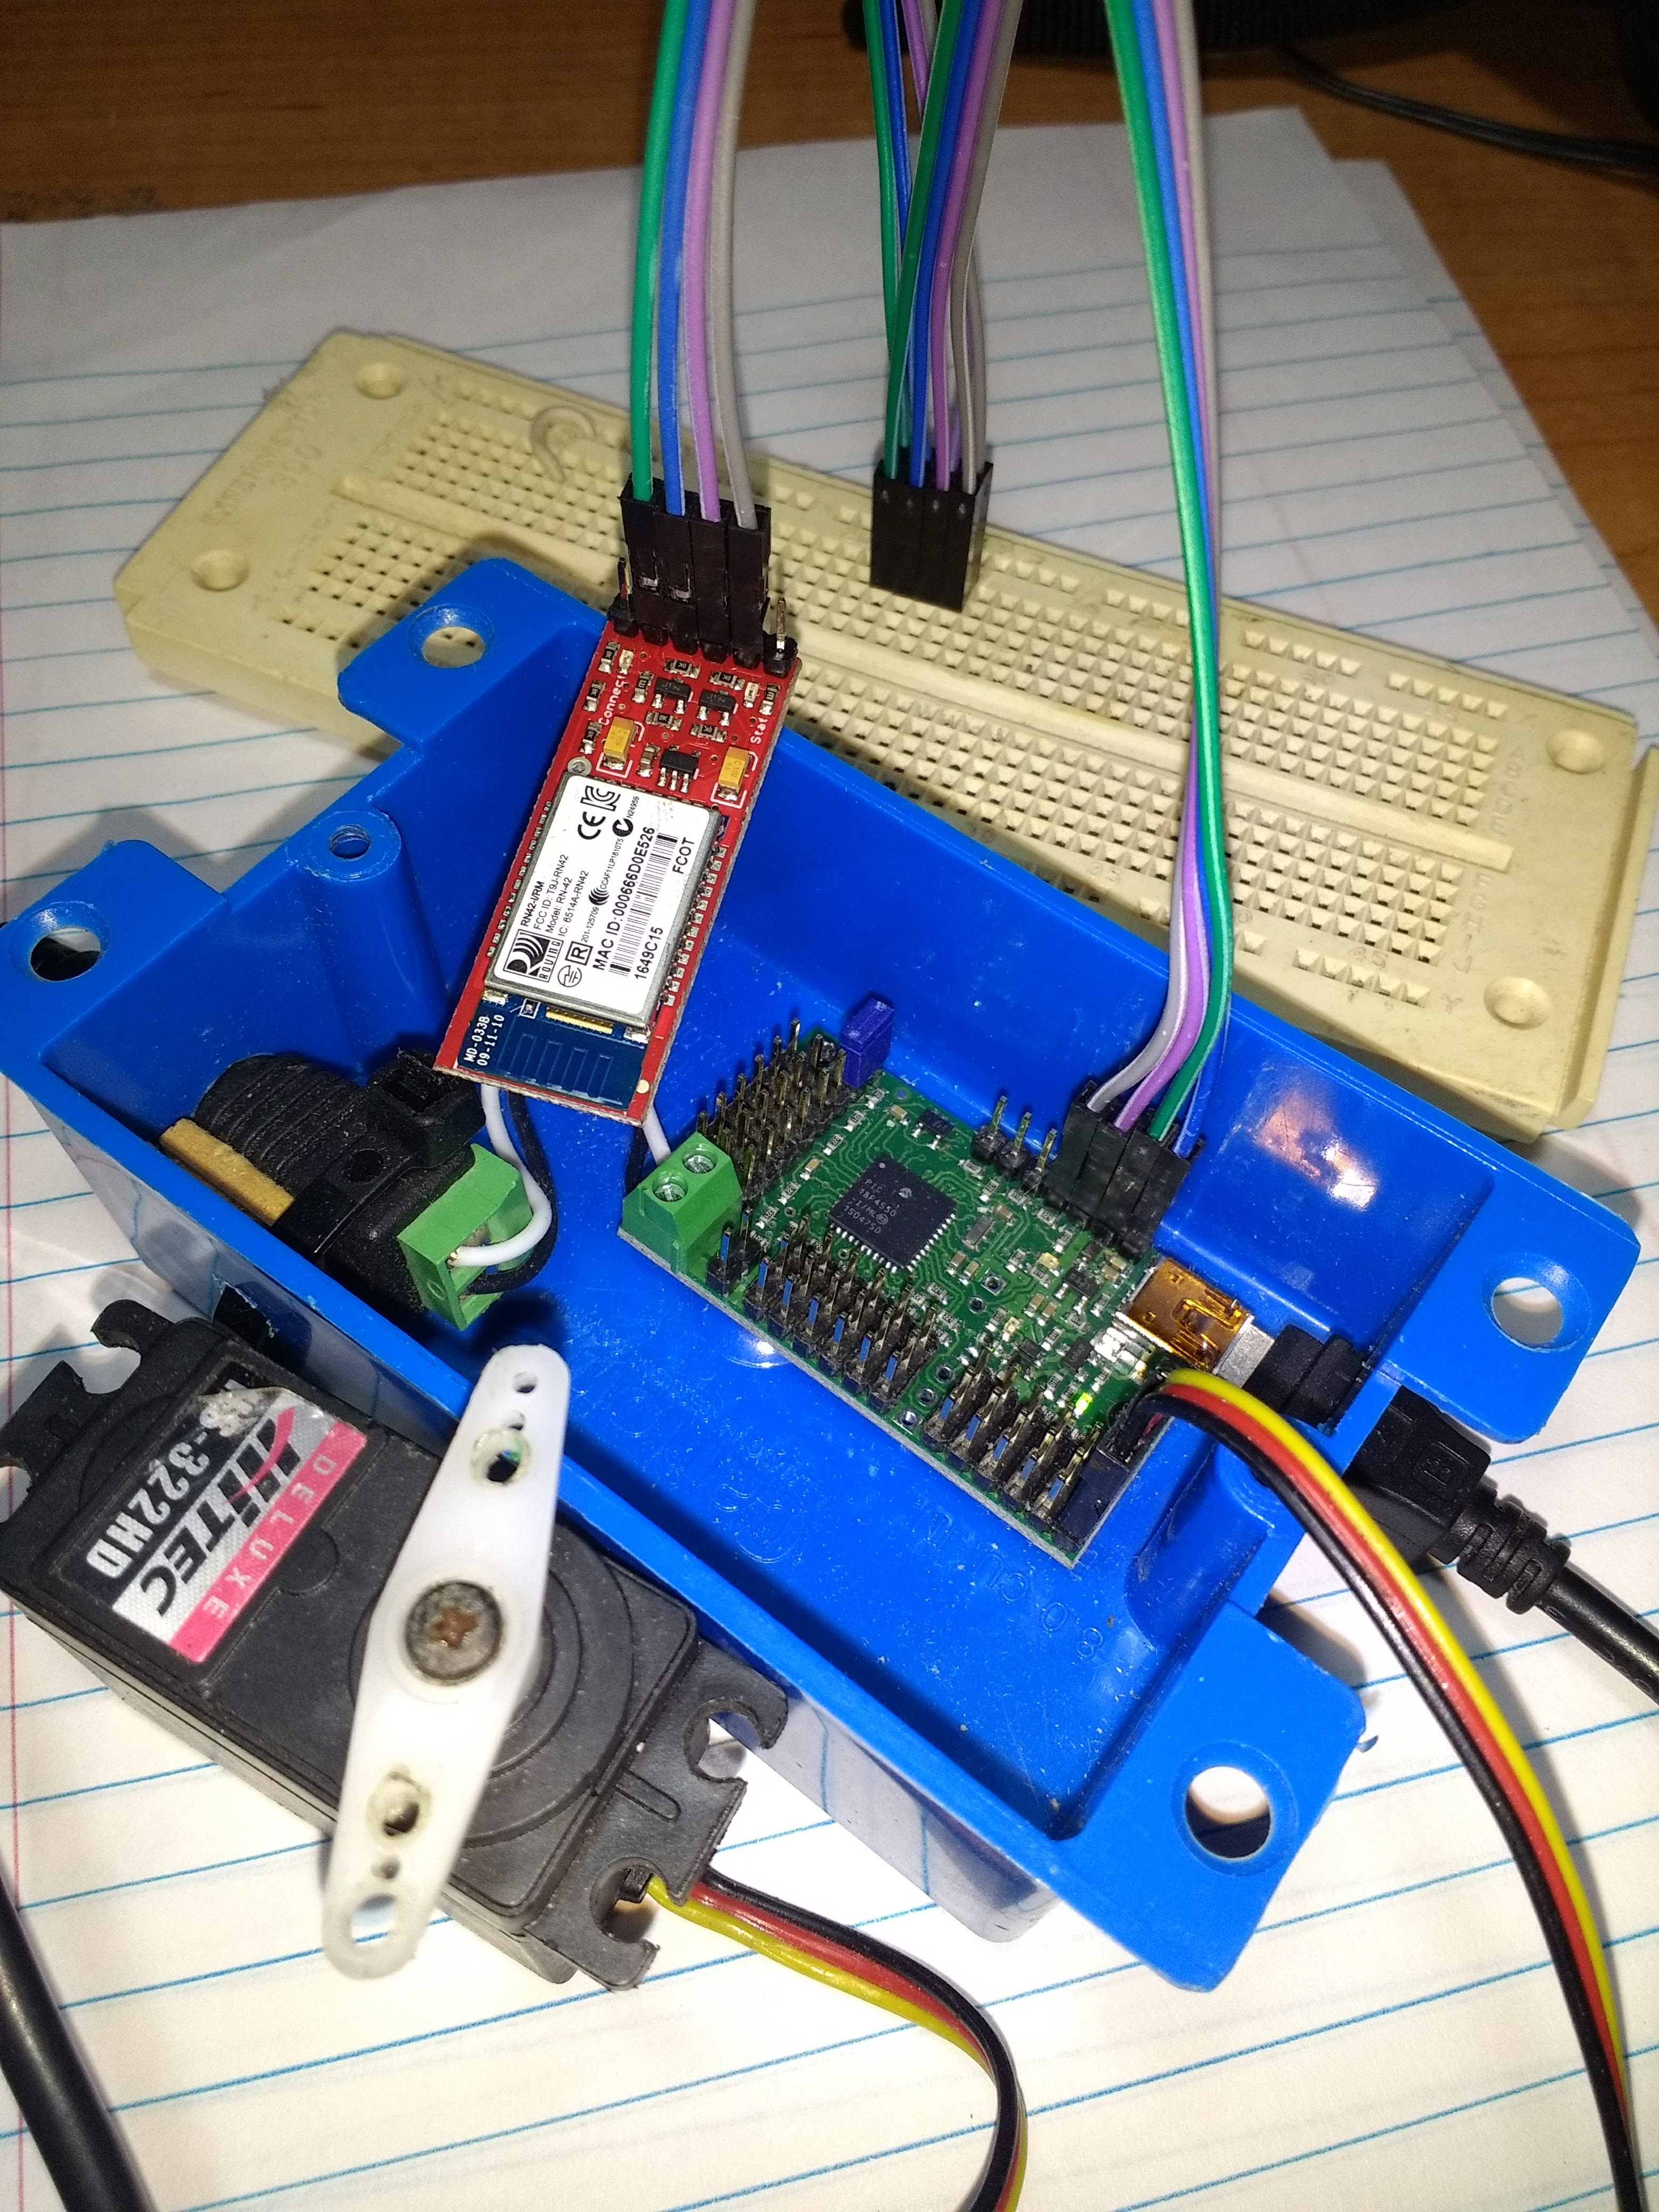
I have included some pictures of my setup and how everything is connected. From the Maestro to the Bluetooth module, I used a blue jumper wire to connect ground to ground; a green wire to connect power to power; a purple wire to connect RX to TX; and a grey wire to connect TX to RX. There is a servo connected to channel one on the Maestro, and 6 volts being supplied through a power supply.

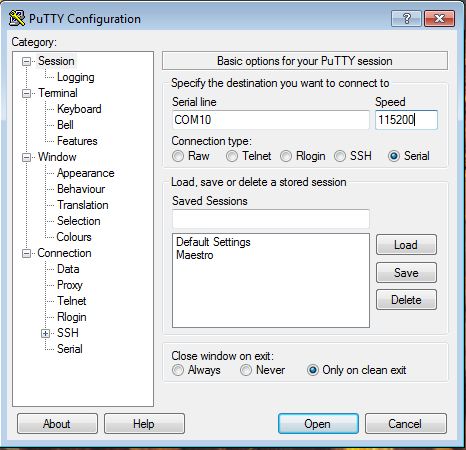
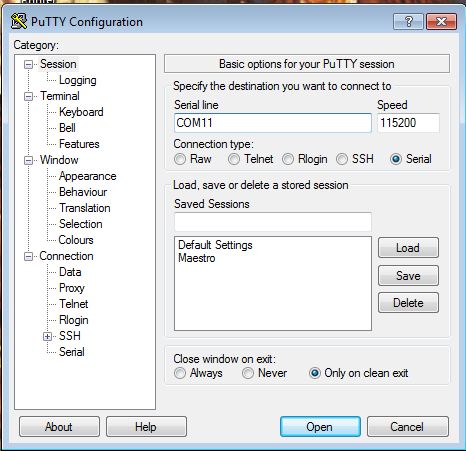
After taking the pictures, I placed a single jumper wire between the purple and grey wires connected to the Bluetooth module’s RX and TX pins. After restarting my computer and downloading PuTTY, I was still unable to interface with the module. PuTTY could not open COMM 10 altogether, and although COMM 11 seemed to be opened, I could not enter any data into the window. The Pololu Serial Transmitter, on the other hand, was unable to open either COMM 10 or 11; however, it changed the ‘n’ suffix to a ‘w’. The screenshots documenting all of this are here:


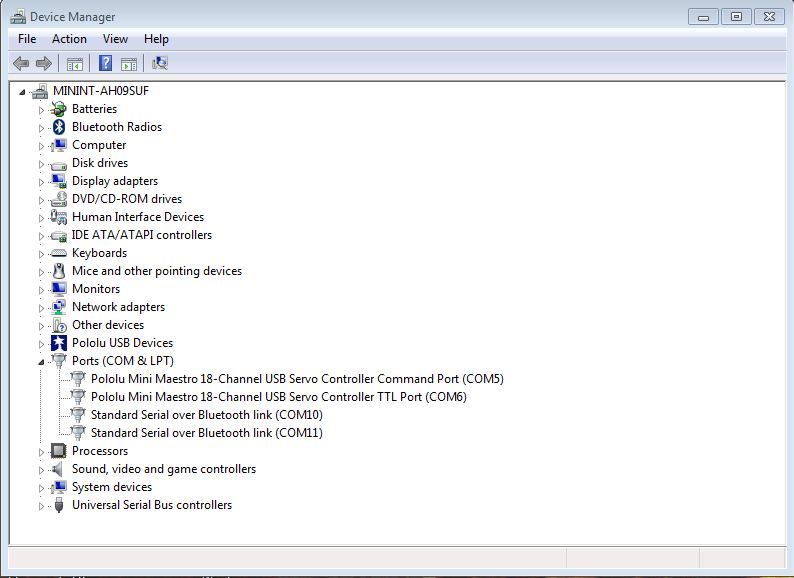
When double checking the COMM ports in the Device Manager, I noticed that my computer was lacking some drivers associated with the Bluetooth module (please see the screenshot below). Could this be preventing the COMM port from opening? If so, could you tell me where to get the drivers for the module? I tried updating the drivers automatically, but my computer can’t find them.
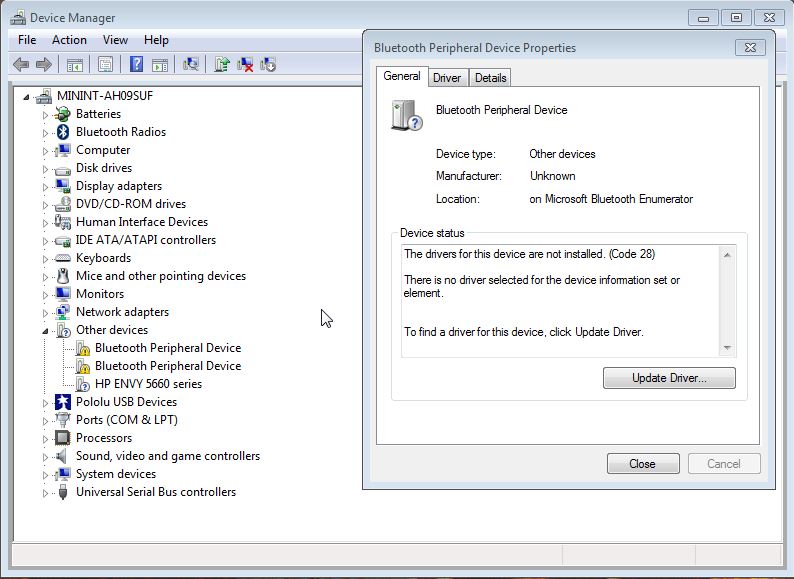
Thanks so much!
I do not see anything obviously wrong with your connections.
We are not sure if that is causing the problem. If that module requires any drivers, I would expect the drivers to be linked on its product page on the SparkFun website. If you haven’t already, I suggest contacting SparkFun for further assistance with their product.
- Amanda