I have a Maestro 18 that I’m trying control via an Arduino Mega 2560.
I have the Maestro and Arduino connected to a computer via USB.
Maestro is powered via a 5vdc power supply and the jumper is also set.
Maestro has two sequences controlling two servos. Sequence #1 moves the servos in one direction, sequence #2 to the other direction. Both sequences work via the Maestro Control Center.
I’ve got 1 wire going from TX3 (pin 14) on the Arduino going to RX (pin 3) on the Maestro.
Arduino is running the following code, however there isn’t any servo movement. Is the code wrong? Wiring?
#include <PololuMaestro.h>

MiniMaestro maestro(Serial3);

void setup()
{
  // Set the serial baud rate.
  Serial3.begin(9600);
}

void loop()
{
  maestro.restartScript(0);
  delay(2000);

  maestro.restartScript(1);
  delay(2000);
}
Your code looks okay, but please note that the RestartScript() command does not work with sequences directly. You will first need to copy the sequence(s) to the script. You can do this using the “Copy all Sequences to Script” button located in the “Script” tab of the Maestro Control Center. After that, you will likely need to add a “quit” command to the end of the main subroutines that were generated, otherwise when you trigger it to run that subroutine from a serial command, it will reach the return command and trigger an error (since it has nowhere to return to).
Also, you should have a common ground connection between the Arduino and Maestro (it is not clear if you have that already).
Can you try doing those things and seeing if that fixes your problems? If not, could you post pictures of your setup that show all of your connections as well as a copy of your Maestro settings file? You can save a copy of your settings file from the “File” drop-down menu of the Maestro Control Center while the controller is connected.
Brandon
Thank you Brandon.
I confirmed that the sequences had been copied to the script and applied to Maestro.
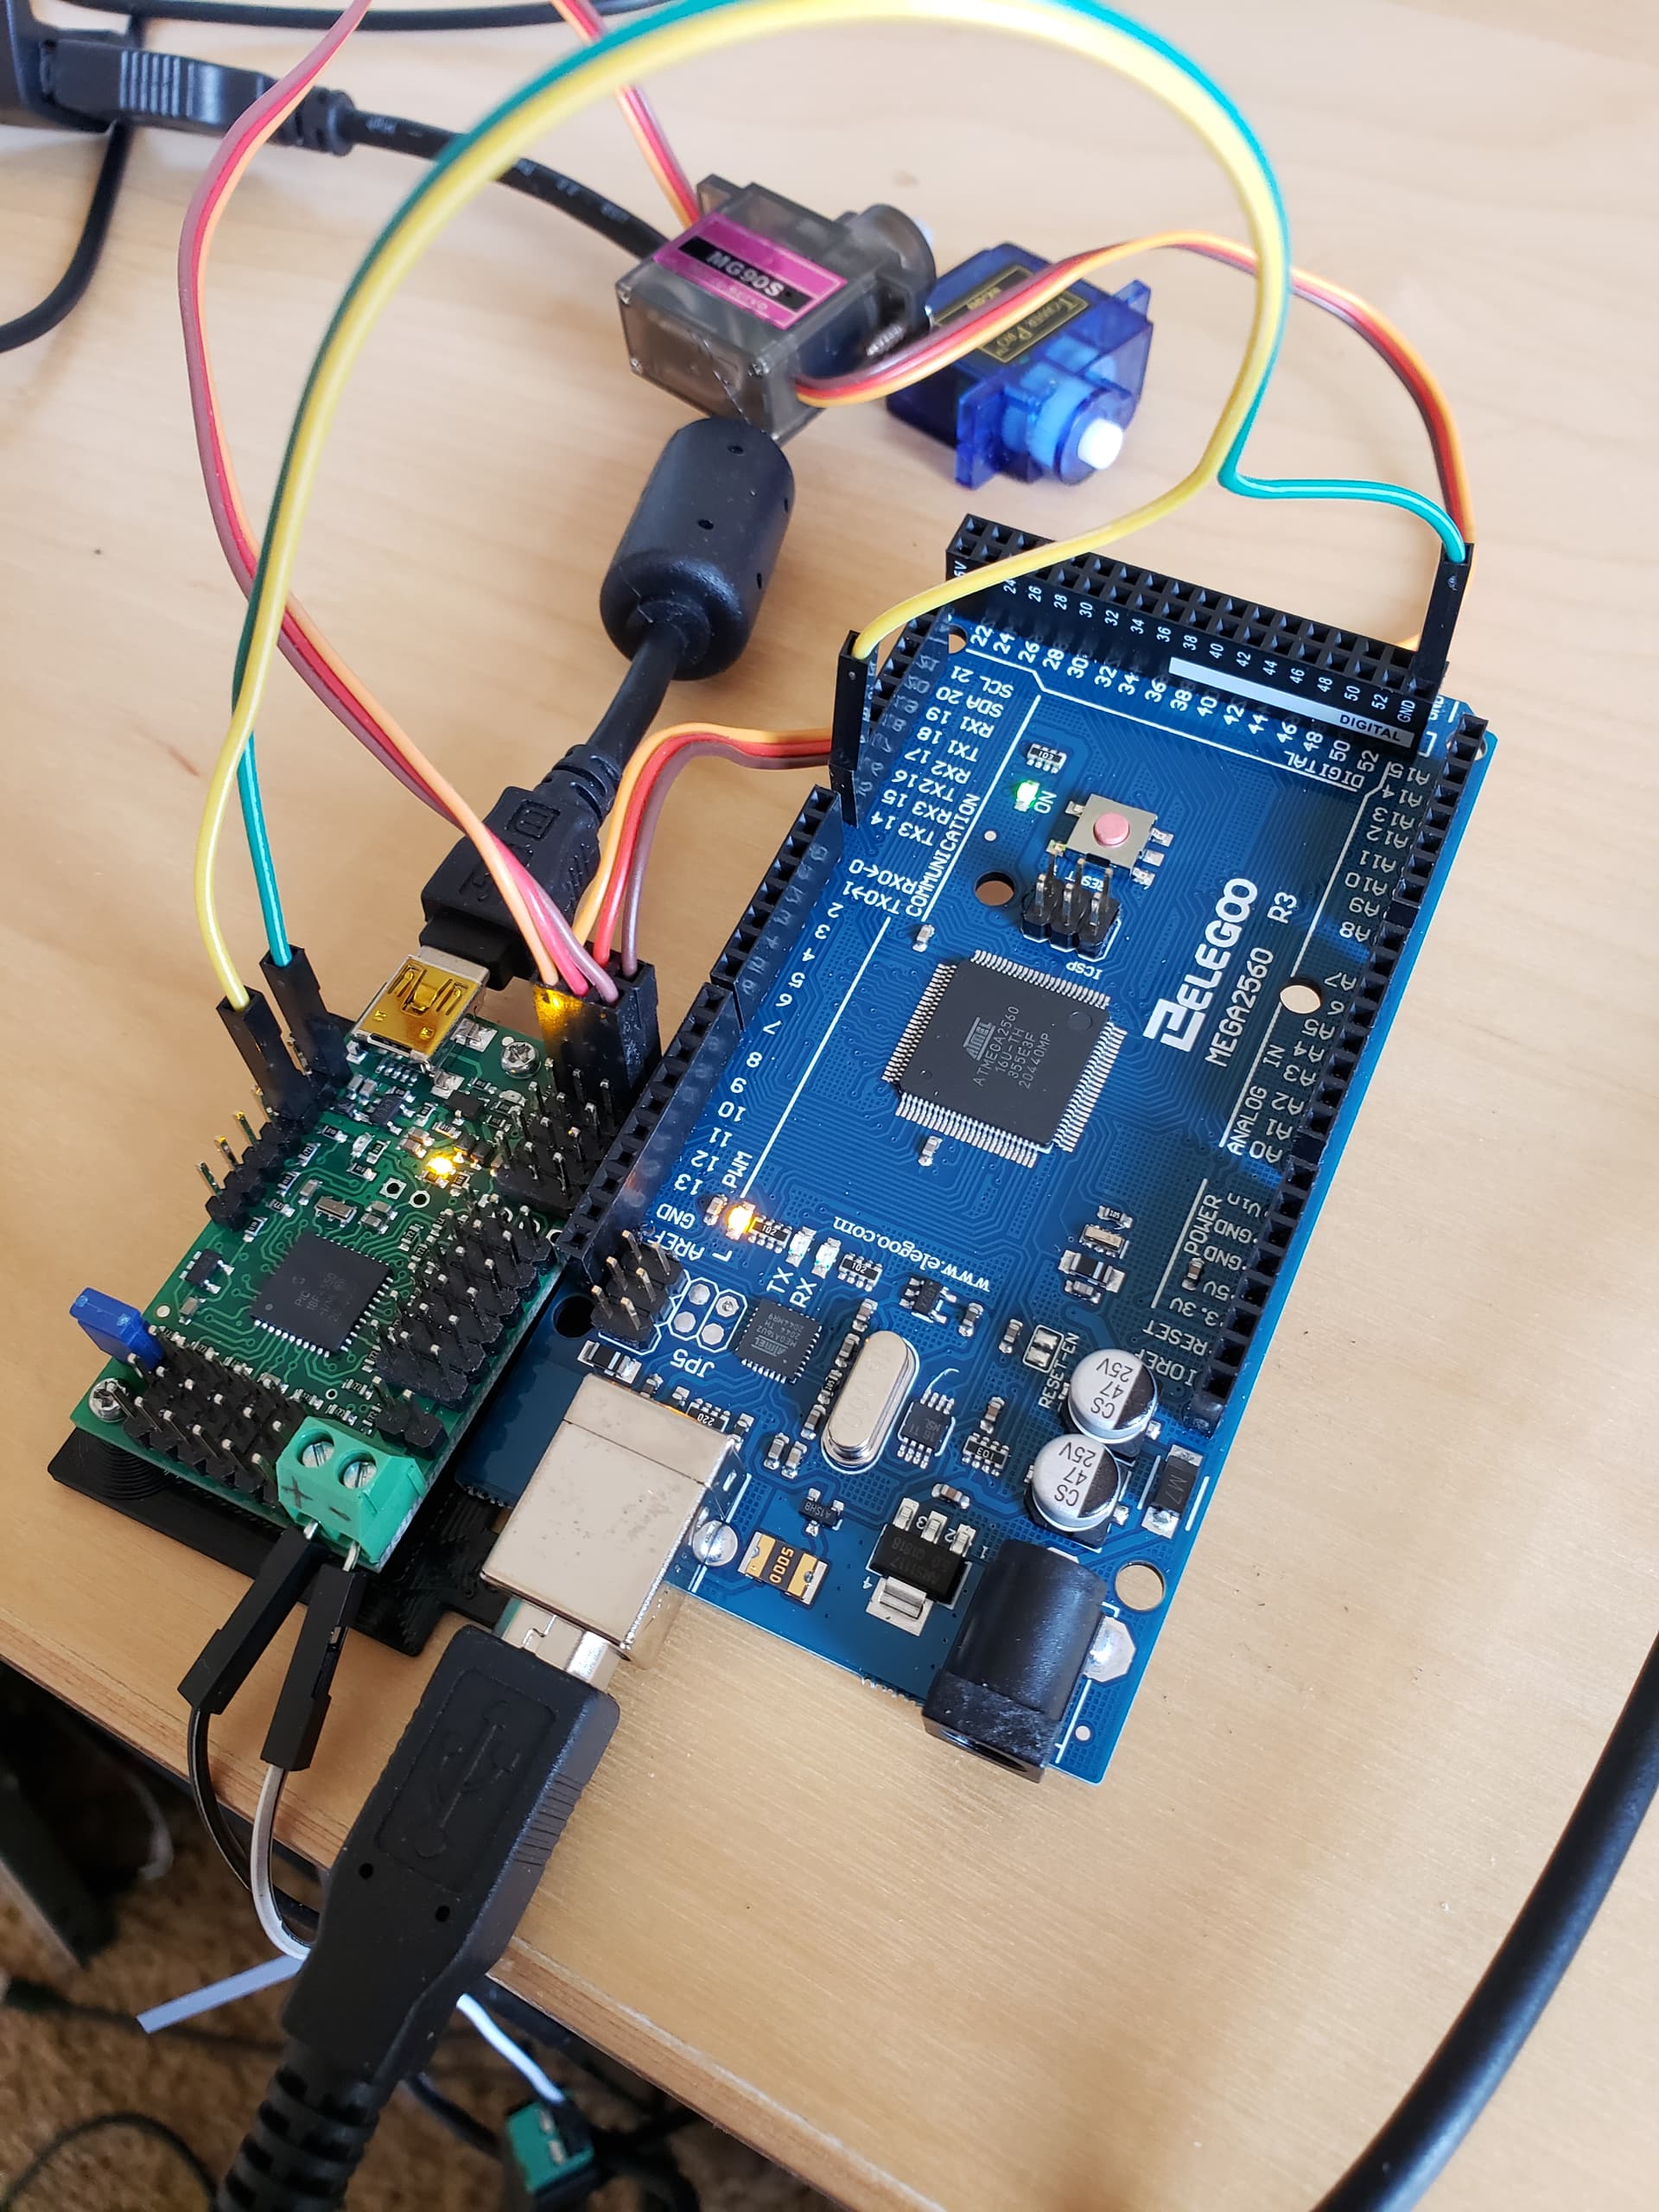
I simplified both the sequence (just 1) and the code to trigger the sequence 2 every seconds. I’ve attached a image of the basic setup I’m using along with the Maestro settings file.
#include <PololuMaestro.h>
MiniMaestro maestro(Serial3);
void setup()
{
// Set the serial baud rate.
Serial3.begin(9600);
}
void loop()
{
maestro.restartScript(0);
delay(2000);
}
maestro.txt (4.1 KB)
Thank you for the additional information. I have replicated your setup here using your settings file and Arduino program (although I used one of our Arduino-compatible A-Star 32U4 controllers instead of an Arduino Mega since I don’t have one readily available, so I changed the program to use Serial1), and it seemed to work fine for me. I don’t see a problem with your connections, but you might double check that they are all making good contact. Can you check in the “Status” tab of the Maestro Control Center to see if it is reacting at all (indicating that the script is running)? You might try using a different serial port on your Arduino Mega too, just in case it is damaged somehow.
Brandon
The Arduino Mega is brand new, though I did try Serial 1 & 2 as well. Status tab doesn’t show any activity at all. Wiring connections appear to be fine, I did check continuity of the wire.
I don’t see anything obviously wrong with your setup. Could you try looking at the signal on the RX line with an oscilloscope and try to carefully measure the bit rate? Also, could you post a picture of that scope capture?
Do the servos move as expected when you start the script from the “Script” tab of the Maestro Control Center?
Brandon
Unfortunately I don’t have an oscilloscope to measure the bit rate of the signal.
Running the script from the ‘Script’ tab does move the servos.
Do you have any other serial devices that you can try to get working that Elegoo Mega board? Additionally, do you have another Arduino-compatible controller you could use with the Maestro to see if that works? If you have a USB-to-Serial adapter, you could try using that to send serial data to the Maestro using our Serial Transmitter Utility software.
Brandon
I do have a USB to FTDI serial adapter. I’ve attached a picture showing the wiring connections, purple from FTDI (rx) to pin 4 (tx) on the Maestro, grey from FTDI (tx) to pin 3 (rx) on the Maestro and a black GND between the two.
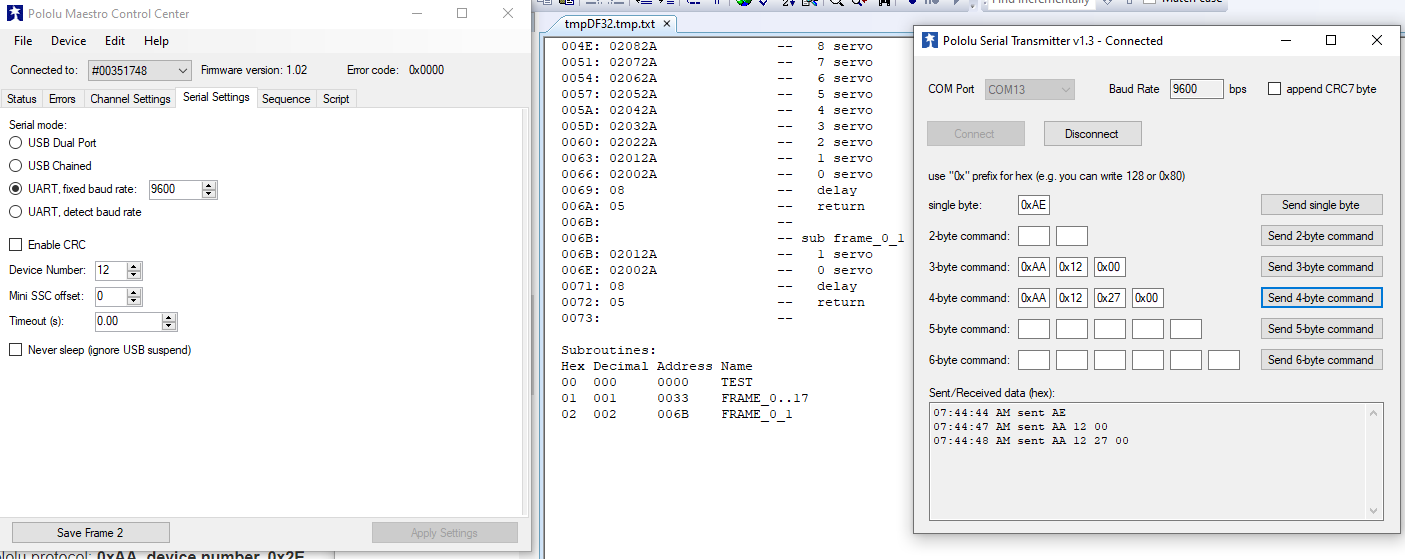
I also attached a screenshot of the Maestro serial settings, script and Serial Transmitter Utility showing the commands I tried. I believe they are correct.
FTDI tx led does flash when command is sent, nothing on rx.
No movement of the servos.
I ordered another Maestro 18, used the same wiring layout as I was with the Arduino Mega and everything appears to be working now!
No idea what would of happened with the prior Maestro, but it obviously had a problem with the rx/tx pins.
Is there any way to copy the script or sequences from one Maestro to another?
1 Like
I am glad to hear your replacement Maestro is working for you! If the other Maestro appears to be working aside from the serial interface, it’s possible the RX pin was damaged somehow.
As far as copying your script and sequences from one Maestro to another, you can save the settings file from the Maestro you want to copy from and load it onto the new Maestro using the Maestro Control Center. The “Save settings file…” and “Open settings file…” options are in the “File” drop-down menu (just make sure to click “Apply Settings” after you open the settings file on the new Maestro). Please note that in order to copy the script and sequences, the settings file needs to be saved from the computer it was originally programmed from.
Brandon