
I am just starting out with the Maestro, and I was hoping someone can point me in the right direction. I just want to create a simple toggle to set all 12 servos to a certain value with a momentary switch. Any help will be much appreciated!
Hello.
You can use the Sequencer feature of the Maestro Control Center to easily create frames that designate the position values for all 12 of your servos before copying it to a script using the “Copy Sequence to Script” button under the “Sequence” tab. For more details about the Sequencer feature, see the “Sequencer” section of the Maestro Servo Controller User’s Guide.
After you creating the two frames for your script to toggle between, you can then merge your script with the “Using a button or switch to control servos” example script, which detects the state of a button or switch and executes the associated motion sequence. You can find that example script under the “Example Scripts” section of the user’s guide.
If you try merging your code with the button example code and run into issues, you can post your modified script here, and I would be happy to take a look.
- Amanda
Hi Amanda,
Thanks for helping me out on this. I’ve done what you suggested, but I can’t seem to get the button working. I’ve wired it up like the instructions say, I’ve confirmed that it is behaving as it should with a multimeter, but it isn’t toggling the values, nor is it showing anything in the status section.
Here’s the code:
goto main_loop    # Run the main loop when the script starts (see below).

# This subroutine returns 1 if the button is pressed, 0 otherwise.
# To convert the input value (0-1023) to a digital value (0 or 1) representing
# the state of the button, we make a comparison to an arbitrary threshold (500).
# This subroutine puts a logical value of 1 or a 0 on the stack, depending
# on whether the button is pressed or not.
sub button
  0 get_position 500 less_than
  return

# This subroutine uses the BUTTON subroutine above to wait for a button press,
# including a small delay to eliminate noise or bounces on the input.
sub wait_for_button_press
  wait_for_button_open_10ms
  wait_for_button_closed_10ms
  return

# Wait for the button to be NOT pressed for at least 10 ms.
sub wait_for_button_open_10ms
  get_ms # put the current time on the stack
  begin
    # reset the time on the stack if it is pressed
    button
    if
      drop get_ms
    else
      get_ms over minus 10 greater_than
      if drop return endif
    endif
  repeat

# Wait for the button to be pressed for at least 10 ms.
sub wait_for_button_closed_10ms
  get_ms
  begin
    # reset the time on the stack if it is not pressed
    button
    if
      get_ms over minus 10 greater_than
      if drop return endif
    else
      drop get_ms
    endif
  repeat

# An example of how to use wait_for_button_press is shown below:

# Uses WAIT_FOR_BUTTON_PRESS to allow a user to step through
# a sequence of positions on servo 1.
main_loop:
begin
  4000 frame
  5000 frame
  6000 frame
  7000 frame
  8000 frame
repeat

sub frame
  wait_for_button_press
  1 servo
  return


# Rec Trigger
begin
  500 3968 3968 3968 3968 3968 3968
  3968 3968 frame_1..8 # Frame 0
  500 8000 8000 8000 8000 8000 8000
  8000 8000 frame_1..8 # Frame 1
repeat

sub frame_1..8
  wait_for_button_press
  8 servo
  7 servo
  6 servo
  5 servo
  4 servo
  3 servo
  2 servo
  1 servo
  delay
  return
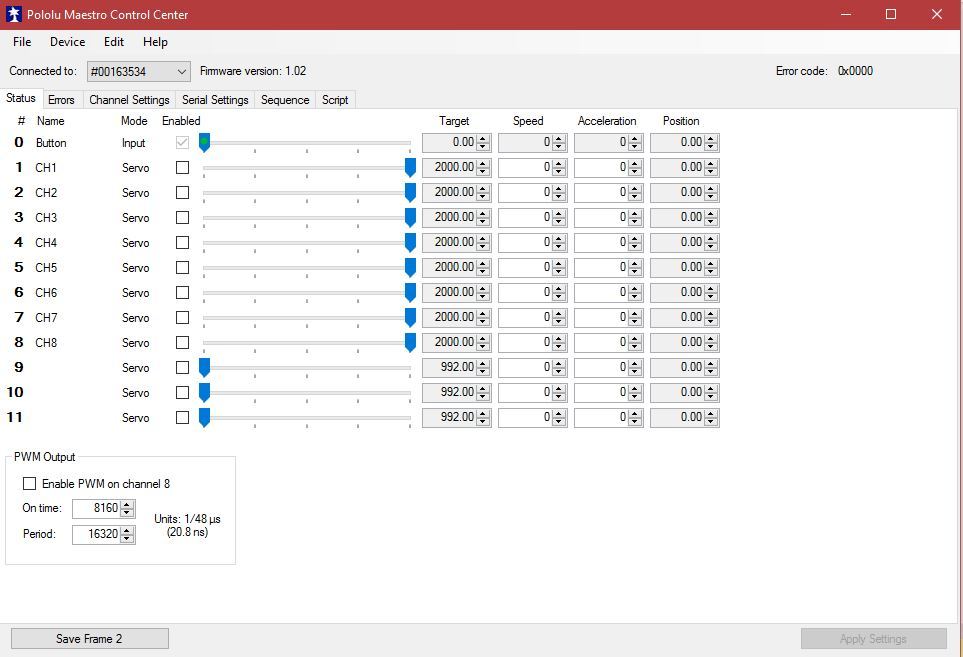
Here’s what the status screen shows, no matter what:
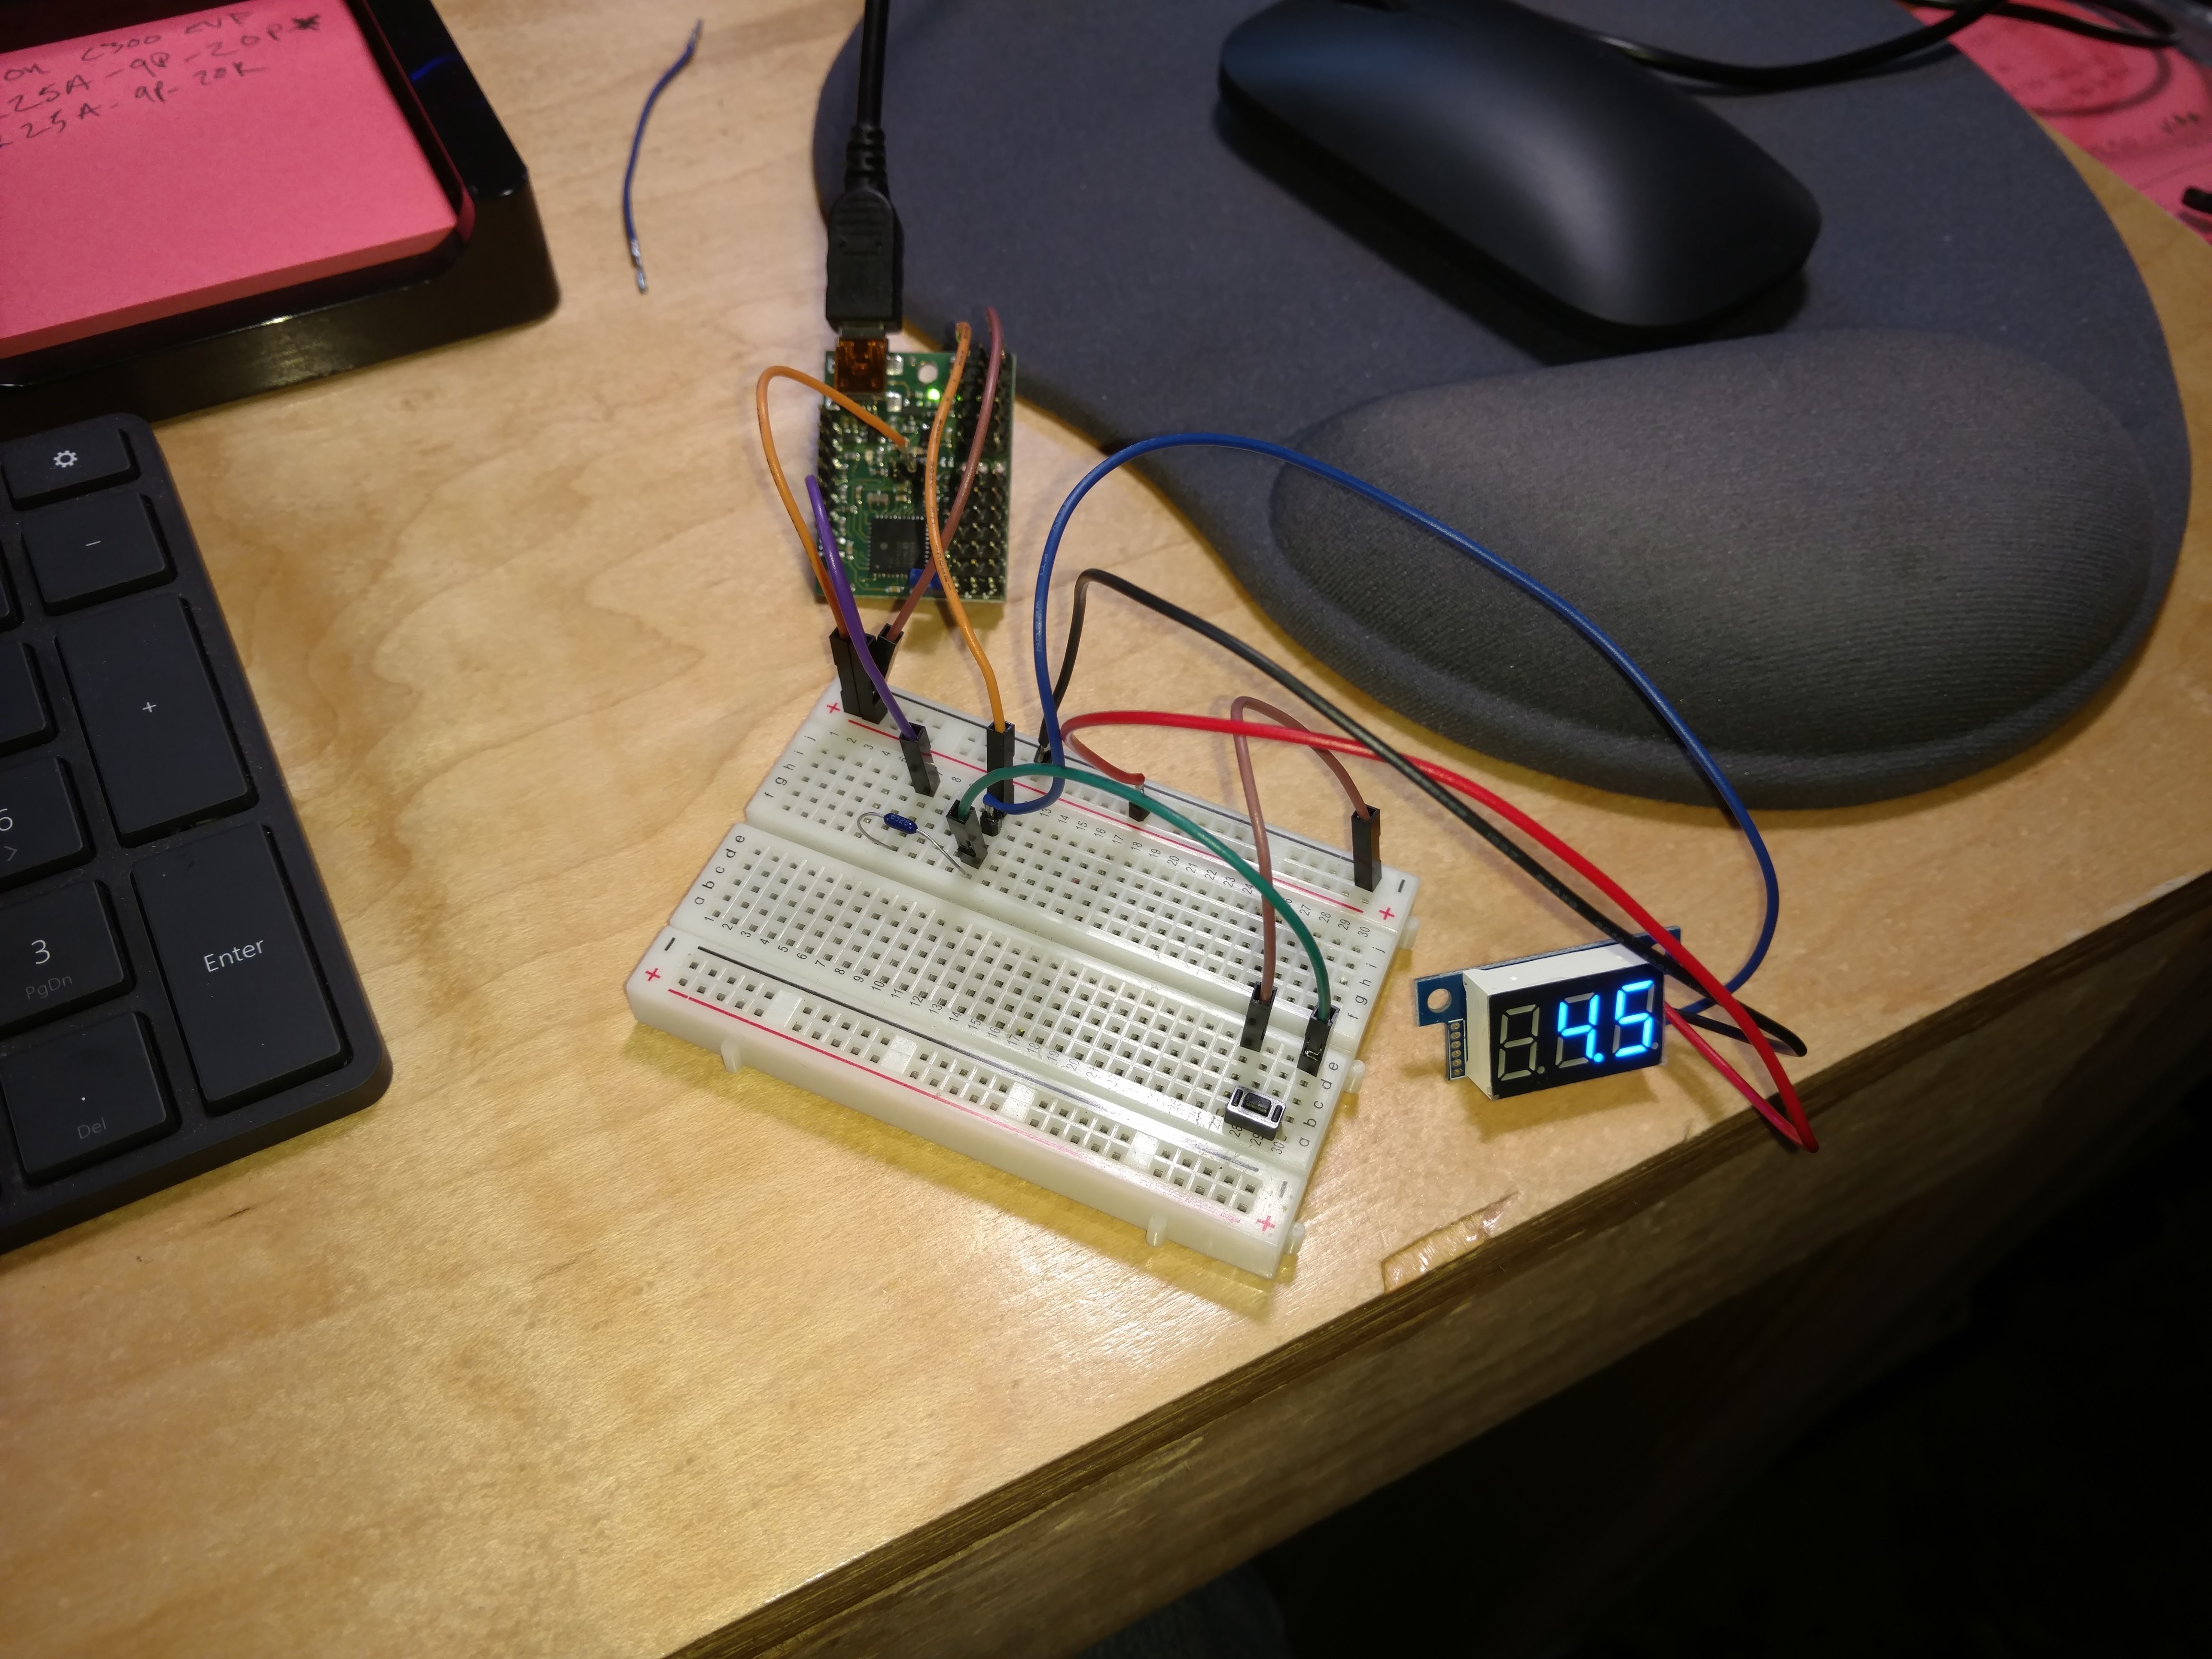
Here’s the breadboard:
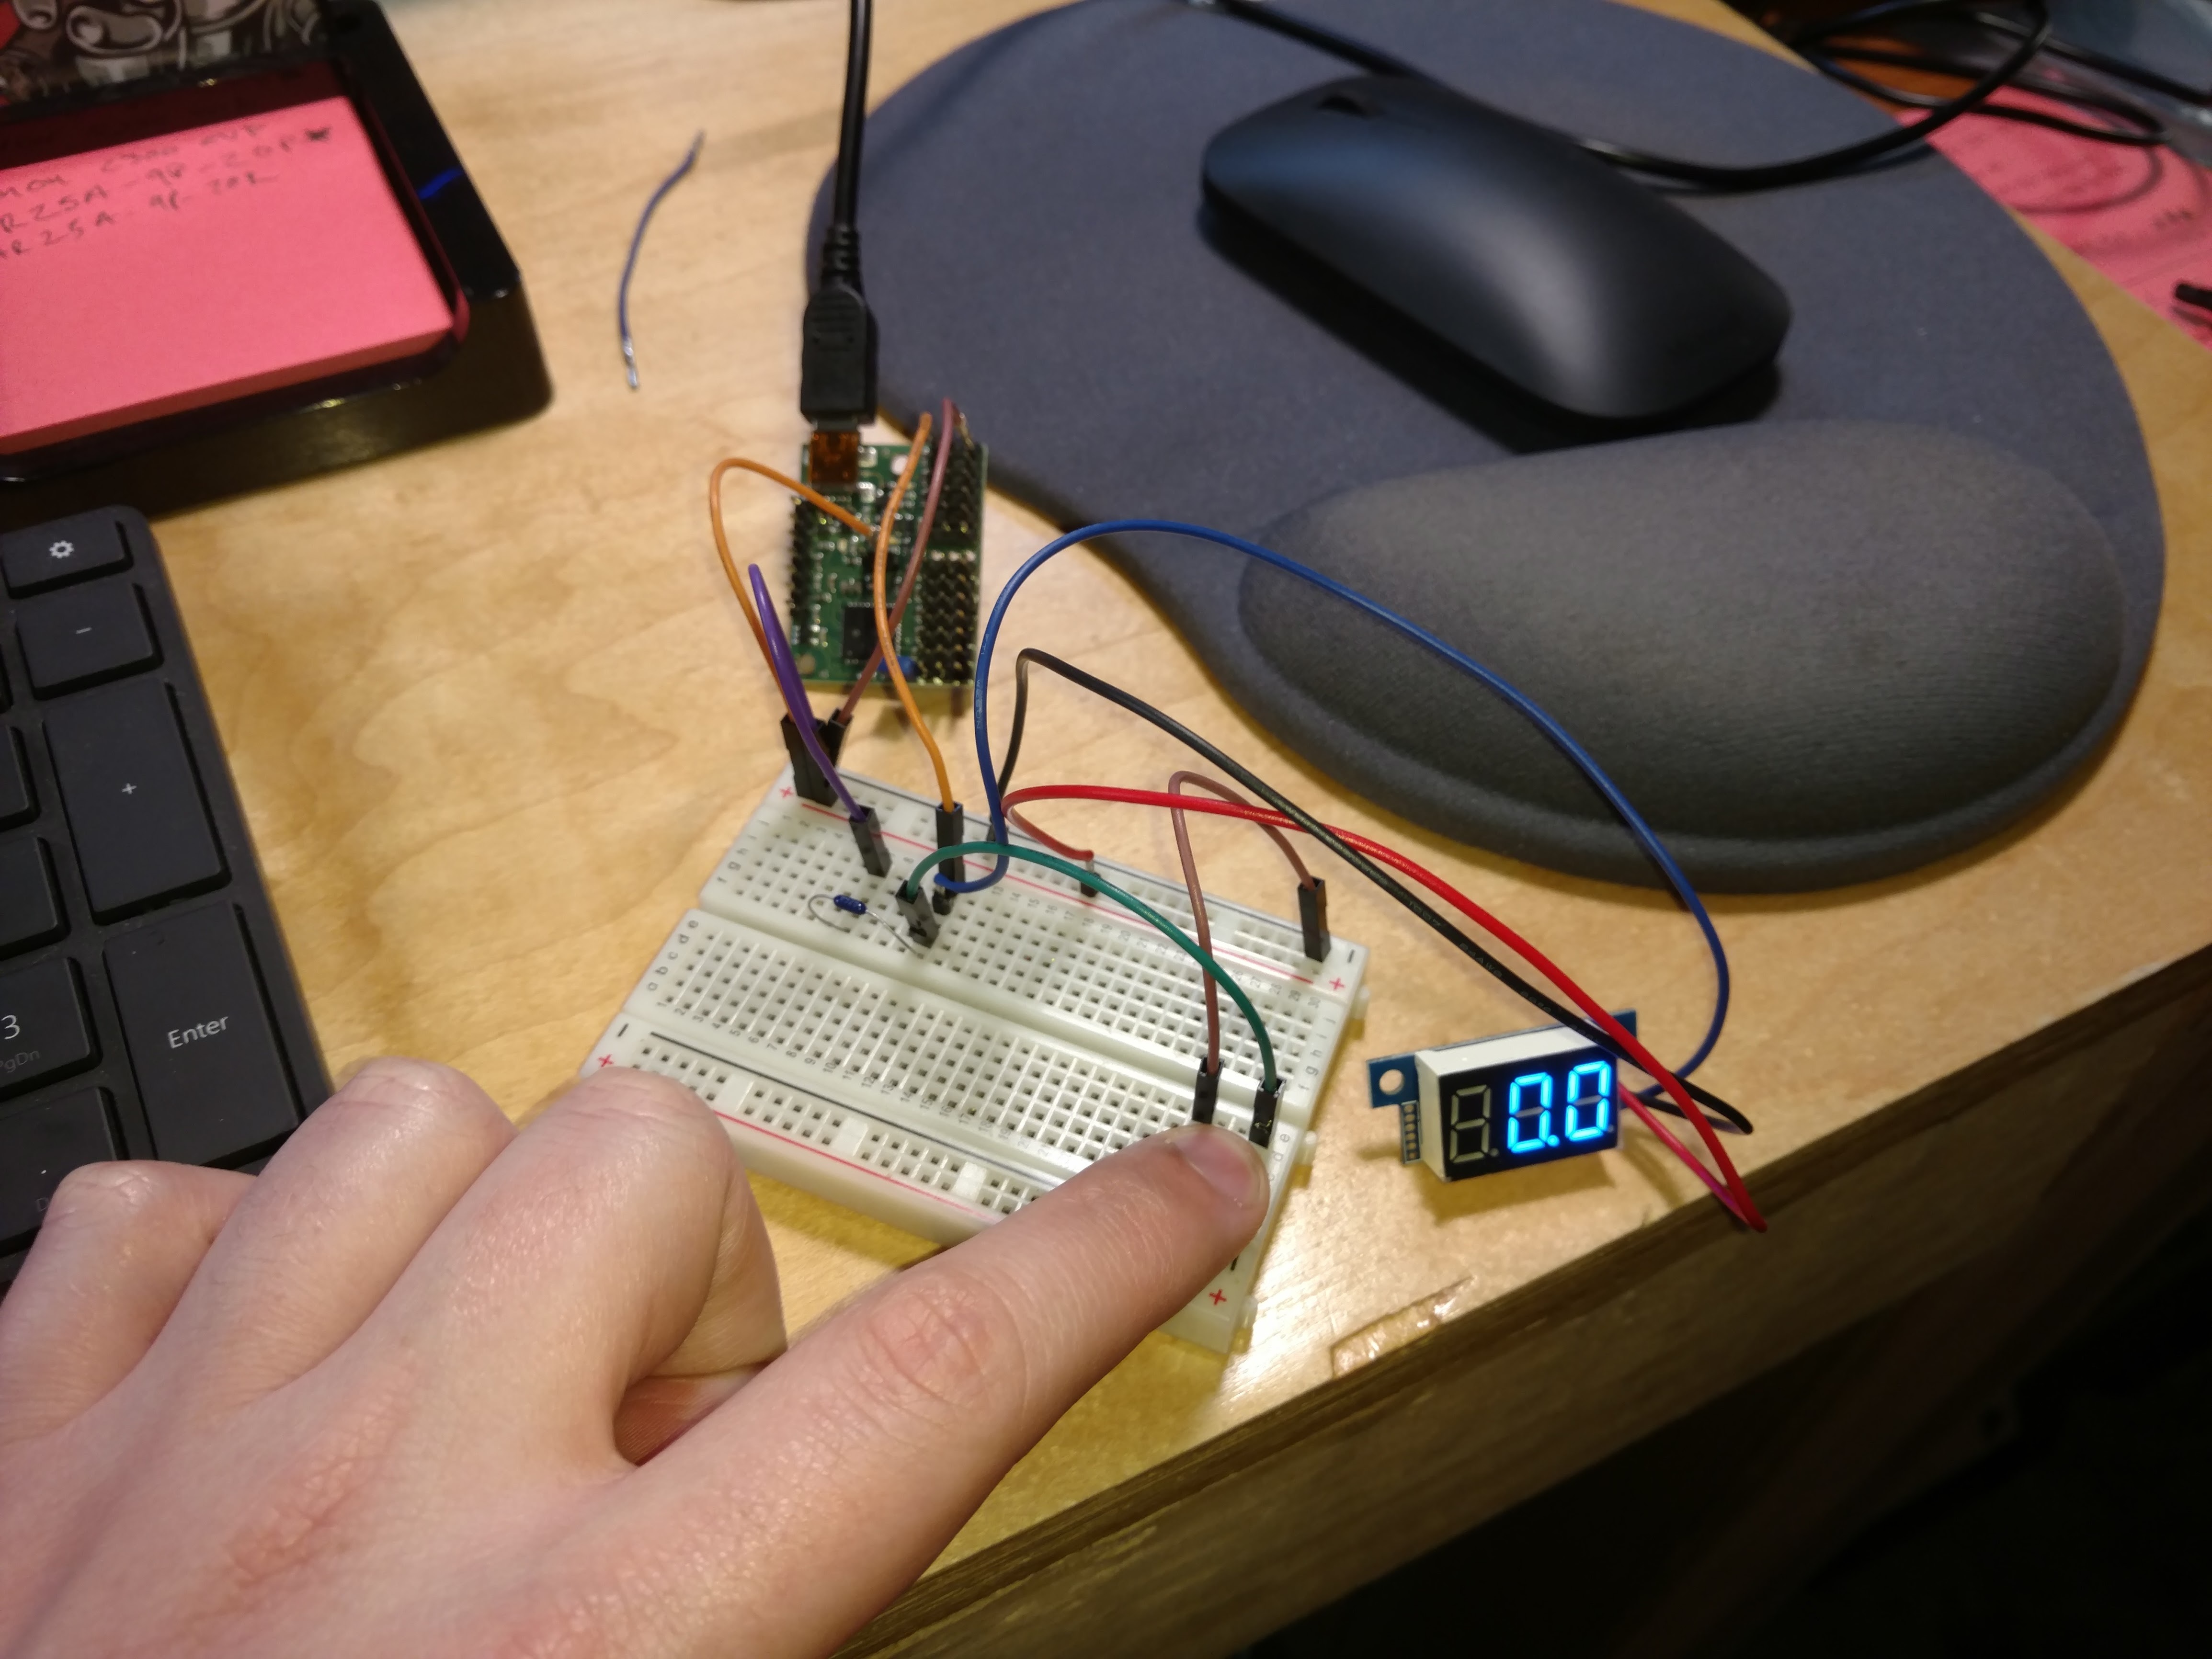
Here’s the momentary button being closed:
Sorry I posted the wrong code. Here is the code I am using:
goto main_loop    # Run the main loop when the script starts (see below).

# This subroutine returns 1 if the button is pressed, 0 otherwise.
# To convert the input value (0-1023) to a digital value (0 or 1) representing
# the state of the button, we make a comparison to an arbitrary threshold (500).
# This subroutine puts a logical value of 1 or a 0 on the stack, depending
# on whether the button is pressed or not.
sub button
  0 get_position 500 less_than
  return

# This subroutine uses the BUTTON subroutine above to wait for a button press,
# including a small delay to eliminate noise or bounces on the input.
sub wait_for_button_press
  wait_for_button_open_10ms
  wait_for_button_closed_10ms
  return

# Wait for the button to be NOT pressed for at least 10 ms.
sub wait_for_button_open_10ms
  get_ms # put the current time on the stack
  begin
    # reset the time on the stack if it is pressed
    button
    if
      drop get_ms
    else
      get_ms over minus 10 greater_than
      if drop return endif
    endif
  repeat

# Wait for the button to be pressed for at least 10 ms.
sub wait_for_button_closed_10ms
  get_ms
  begin
    # reset the time on the stack if it is not pressed
    button
    if
      get_ms over minus 10 greater_than
      if drop return endif
    else
      drop get_ms
    endif
  repeat

# An example of how to use wait_for_button_press is shown below:

# Uses WAIT_FOR_BUTTON_PRESS to allow a user to step through
# a sequence of positions on servo 1.
main_loop:
begin
  500 3968 3968 3968 3968 3968 3968
  3968 3968 frame_1..8 # Frame 0
  500 8000 8000 8000 8000 8000 8000
  8000 8000 frame_1..8 # Frame 1
repeat

sub frame_1..8
  wait_for_button_press
  8 servo
  7 servo
  6 servo
  5 servo
  4 servo
  3 servo
  2 servo
  1 servo
  delay
  return
I added code tags to your code in both your posts to make it easier to read. Please format your code in future posts by putting a backtick (`) before and after the code (if it is in the middle of a paragraph) or indenting the code by four spaces (if it is a block of code). You can click on the pencil icon in the upper right-hand corner of your recent post and view the raw source to see how I formated your code.
I did not see anything obviously wrong with your code, so I tried to reproduce the issue, but was unable to. Does the slider on channel 0 toggle between 0 and 255 when you press and release the pushbutton? Do you have the “Run script on startup” option selected under the “Script” tab? The script will not run automatically unless you manually click the “Run Script” button under that tab.
If the problem still continues, can you post the settings file for your Maestro here? You can save the file by selecting “Save settings file…” option under the “File” menu in the Control Center.
- Amanda
Thanks for all your help, Amanda. I purchased another board, and the code is working perfectly. I must have damaged the board some how.
Okay, so now my new board is having the same problem that the old board had. I changed nothing. I only had it unplugged for about a week. I plugged the USB back in, and the button no longer registers, and the servo positions don’t change. I don’t understand what’s going on.
I’ve attached the settings file.
I think I’ve figured it out. Here’s my new code:
goto main_loop    # Run the main loop when the script starts (see below).

# This subroutine returns 1 if the button is pressed, 0 otherwise.
# To convert the input value (0-1023) to a digital value (0 or 1) representing
# the state of the button, we make a comparison to an arbitrary threshold (500).
# This subroutine puts a logical value of 1 or a 0 on the stack, depending
# on whether the button is pressed or not.
sub button
  11 get_position 500 less_than
  return

# This subroutine uses the BUTTON subroutine above to wait for a button press,
# including a small delay to eliminate noise or bounces on the input.
sub wait_for_button_press
  wait_for_button_open_10ms
  wait_for_button_closed_10ms
  return

# Wait for the button to be NOT pressed for at least 10 ms.
sub wait_for_button_open_10ms
  get_ms # put the current time on the stack
  begin
    # reset the time on the stack if it is pressed
    button
    if
      drop get_ms
    else
      get_ms over minus 10 greater_than
      if drop return endif
    endif
  repeat

# Wait for the button to be pressed for at least 10 ms.
sub wait_for_button_closed_10ms
  get_ms
  begin
    # reset the time on the stack if it is not pressed
    button
    if
      get_ms over minus 10 greater_than
      if drop return endif
    else
      drop get_ms
    endif
  repeat

# An example of how to use wait_for_button_press is shown below:

# Uses WAIT_FOR_BUTTON_PRESS to allow a user to step through
# a sequence of positions on servo 1.
main_loop:

begin
  500 5900 5900 5900 5900 5900 5900
  5900 5900 5900 5900 5900 frame_0..10 # Frame 0
  500 6200 6200 6200 6200 6200 6200
  6200 6200 6200 6200 6200 frame_0..10 # Frame 1
repeat

sub frame_0..10
  wait_for_button_press
  10 servo
  9 servo
  8 servo
  7 servo
  6 servo
  5 servo
  4 servo
  3 servo
  2 servo
  1 servo
  0 servo
  delay
  return
And here’s my settings file:
maestro_settings_pushbutton.txt (4.7 KB)
One problem I’ve found with this method is that I need a definable transition from one position to the next in order for my device to work. Right now, when I click the button the transition from one value to the next activates my device, so that is good. The problem with with the code is that when i first power up the device, I have to push the button to get to the first value, then push the button again to activate the transition to the next.
My question is: Can I set the board to already have the first value loaded when I initially power up? That way, I can start the transition with the first button press, instead of the second.
Thanks again!
I am glad you were able to narrow down the issue.
You can set the default positions for each servo channel in the Maestro Control Center. To do that, go to the “Channel Settings” tab, select “On startup: Goto”, enter the default position for each channel, and click the “Apply Settings” button in the bottom right corner of the Control Center.
Alternatively, you can set each servo to the default position at the beginning of your script before you jump to main_loop. Although, after looking at your code, I think the easiest way is to call wait_for_button_press after setting all your servos to their positions in the frame_0..10 subroutine like so:
sub frame_0..10
  10 servo
  9 servo
  8 servo
  7 servo
  6 servo
  5 servo
  4 servo
  3 servo
  2 servo
  1 servo
  0 servo
  delay
  wait_for_button_press
  return
- Amanda