Hi. When I enter the last line of the code “Serial.println(maestro.getPosition(0));”, the code stops working, hangs from the last line, and does not print any value. the Servo number “0” turns as expected but when it reach to the last line where the getPosition is it get stuck there. i tried it with Arduino mega But same problem occur. i’m wondering what’s the problem
Please note that on some Arduino’s the software serial library can only use specific pins as RX. For example, with the Arduino Mega pin 6 will not work for RX, so you would need to change it to one of the supported pins mentioned in Arduino’s Software Serial documentation.
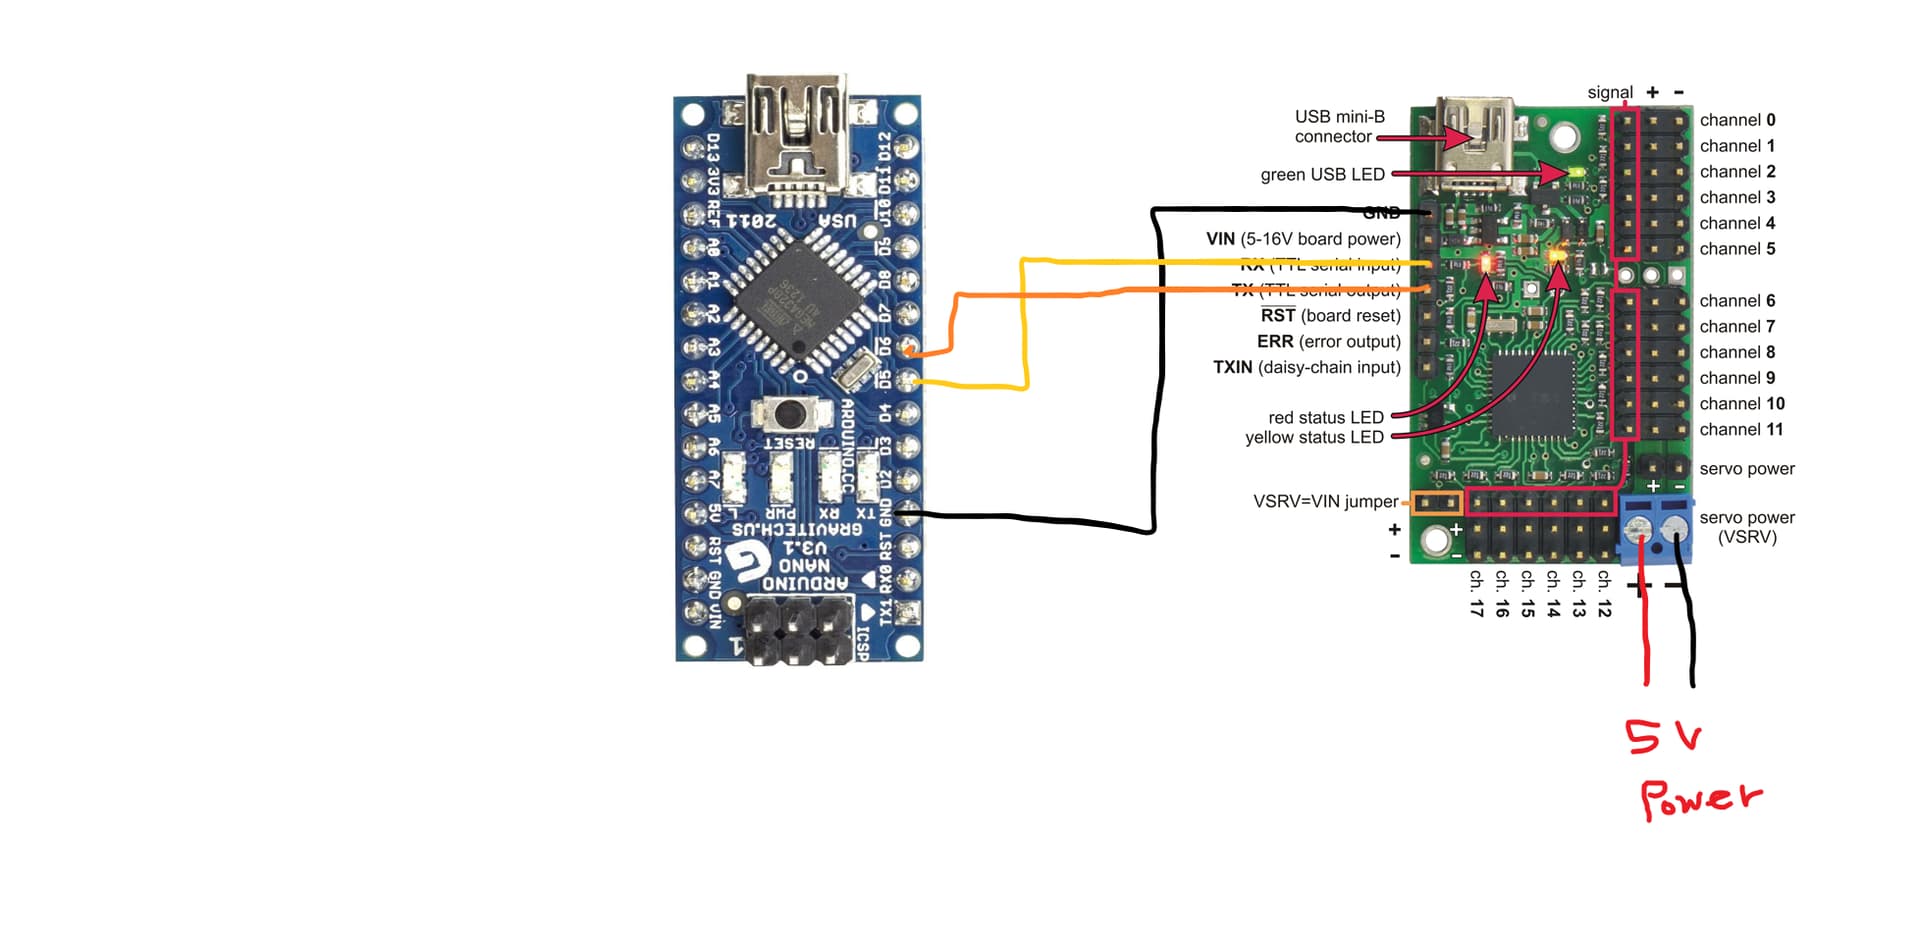
Before you tried switching to the Mega, were you using an Arduino Nano v3.1 as shown in your picture? If so, it shouldn’t have this limitation since it’s based on the ATmega328.
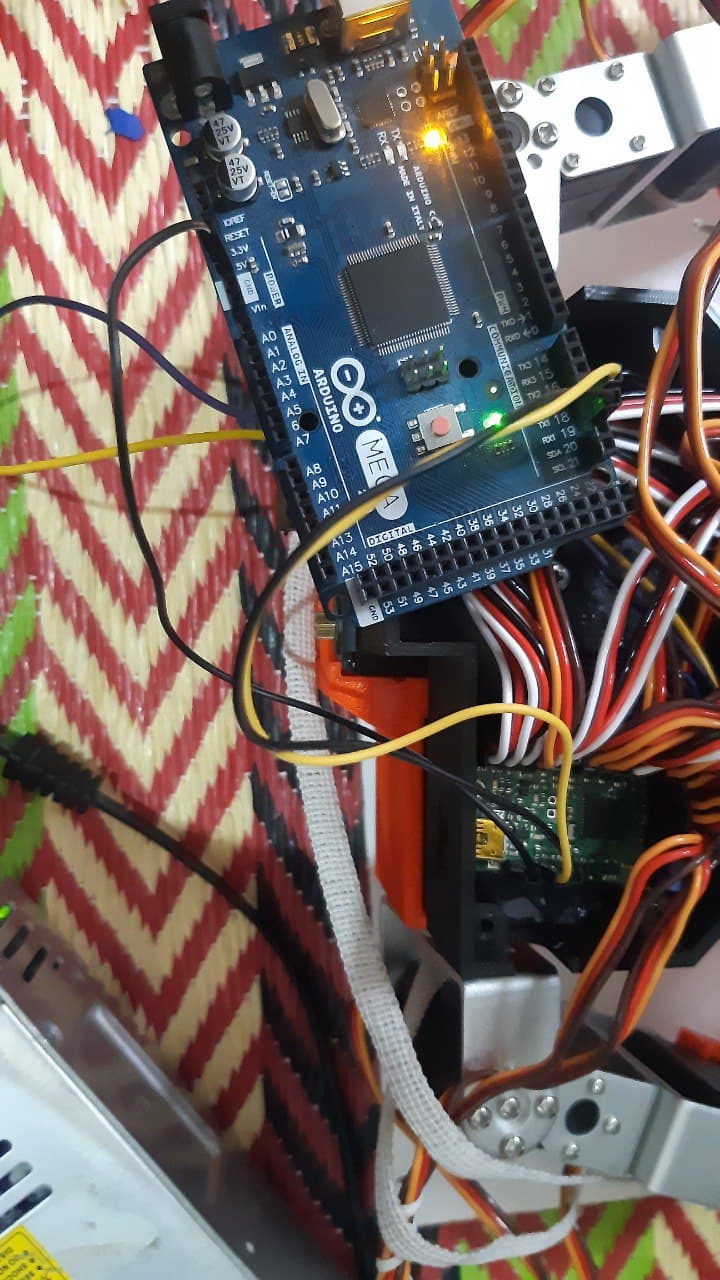
If that does not fix your issue, can you post pictures of your actual setup that show all of your connections? Additionally, could you post a copy of your Maestro settings file? You can save a copy of your settings file from the “File” drop-down menu of the Maestro Control Center.
Thank you for the additional information. I loaded your settings on a Maestro here and ran your code on an ATmega328P and it worked fine, so I suspect there might be a problem with your connections (i.e. the wire going from the Arduno’s TX to the Maestro’s RX pin) or something else in your setup.
The only other thing that stands out to me is that it looks like you might be powering the Maestro’s logic side from the servo power rail, which is being supplied with 5V. Since 5V is the Maestro’s minimum operating voltage, it might be restarting or browning out if the servos cause the voltage to dip (especially when they are moving or start to move). As a test, could you try removing the shorting block connecting the “VSRV=VIN” pins and power the Maestro logic separately (e.g. through the USB port) to see if that changes anything? You could also try monitoring the voltage on the servo power rail to see how close to 5V it is with all of those servos connected.
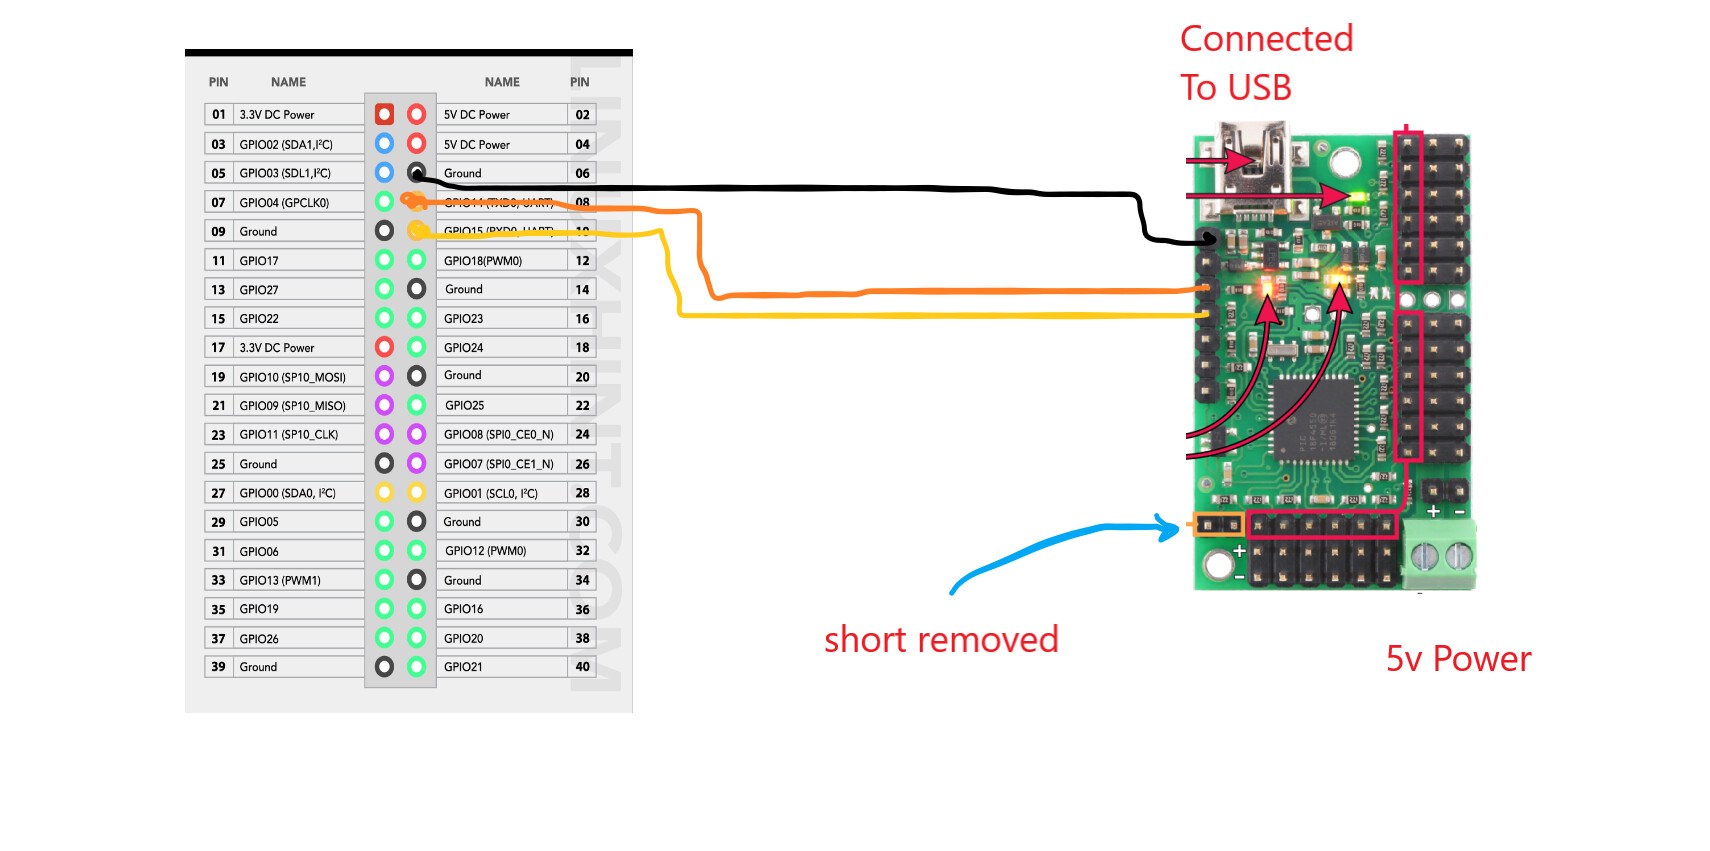
didn’t work i tried it on raspberry pi 4 this time using the FRC4564 library
i removed the VSRV=VIN shorting block and powered the maestrom from the USB port.
The situation is hopeless.
the servo [0] moves as expected but when it reaches to “servo.getPosition(0)” the code stuck there without printing anything back
python code:
import maestro
import time
servo = maestro.Controller('/dev/ttyAMA0')
while True:
  servo.setAccel(0,25)
  servo.setTarget(0,6000)
  print("Moving To 6000")
  time.sleep(2)
  servo.setAccel(0,25)
  servo.setTarget(0,1000)
  print("Moving To 1000")
  time.sleep(1)
  print(servo.getPosition(0))
  print("Position")
  servo.close

output:
Moving To 6000
Moving To 1000
The Raspberry Pi is a 3.3V device; 3.3V signals are not guaranteed to work with the Maestro, which is a 5V device. Additionally, the Raspberry Pi is not 5V-tolerant, so it is possible that connecting the Raspberry Pi’s RX pin directly to the Maestro’s TX pin could damage the Raspberry Pi pin.
I recommend trying to stick to one controller for now, ideally one that you can very the UART is working with another device. Continually changing parts of your system will make it difficult to troubleshoot and narrow down the problem.
Ultimately, the most useful troubleshooting you could do would be to look at the serial signals with an oscilloscope and see what they are actually doing. There is a possibility that something is wrong with the Maestro’s TX pin, but it’s hard to tell for sure without looking at the signal.
I appreciate your clarification regarding the voltage differences between the Raspberry Pi and the Maestro. Your explanation makes it clear that connecting these devices directly could lead to potential damage, which is something I was not aware of previously. I apologize for not considering the impact of changing parts on troubleshooting.
In light of your advice, I will refrain from connecting the Raspberry Pi and the Maestro directly. Instead, I’ll explore other options to test the UART functionality without risking any damage. If necessary, I’ll consider using an oscilloscope to analyze the serial signals for a more accurate diagnosis.
Once again, I apologize for my previous actions and appreciate your guidance in addressing this issue.