Hello, I am looking for how to run two servos off of a Pololu Maestro using two potentiometers. I am using a 270 and a 360 degree servo.
I don’t know what script or setup I need to use
Thank you for reading!
Xia Collier
Hello, I am looking for how to run two servos off of a Pololu Maestro using two potentiometers. I am using a 270 and a 360 degree servo.
I don’t know what script or setup I need to use
Thank you for reading!
Xia Collier
Hello, Xia.
You will first need to choose Maestro channels you want to use to read the potentiometers and configure them as inputs in the “Channel Settings” tab of the Maestro Control Center. Then you can connect your potentiometer signals to those channels. You can find a more detailed explanation of this in the “Attaching Servos and Peripherals” section of the Maestro user’s guide.
After that, you will need to write a script to correlate the potentiometer inputs to the outputs for your servos. You can find an example for that in the “Example Scripts” section of the user’s guide, under the “Using an analog input to control servos” heading. Please note that the example uses 1 potentiometer to control 1 servo; I generally recommend getting that working first, then adding your second.
Brandon
thank you!
Hello again, the example code worked with my system but when trying to hook up two servos and two potentiometers my code runs but the potentiometers aren’t controlling the servos…
I assume it is a code issue because I am unfamiliar with the language that Pololu uses.
Here is my code:
# Set the servo on channel 0 based on the input from potentiometer 1
begin
  4000 0 300 0 servo_range
  6000 300 600 0 servo_range
  8000 600 1023 0 servo_range
repeat

# Set the servo on channel 1 based on the input from potentiometer 2
begin
  2000 0 300 1 servo_range
  5000 300 600 1 servo_range
  8000 600 1023 1 servo_range
repeat

# usage: <pos> <low> <high> <channel> servo_range
# If the pot is in the range specified by low and high,
# keeps the specified servo at pos until the pot moves out of this
# range, with hysteresis.
sub servo_range
  pot 3 pick less_than logical_not    # >= low
  pot 3 pick greater_than logical_not # <= high
  logical_and
  if
    begin
      pot 3 pick 10 minus less_than logical_not   # >= low - 10
      pot 3 pick 10 plus greater_than logical_not # <= high + 10
      logical_and
    while
      3 pick 0 servo
    repeat
  endif
  drop drop drop drop
  return

sub pot
  1 get_position
  return
Thank you again for your help,
Xia Collier
I noticed a couple problems with your code, which I will describe below since it could help you understand the Maestro servo language, but unfortunately even if you fix them it will not work how you want. The example you based your script on accounts for hysteresis and stays in a WHILE loop until the potentiometer is no longer in the same range. During this time, the script will not read or update the other potentiometer, so it is not a practical approach for your application. You might try basing your script off of the example that uses discrete positions without hysteresis.
Problems with your current script:
Your script will never reach the BEGIN/REPEAT loop intended for controlling the servo on channel 1 since it will always be inside of the BEGIN/REPEAT loop for servo 0.
It looks like your pot subroutine is reading the position of channel 1, which you say has a servo connected and not a potentiometer. Also, it sounds like you have two potentiometers, but are only using the reading of one of them. It is not clear what pins your potentiometers are connected to.
The WHILE loop will prevent the two potentiometers from updating the servos independently.
Brandon
Thank you I will look into that, Have a nice weekend!
Good evening,
I have a few questions on how to code the two servos together. I don’t understand how to set up the two servos with two potentiometers independently. I have set up the two servos independently but I don’t understand how to connect them together in the same string of code. I keep getting an overflow/underflow error.
I have attached code that I have tested as a PDF so you can see the path that I am going on
Thank you for reading and I look forward to hearing back from you!
Xia Collier
pololu codes.pdf (32.1 KB)
As I mentioned in my previous post, it would be very difficult to expand our example that uses hysteresis to work for multiple servos (a different approach entirely would probably be more appropriate). However, using our example without hysteresis would be much simpler. You could essentially just copy the code twice inside of the same BEGIN/REPEAT loop and change the values for the potentiometer and servo channels to match your setup. For example, it might look something like this if you connect your first servo and potentiometer to channels 0 and 1 and your second servo and potentiometer to channels 2 and 3:
begin

# Set servo 0 to 4000, 6000, or 8000 depending on
# the potentiometer connected to channel 1
  1 get_position    # get the value of the pot on channel 1, 0-1023
  dup 300 less_than
  if
    4000   # go to 4000 for values 0-299
  else
    dup 600 less_than
    if
      6000 # go to 6000 for values 300-599
    else
      8000 # go to 8000 for values 600-1023
    endif
  endif
  0 servo  # update servo 0 position
  drop     # remove the original copy of the pot value


# Set servo 2 to 4000, 6000, or 8000 depending on
# the potentiometer connected to channel 3
  3 get_position    # get the value of the pot on channel 3, 0-1023
  dup 300 less_than
  if
    4000   # go to 4000 for values 0-299
  else
    dup 600 less_than
    if
      6000 # go to 6000 for values 300-599
    else
      8000 # go to 8000 for values 600-1023
    endif
  endif
  2 servo  # update servo 2 position
  drop     # remove the original copy of the pot value

repeat
Brandon
Thank you so much for your input everything works perfectly!
Hello again! I didn’t realize that the Maestro doesn’t work without the connection to a PC, how would I go about connecting the Maestro to an Arduino Nano using this system?
Thank you again, I look forward to hearing from you!
Xia Collier
The Maestro does not need connection to a PC to run a script. You can configure the Maestro to run its script as soon as it has powered up (whether it is connected to a PC or not) by enabling the “Run script on startup” box in the “Script” tab of the Maestro Control Center.
Brandon
Hello,
When I saved the Frame and tried running it as a script the potentiometers would not control the servos but when I connected the USB to the Maestro it worked perfectly fine. All connections are secure and all pins are in their respective places.
Could you post a copy of your Maestro settings file? You can save a copy of your settings file from the “File” drop-down menu of the Maestro Control Center while the controller is connected.
Also, how are you powering the Maestro and servos when it is not connected to USB? Could you post some pictures that show all of your connections?
Brandon
Hello!
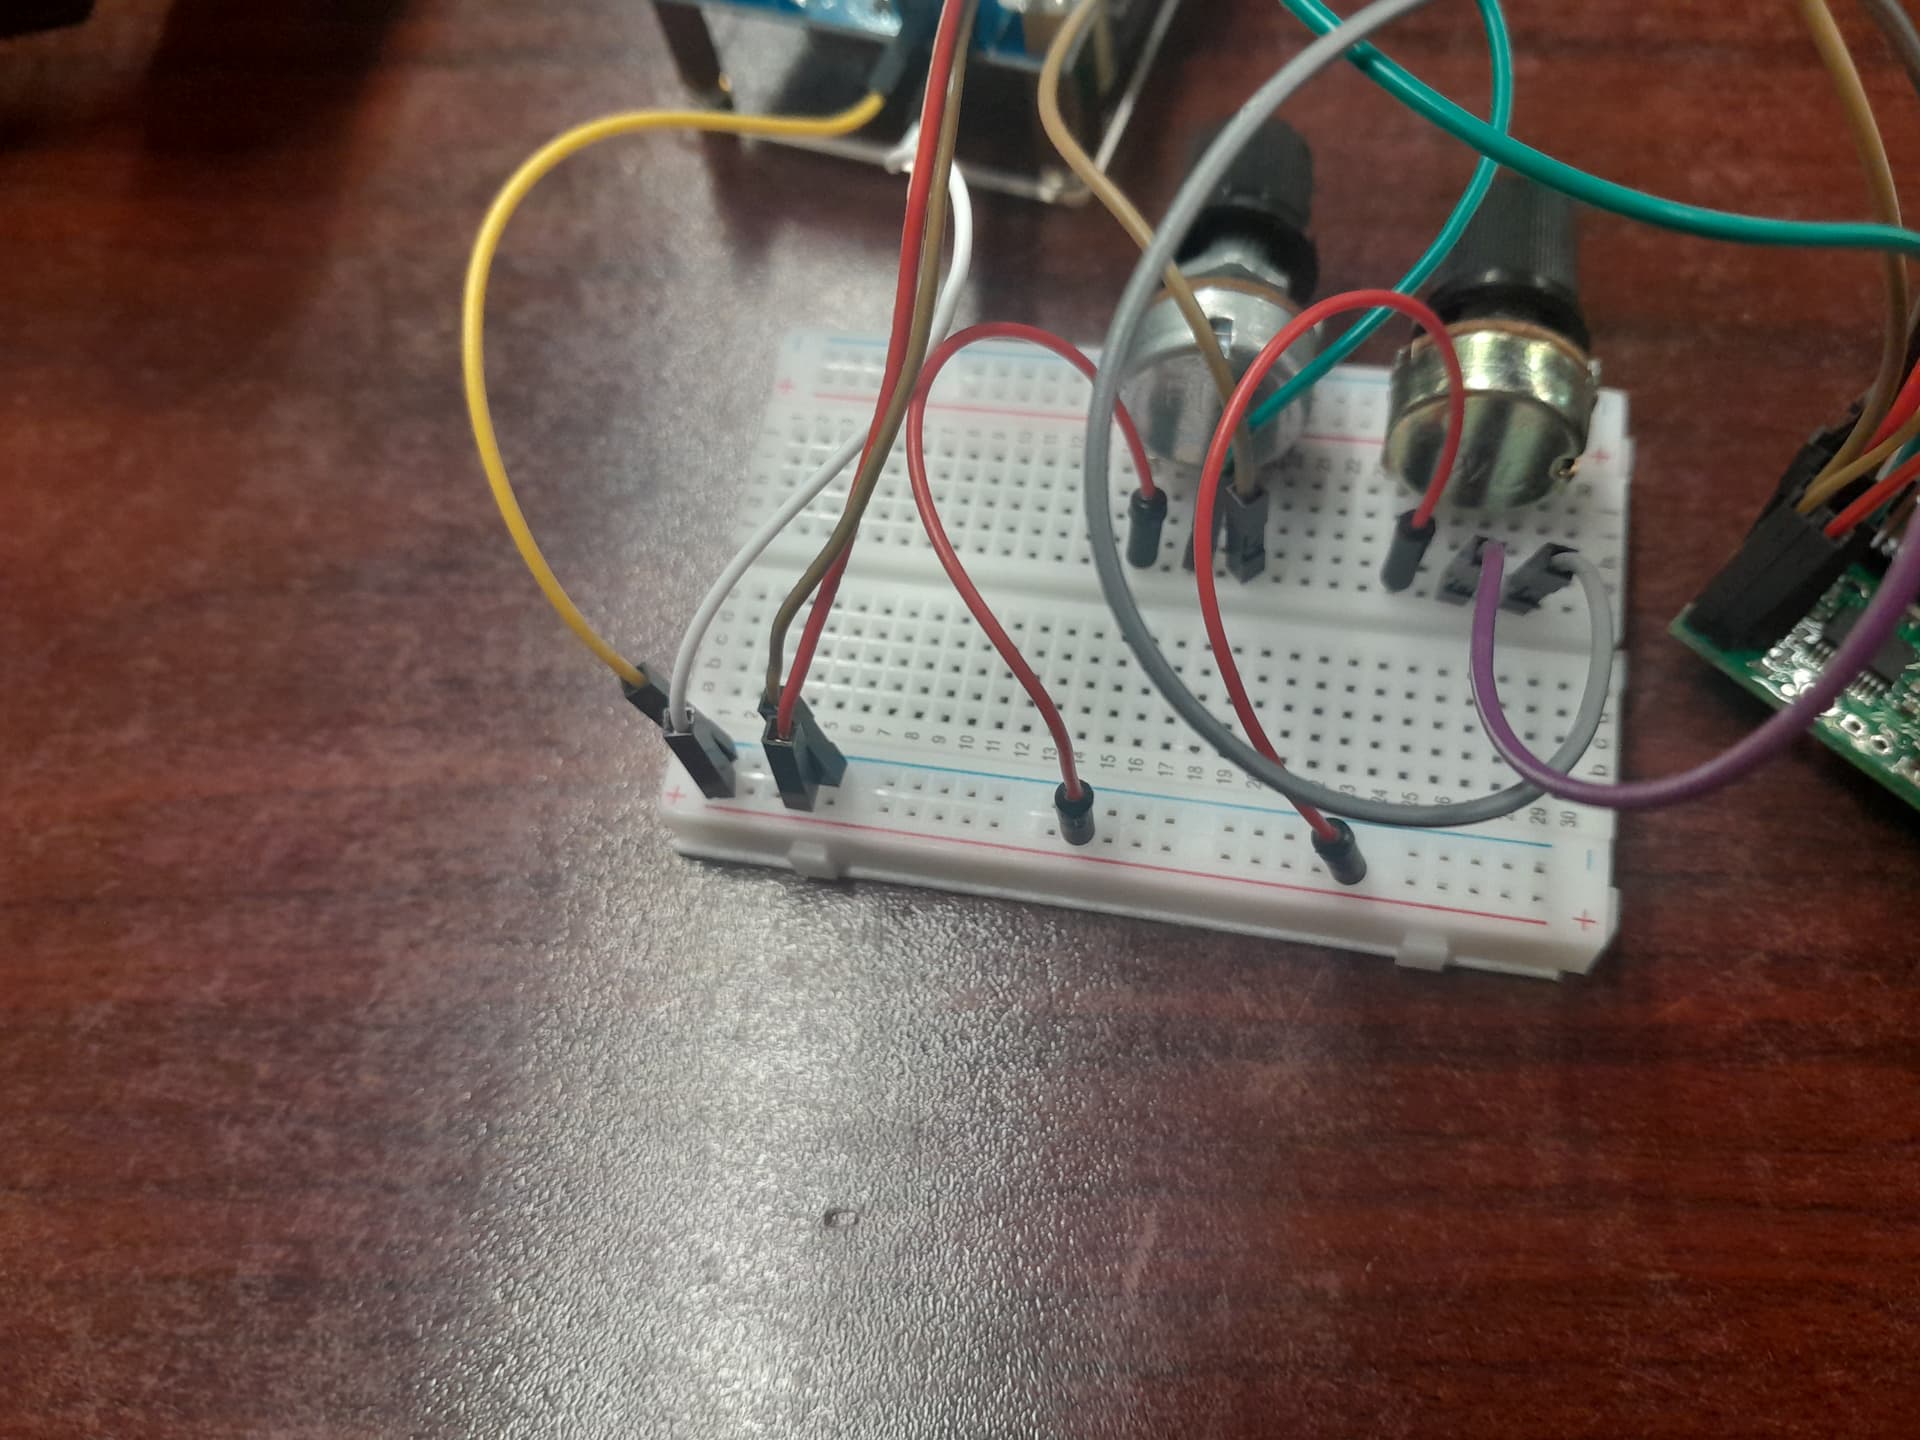
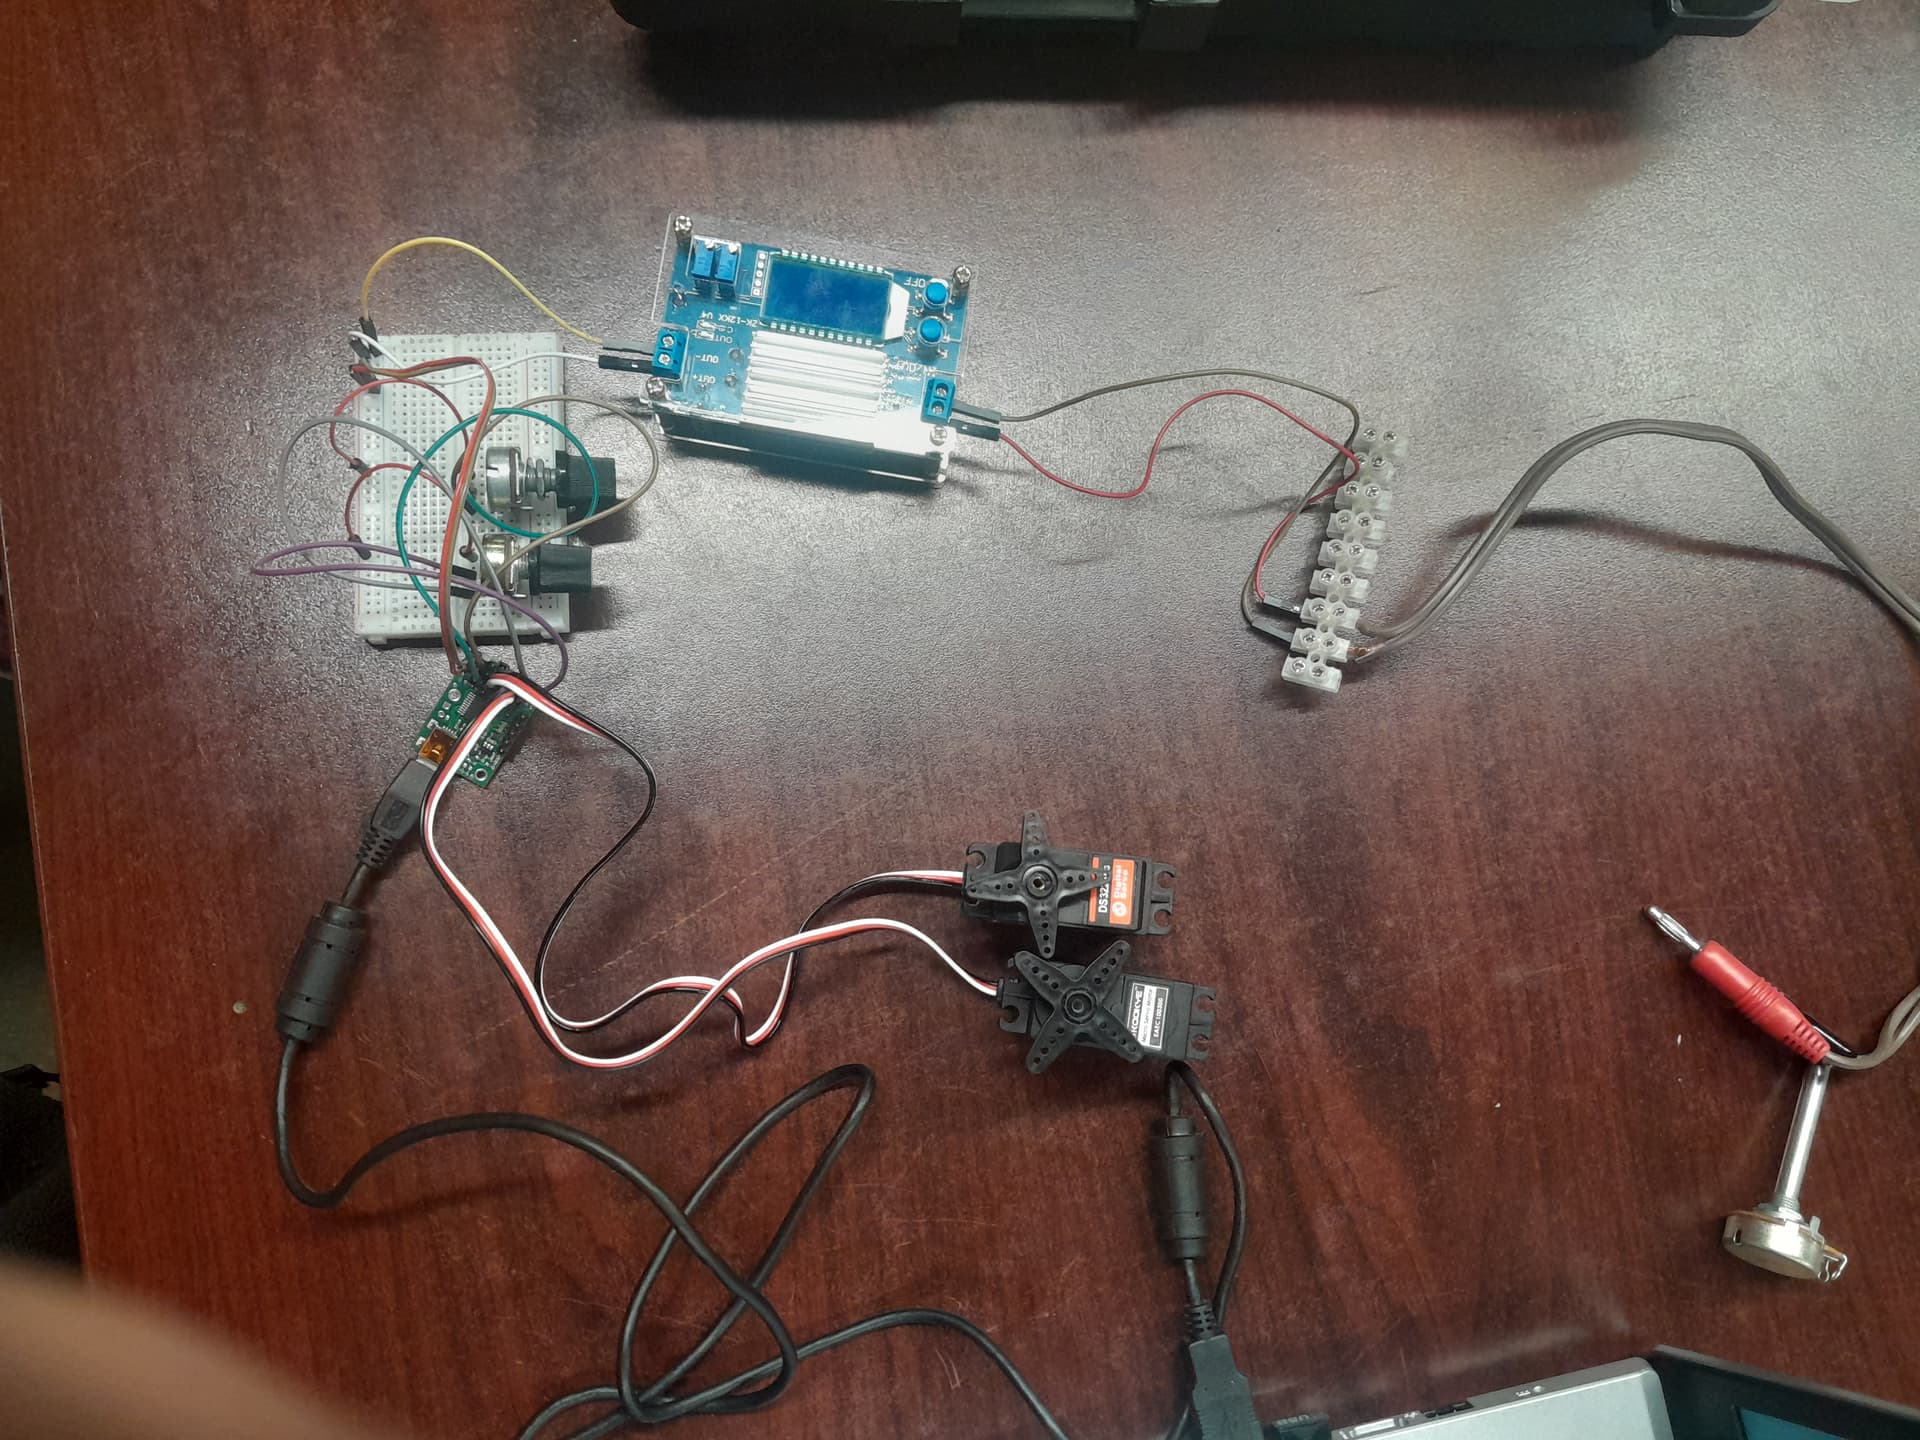
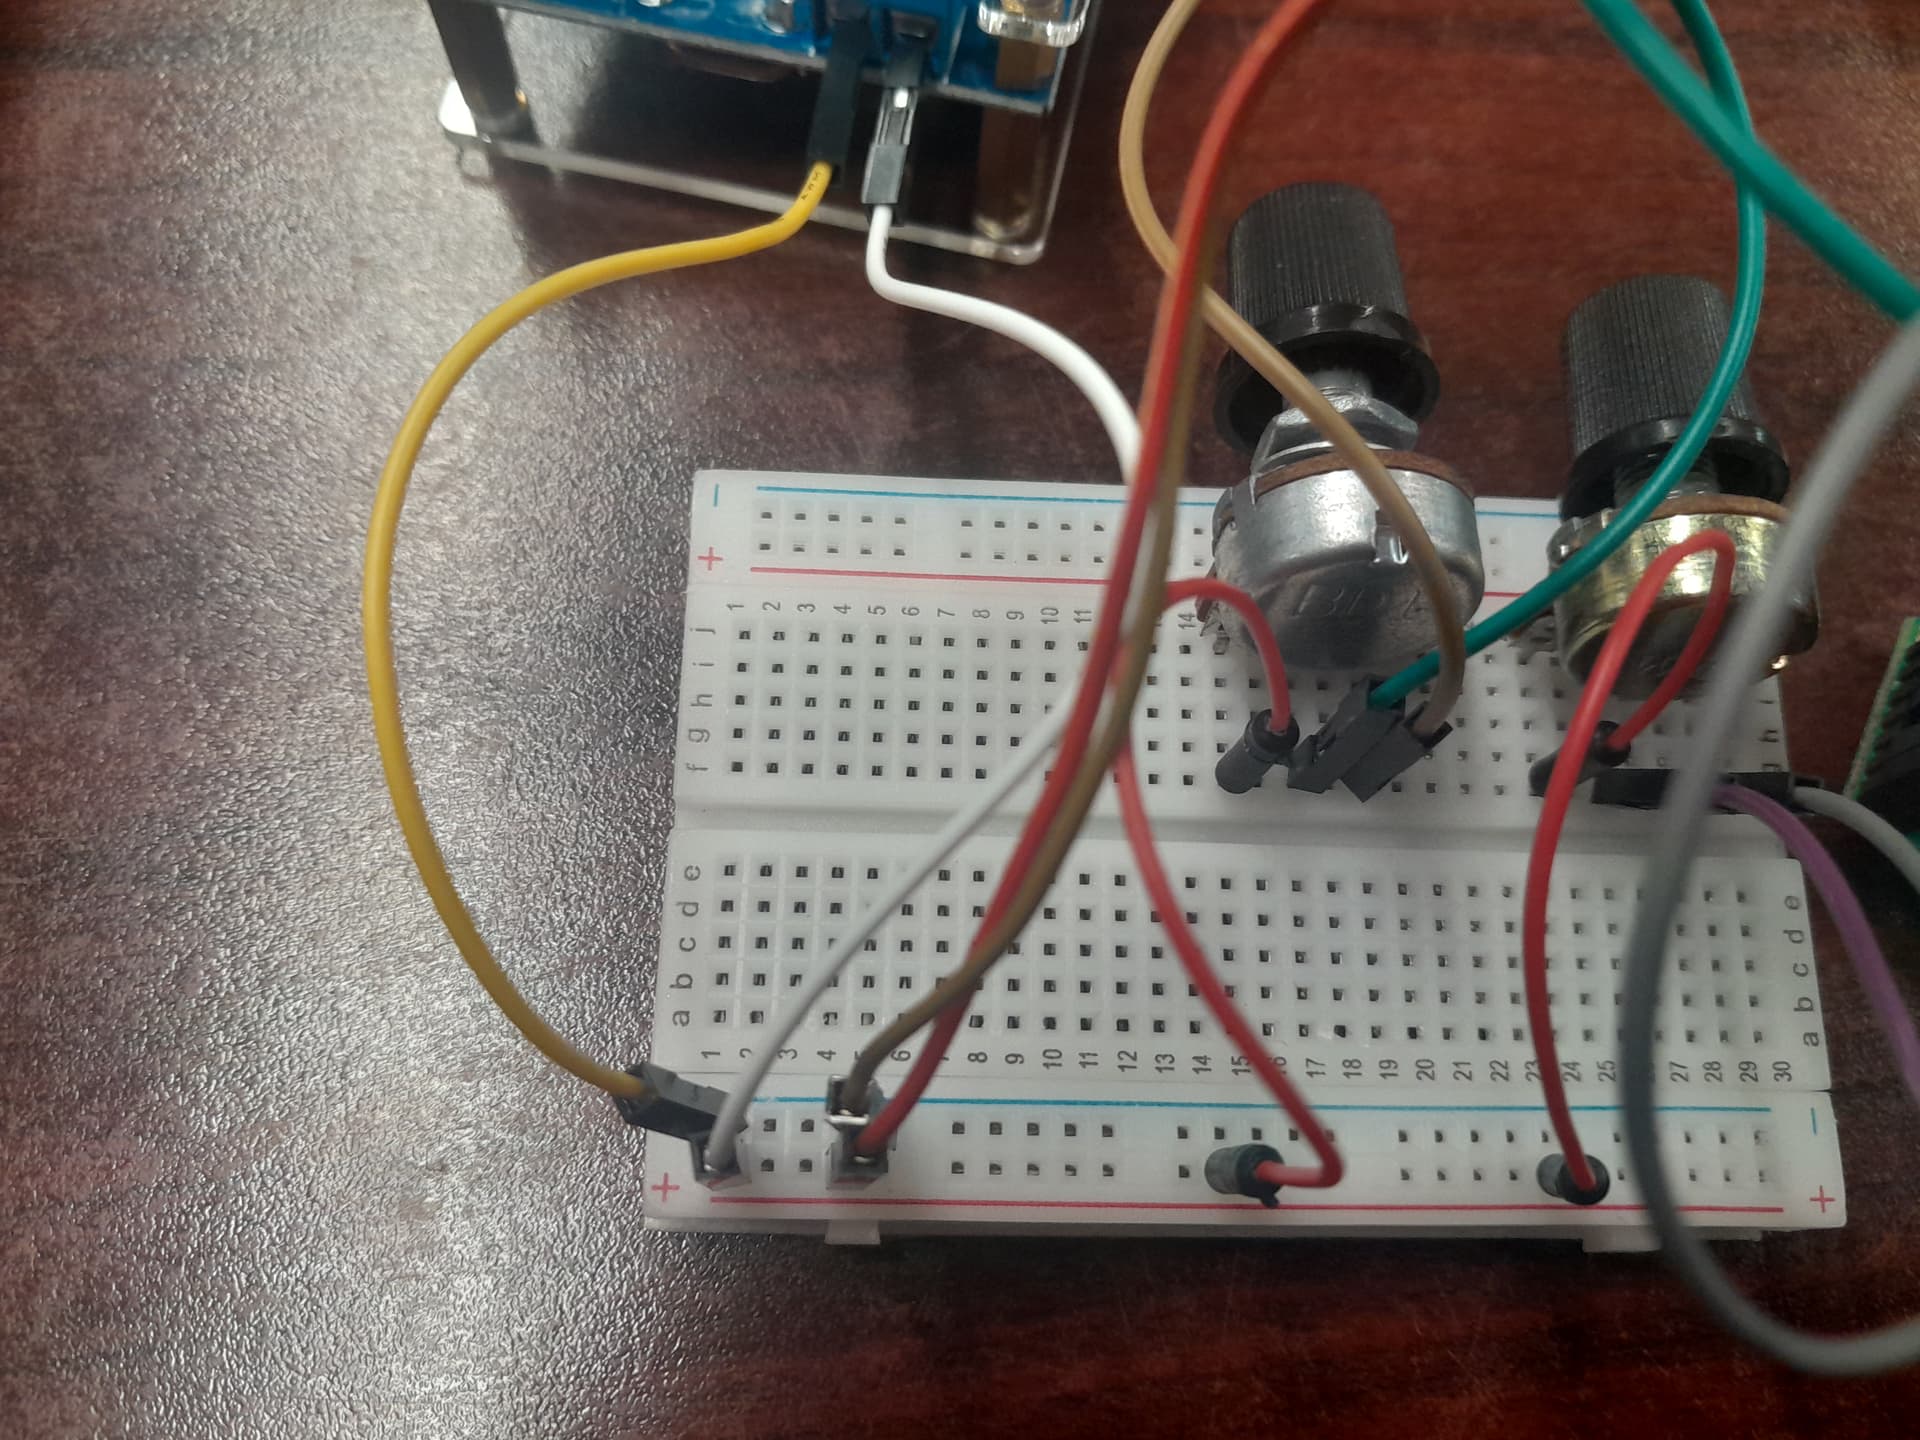
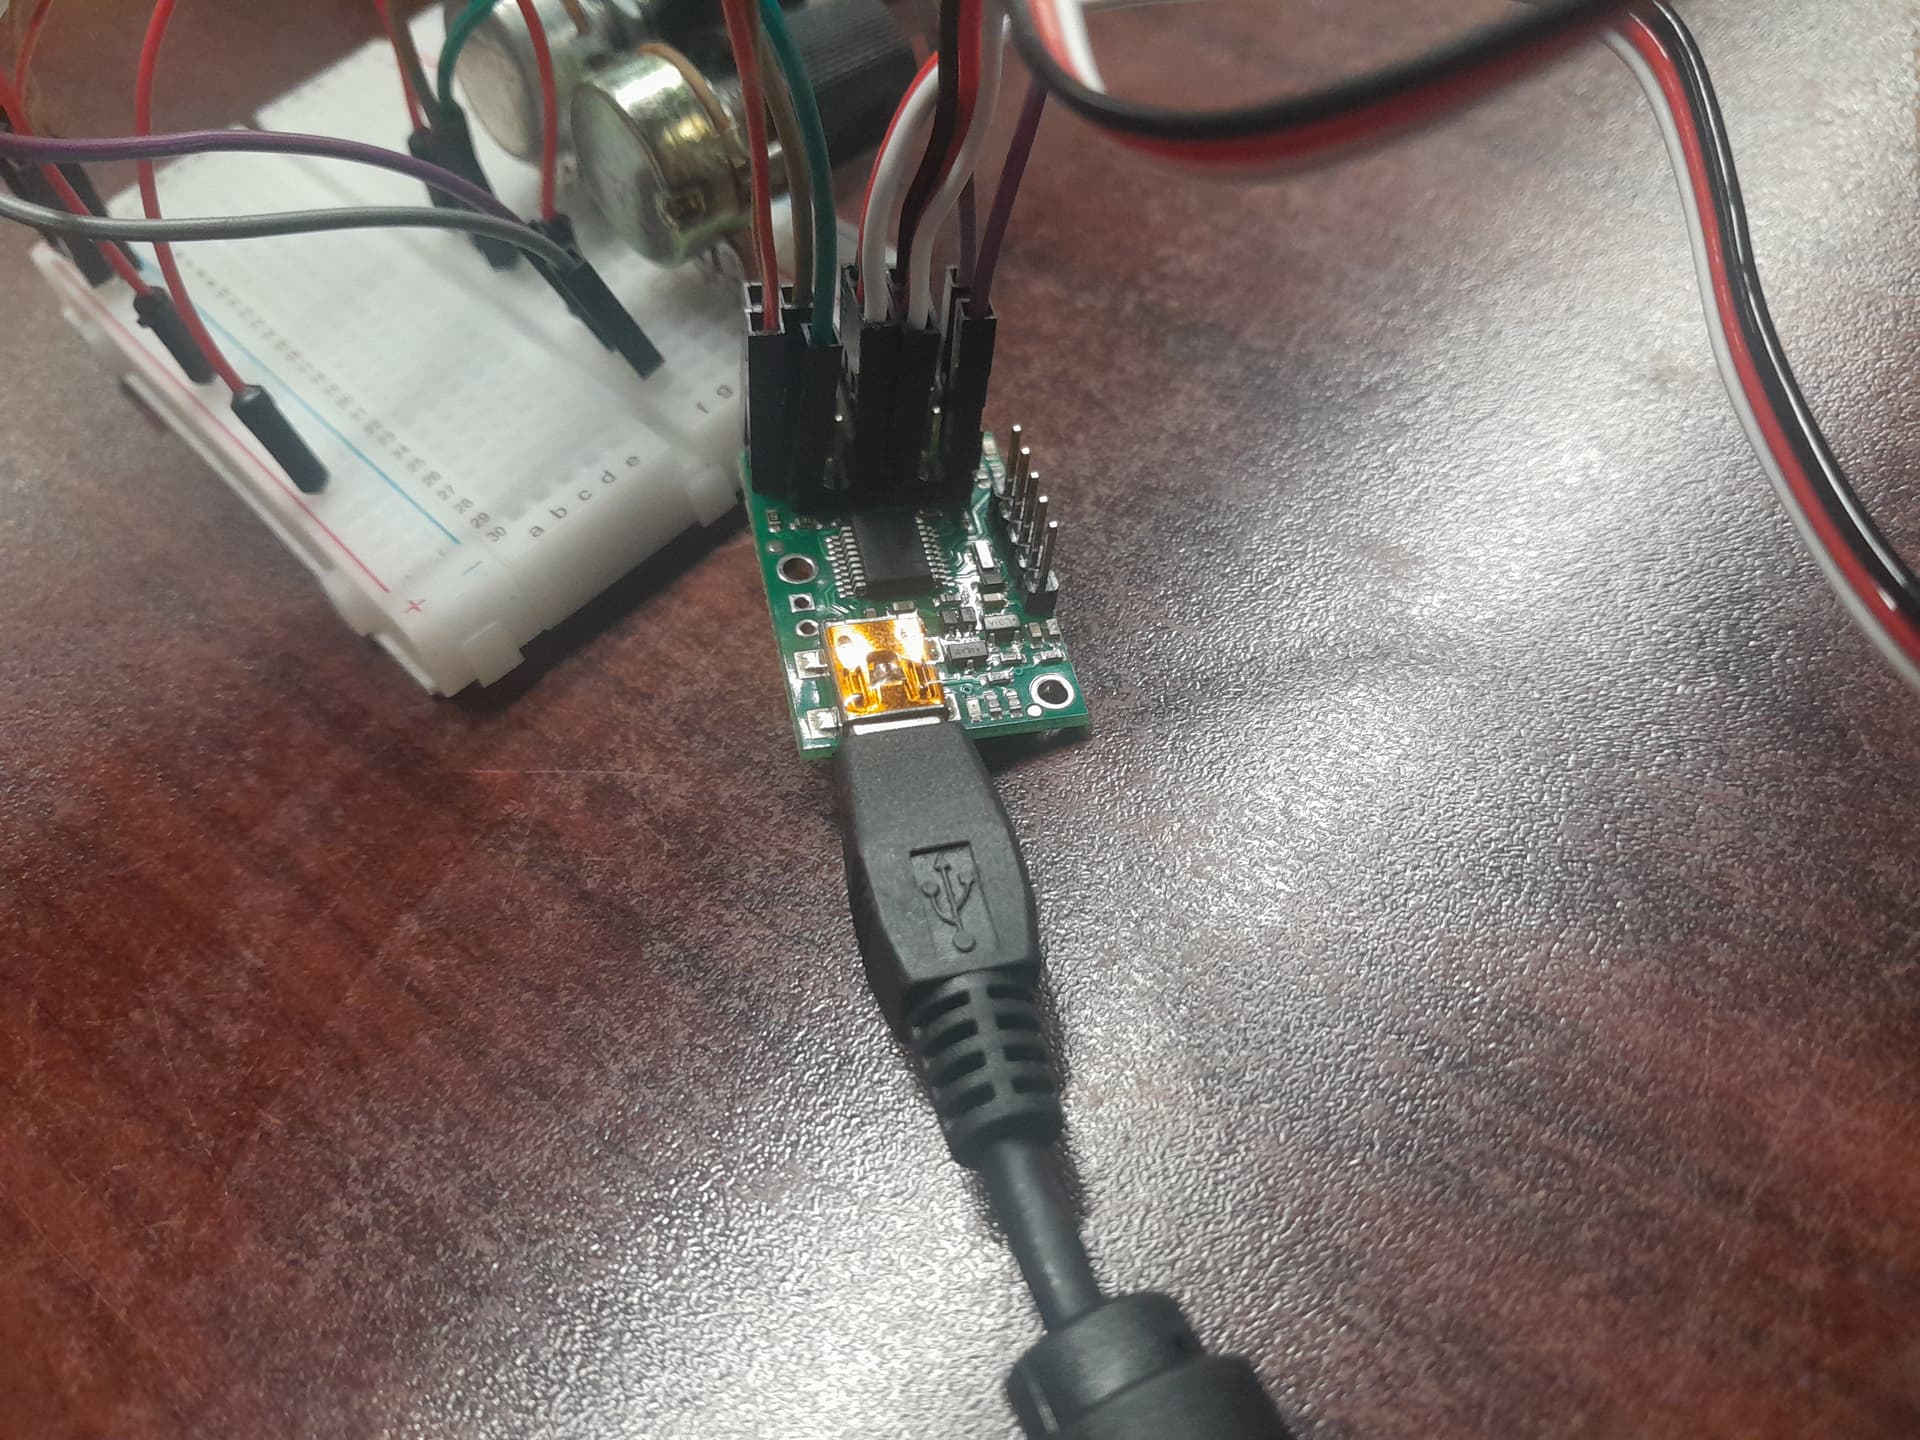
Below are four images of my system
the black servo is the 360 one and the red one is the 270 one, I am running my system off of 12 volts and it is taking an average of 5.5A.
For clarification this board is the 6-channel micro maestro, the following is the code that I am using.
maestro_settings.txt (2.8 KB)
I look forward to hearing back from you!
Xia Collier
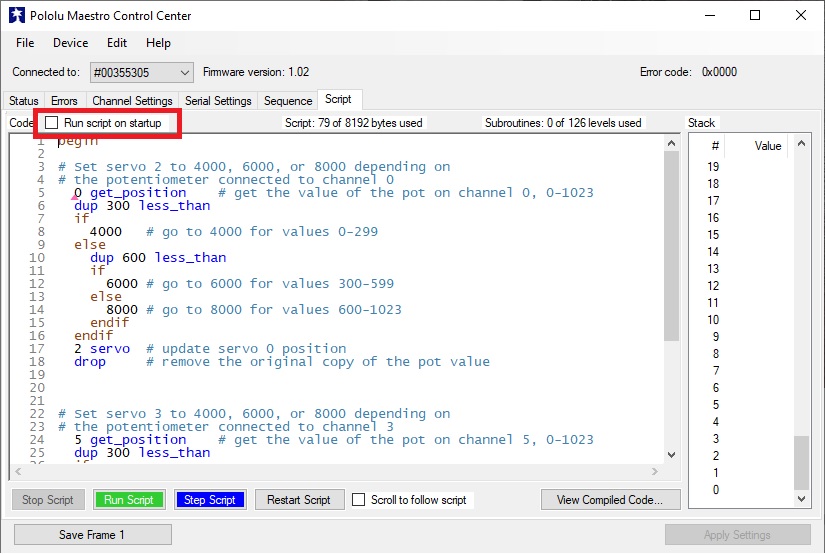
From your settings file, it looks like you have not checked the “Run script on startup” box in the “Script” tab of the Maestro Control Center:
Could you try checking that box and making sure to click the “Apply Settings” button afterward, then testing to see if that fixes the problem?
Brandon
Hello, it still does not work.
Here is a video of my system
Thank you for your continued support,
Xia Collier
It looks like you have the “Run script on startup” button checked now. However, you are not powering the Maestro after removing the USB connection. If you want to run the Maestro without a USB connection, you will need to provide a 5-16V power source to the Maestro’s processor through the VIN pin (it will not get power from the servo power rail by default). You can find information about a few different ways to do this in the “Powering the Maestro” section of the Maestro user’s guide.
Brandon