I took a leap and landed in it! I have never programed in c or any micro controllers. I’ve always wanted to and seen the Orangutan SV-328 on special so I grabbed one. I’ve done Basic on PCs and thats about it (thinking I should have started with a Basic Stamp). Anywho… I can learn quickly just need a bit of a jump start to get things rolling.
Hardware:
RP5 tracked chassis
Micro Servo
Sharp 10-80cm IR
Orangutan SV-328 (Atmega 328p i think…)
So the plan is to mount the IR on the servo so it can scan for a clear path and wander around my house aimlessly till I get a bit more advanced. At the moment I’m not worrying about the servo I just want to get some readings and it moving without human interferance!
I need a bit of code to show me how to setup the input from the ir and spit it out on the lcd so i can get some data to use when writing the rest of the code. Also a little sample of how to make it interperate this reading and perfom an action (stop,backup,turn ect). I have scoured google and come up with a lot of adurino stuff but not much orangutan (might not be looking in the right places?). Once I have that I should be right! Then I’ll try nut out the servo control and add some encoders.
The Pololu AVR libraries make it easier to do what you want to do, but I think the biggest hurdle for you will be getting used to the C programming language. I suggest as a first step you search online for a good C tutorial/primer (there are a lot out there) or buy a book on C. Once you’re more comfortable with C, I recommend you look at the example programs included with the library and try to understand them. Specifically, you should check out the LCD examples, the servo examples, and the analog input/ADC examples (you would use the OrangutanAnalog functions to read the your distance sensor). You can then use these as starting points for your own programs.
Unfortunately, I don’t have time to teach you C or write substantial code for you, but I can try to answer specific questions about things you find confusing, and I’m happy to give you feedback about your programming attempts.
I have worked out the motors by looking at examples. using time delay (no encoders yet) I have made it move around in a square pattern.
Now I would like to start moving the servo. I tried the example code but none of it seems to make the servo move I have tried different pins each time but no response. The servo is connected to PD0.
The servo is plugged straight into the io using the power from the on board regulator. this is the code i have tried and there is no response.
#include <pololu/orangutan.h>

/*
 * servos1: for all Orangutans (LV, SV, SVP, X2, Baby) and the 3pi robot.
 *
 * This example uses the OrangutanServos functions to control two servos
 * connected to pins PD0 and PD1.  The servo pulses are generated in the
 * background using interrupts, so program execution is not blocked by
 * the pulse-generation code.  If you are using the Orangutan SV or SVP,
 * you can power the servos directly from the board's 5V bus.  For all
 * other Orangutans (LV, X2, Baby) and the 3pi robot, you need to power
 * the servos from a separate source since the on-board voltage regulators
 * do not have enough power to drive typical servos.  This example uses
 * pushbutton inputs to trigger events, so you will need connect an external
 * pushbutton (or wire) to the correct pin if if you are using a Baby
 * Orangutan.
 *
 * The program will hold the two servos connected to pins PD0 and PD1 at
 * default positions unless a user pushbutton is pressed.  While the button
 * is held down, the servos will slowly move to new positions.  When the
 * button is released, the servos will quickly go back to their default
 * positions.
 *
 * Note: the "B" version of the servo functions are used in this example
 * so that it behaves the same for the Orangutan SVP as for all other
 * Orangutans.  If you are not using the Orangutan SVP, you can do not
 * need to use the B versions of the functions (e.g. you can use
 * set_servo_target(0, 1300) instead of set_servo_target_b(0, 1300)).
 * If you do this, you should replace the call to servos_start_extended()
 * with servos_starts().
 *
 * The OrangutanServo library uses timer 1, so it conflicts with the
 * OrangutanBuzzer library, which also uses timer 1.
 *
 * https://www.pololu.com/docs/0J20
 * https://www.pololu.com
 * https://forum.pololu.com
 */

int main()
{
	// This array specifies the correspondence between I/O pins and
	// software-PWMed servos.  Servo 0 is on pin D0 and servo 1 is on pin D1.
	const unsigned char servoPinsB[] = {IO_D0, IO_D1};

	servos_start_extended((unsigned char[]){}, 0, servoPinsB, sizeof(servoPinsB));

	while (1)
	{
		set_servo_speed_b(0, 0);	// no speed limit (move as fast as possible)
		set_servo_target_b(0, 1200);
		set_servo_speed_b(1, 0);
		set_servo_target_b(1, 1700);

		// wait for any button to be pressed
		unsigned char button = wait_for_button_press(ANY_BUTTON);

		// set speed of servo 0 to 150, which means that the pulse width
		// will change by at most 15 microseconds every 20 ms, so it will
		// take 800 ms (0.8 s) to go from a position of 1200 to 1800.
		set_servo_speed_b(0, 150);
		set_servo_target_b(0, 1800);	// start servo 0 moving

		// set speed of servo 0 to 60, which means that the pulse width
		// will change by at most 6 microseconds every 20 ms, so it will
		// take 1333 ms (1.3 s) to go from a position of 1300 to 1700.
		set_servo_speed_b(1, 60);
		set_servo_target_b(1, 1300);	// start servo 1 moving

		// wait for pressed button to be released (servos will keep moving)
		wait_for_button_release(button);

		// when button is released, we jump to the top of the loop and the
		// servos positions are reset
	}
}
In order to figure out what you might be doing wrong, I need you to be really specific. Which servo wire is connected where? Also, can you confirm that you actually understand what that program is supposed to do?
my understanding is that the servo should start in a netural position then when the button is pressed it should move then when the button is released it goes back to the netural position.
Can you see how this is not specific? Please put yourself in my position. If I was doing something that I thought should work but didn’t, what would you need to know from me to help figure out what it might be? In this case, it’s very important that I know what I/O line you are connecting it to!
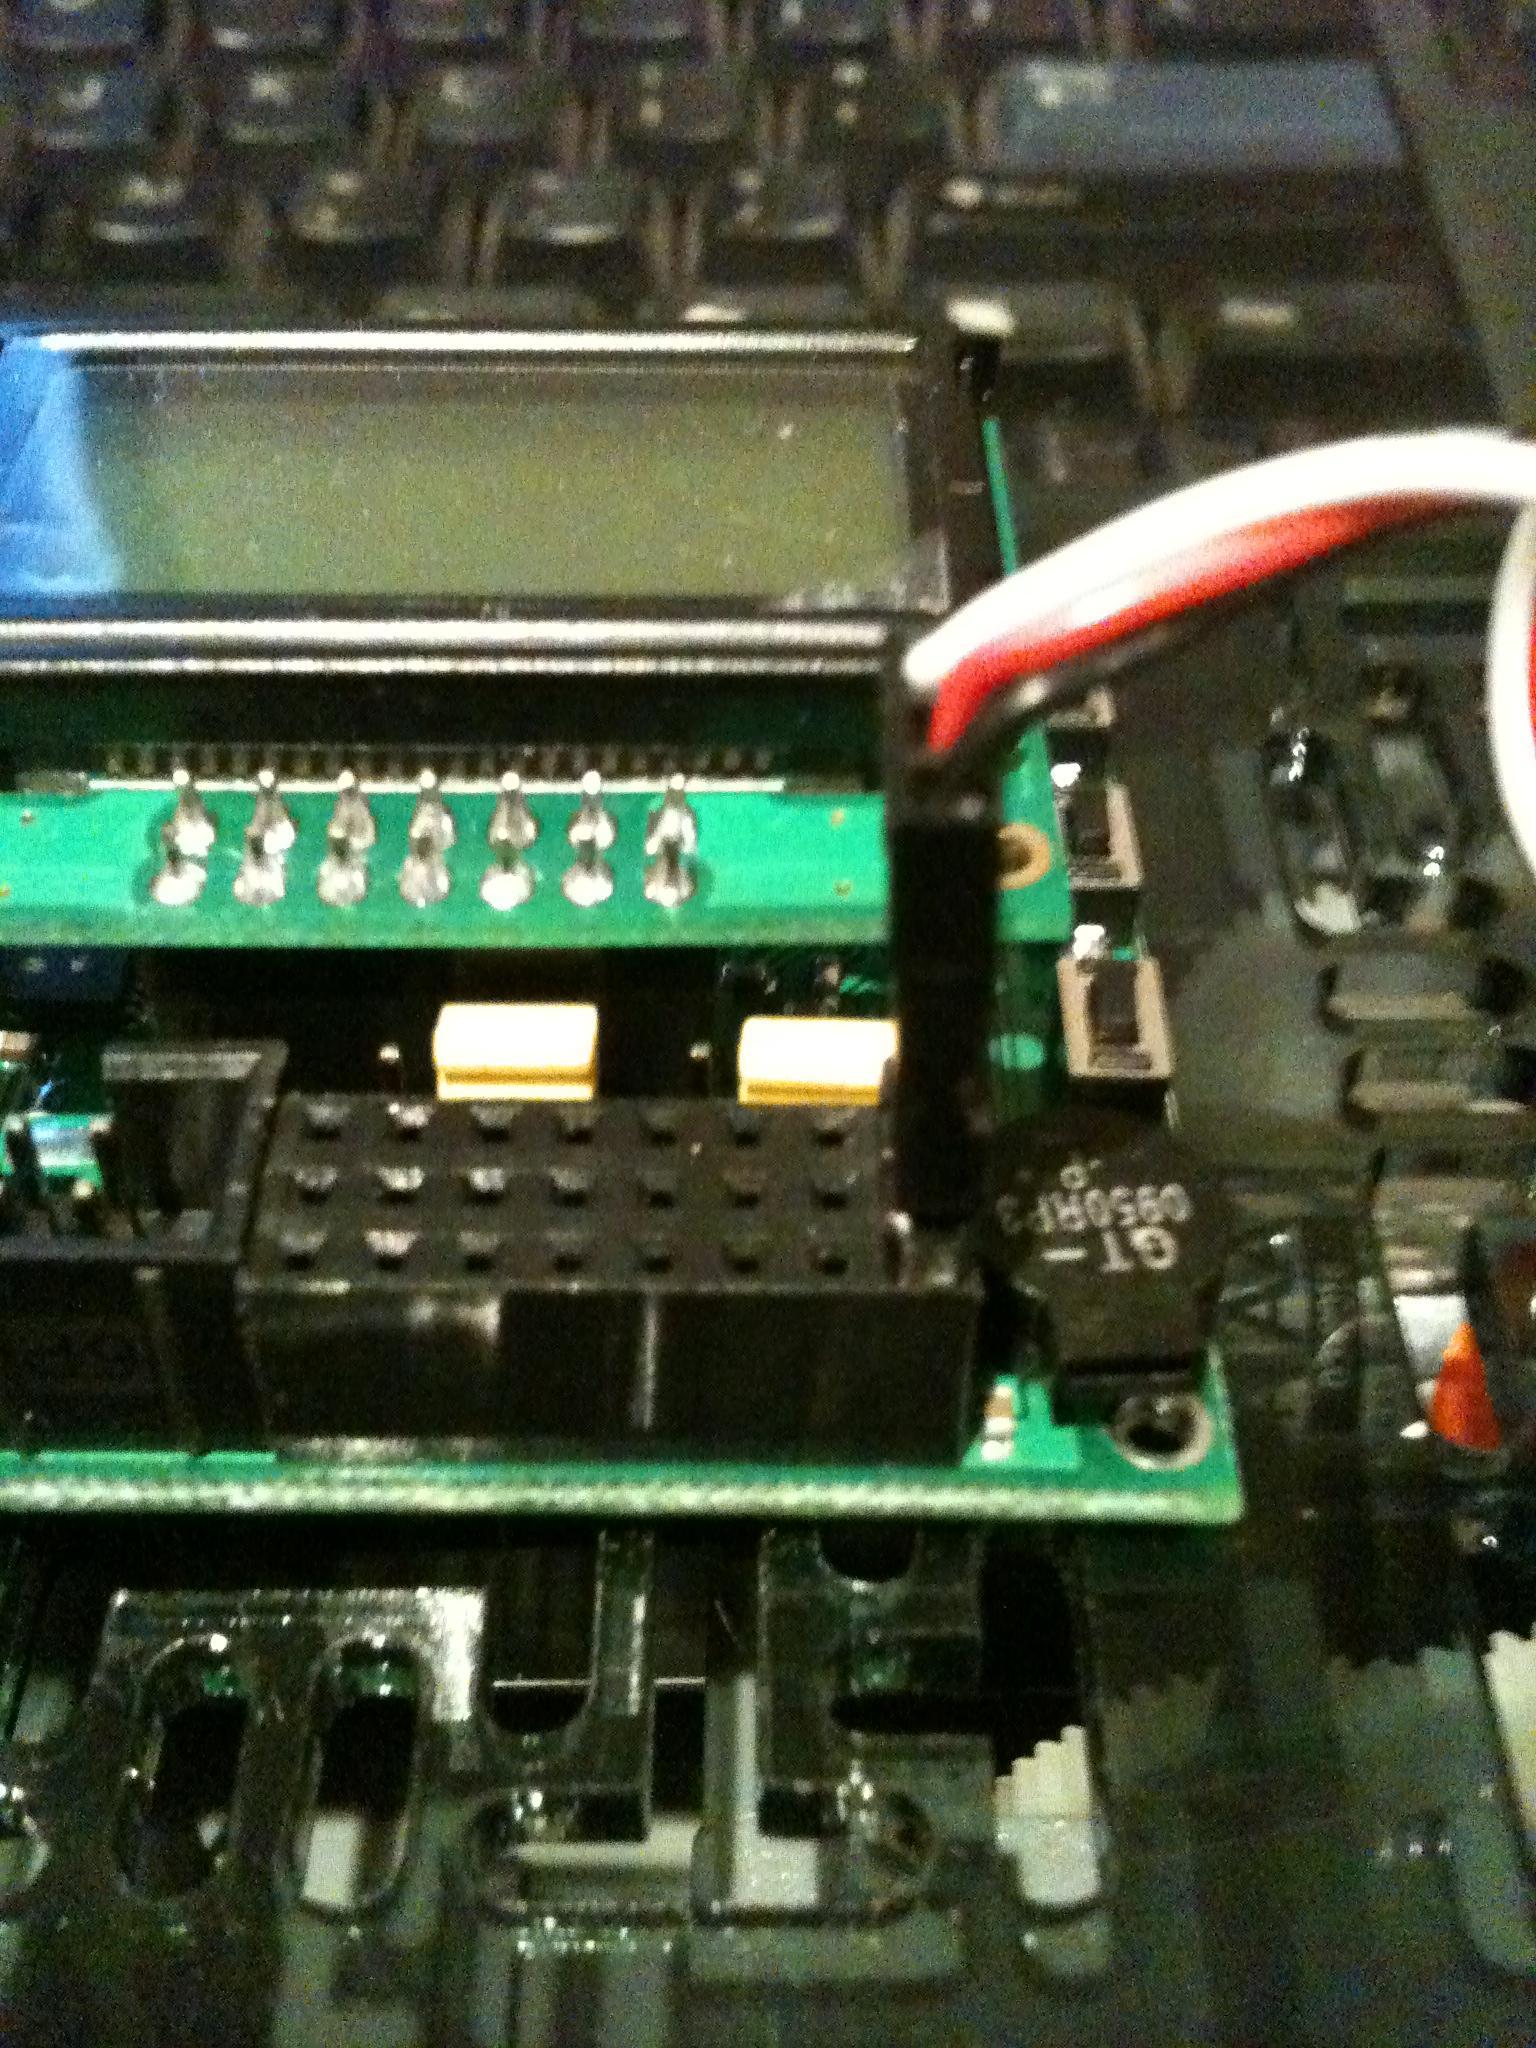
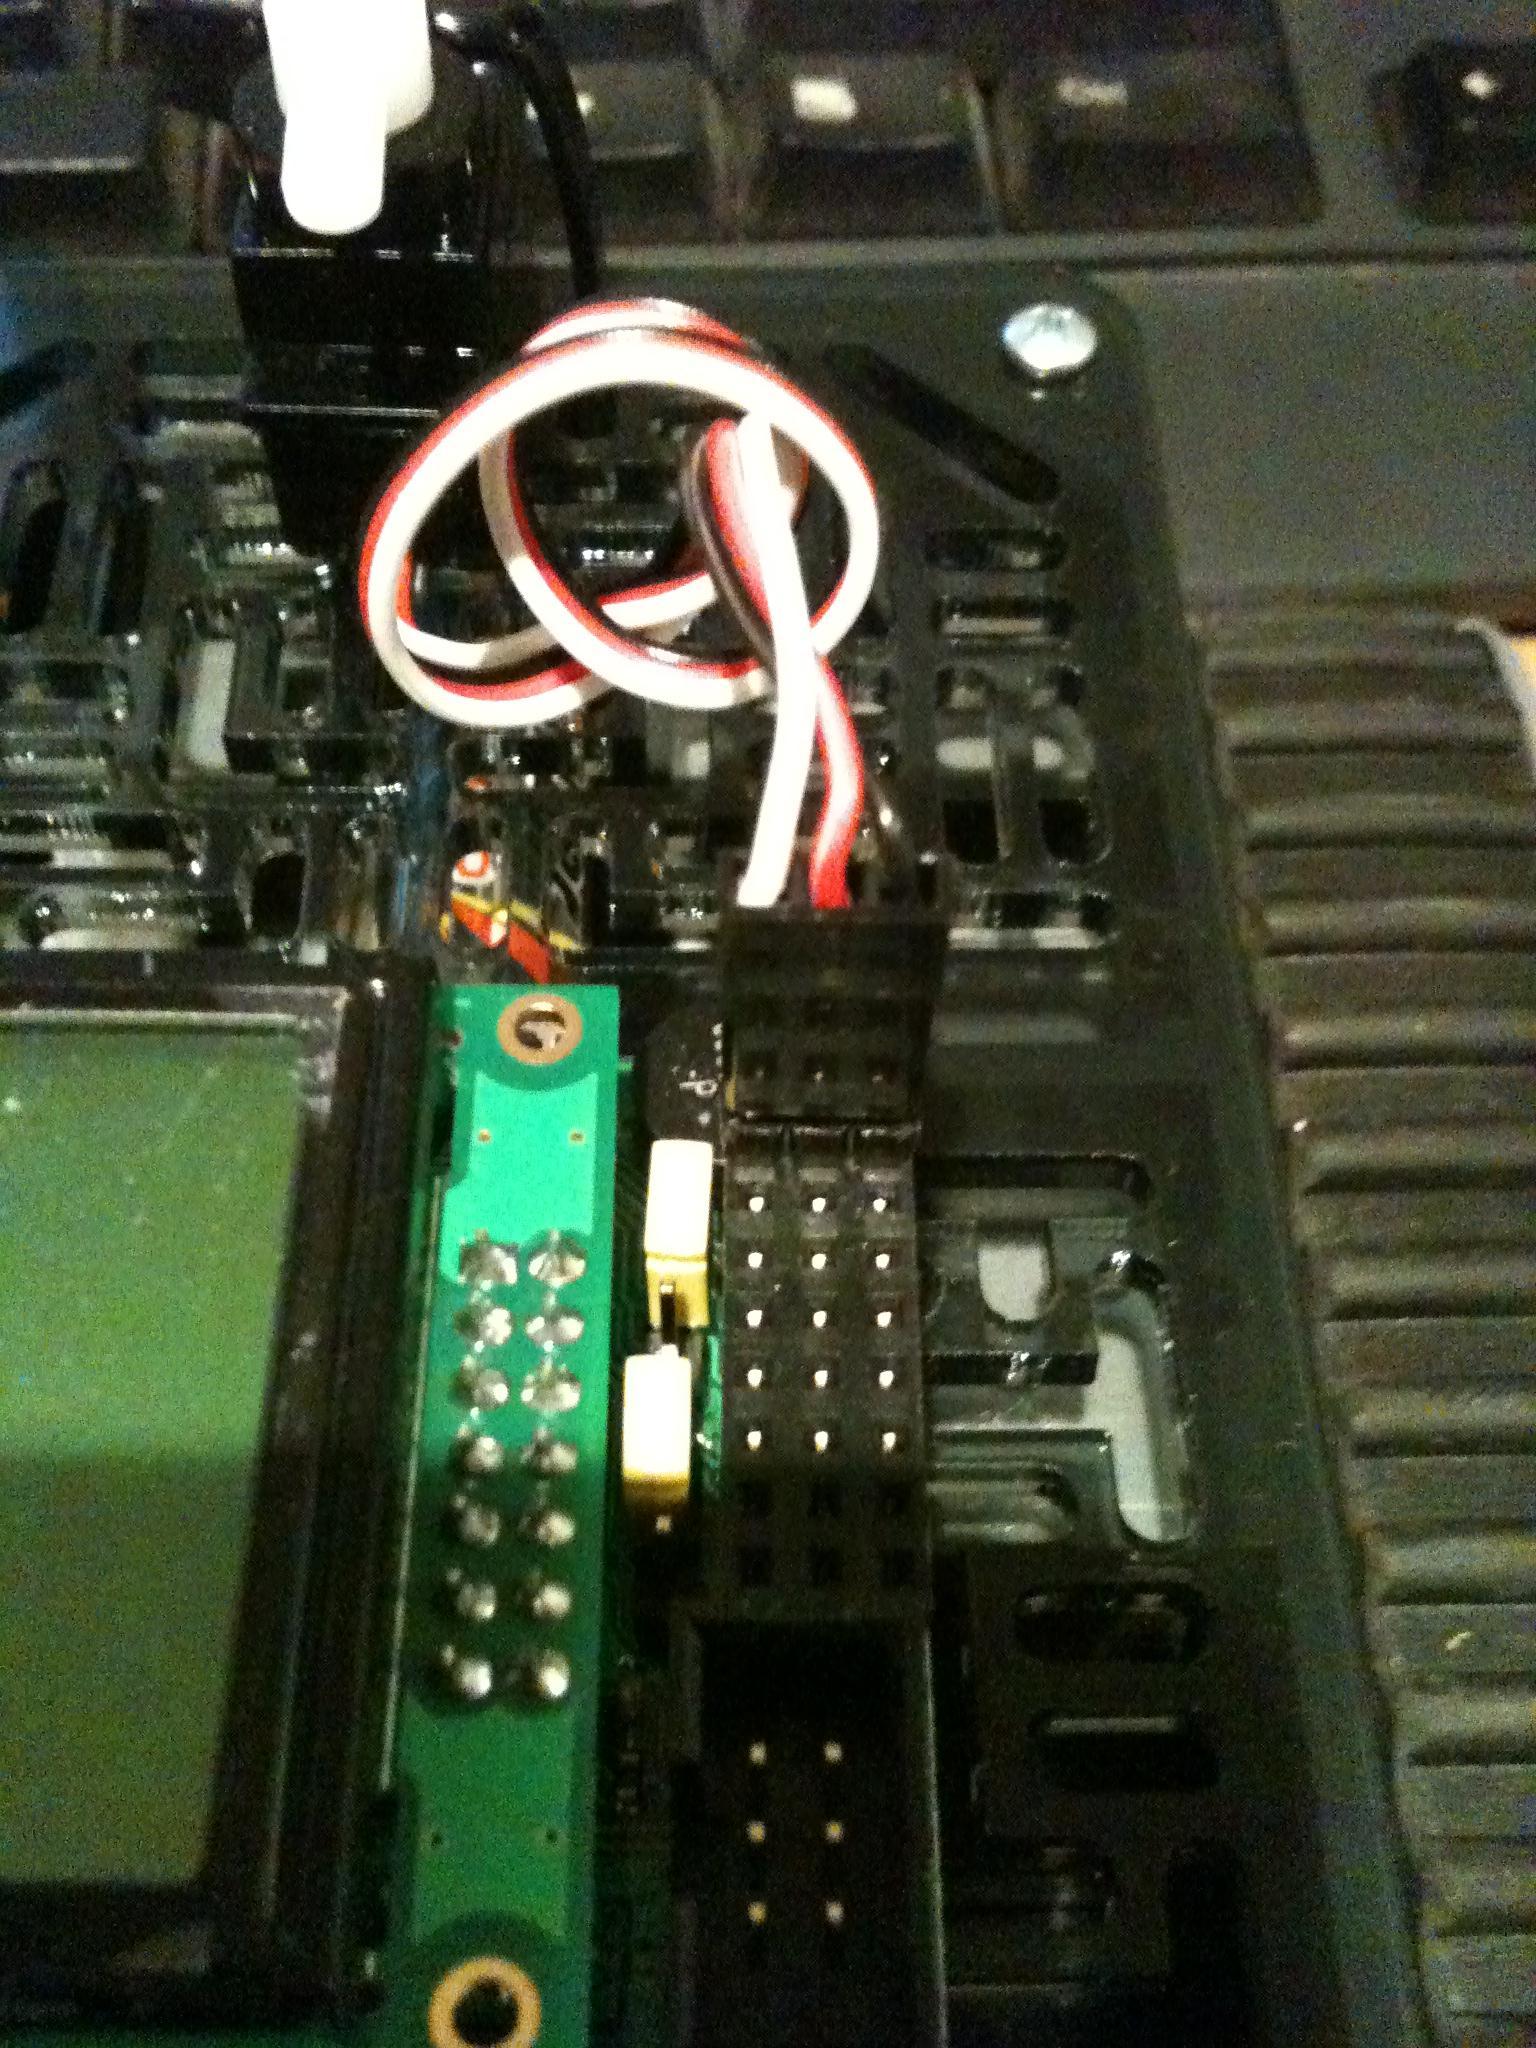
I know you think you are connecting power to power and ground to ground, but I’d like to have some way of evaluating whether you are doing what you think you are, especially given that you’ve openly admitted to being new to this kind of thing. At this point, maybe it would be easier if you posted a picture of your setup so I can see your servo and how it is connected to your Orangutan.
Also, this might seem like a silly question, but are you sure the Orangutan is actually running the program you posted? Maybe you can make it write something to the LCD when it starts, and write something else when you push the button, so that you can be sure the program is running properly.
I’m not new to electronics just micro controllers and the programing of them. I also know how to use servos because I have model helicopters and cars which I built myself.
The code is the sample code that comes with the libraries off your site. I’ve used all three samples and none of them move the servo. one does give readouts on the LCD of the servo pulses. I’m sure the programer is working because I have loaded my own code and it runs it fine and I even loaded the demo program back on it to make sure it still works
I have tried all different ports and all the example codes and none of them make it move. Just then i tried it on the right port and nothing. There is one that uses all 8 ports and still cant get it to move.
What is your power supply and what servo are you using? Do you have an independent way of verifying that your servo works (e.g. an RC receiver you can plug it into)? I assume you don’t have access to an oscilloscope? If not, do you have our USB AVR Programmer (you could at least use the programmer’s SLO-scope feature to verify that the I/O line is outputting a signal something that roughly looks like RC hobby servo pulses)?