Arduino + Pololu Micro Serial 8 Servo Controller

I’m new with programming, Arduino and Pololu Micro serial controller. Can anyone help me get this code in order to center 1 servo? I’ll be using 4 servos and if I can get help making one operating I should be able to get the others working.

Currently this is the code I’ve put together from examples in other projects and I know there is more than one mistake. I am using Pololu Mode with the jumper removed.

#include <ctype.h>

#define bit9600Delay 84  
#define halfBit9600Delay 42
#define bit4800Delay 188 
#define halfBit4800Delay 94 

byte rx = 6;
byte tx = 7;
byte SWval;

void setup() {
  pinMode(rx,INPUT);
  pinMode(tx,OUTPUT);
  digitalWrite(tx,HIGH);
}

void put(int servo, int angle){
   unsigned char buff[6];
   DWORD len;

   unsigned short int temp;
   unsigned char pos_hi,pos_low;
   
   temp=angle&0x1f80;
   pos_hi=temp>>7;
   pos_low=angle & 0x7f;

   buff[0]=0x80;//start byte
   buff[1]=0x01;//device id
   buff[2]=0x04;//command number
   buff[3]=servo;//servo number
   buff[4]=pos_hi;//data1
   buff[5]=pos_low;//data2
   WriteFile(comPort, &buff, 6, &len, 0);

   Serial.print("Servo %d Set to %d\n", servo, angle);
}
void SWprint(int data)
{
  byte mask;
  //startbit
  digitalWrite(tx,LOW);
  delayMicroseconds(bit9600Delay);
  for (mask = 0x01; mask>0; mask <<= 1) {
    if (data & mask){ // choose bit
     digitalWrite(tx,HIGH); // send 1
    }
    else{
     digitalWrite(tx,LOW); // send 0
    }
    delayMicroseconds(bit9600Delay);
  }
  //stop bit
  digitalWrite(tx, HIGH);
  delayMicroseconds(bit9600Delay);
}

int SWread()
{
  byte val = 0;
  while (digitalRead(rx));
  //wait for start bit
  if (digitalRead(rx) == LOW) {
    delayMicroseconds(halfBit9600Delay);
    for (int offset = 0; offset < 8; offset++) {
     delayMicroseconds(bit9600Delay);
     val |= digitalRead(rx) << offset;
    }
    //wait for stop bit + extra
    delayMicroseconds(bit9600Delay); 
    delayMicroseconds(bit9600Delay);
    return val;
  }
}

void loop()
{
    SWval = SWread(); 
    SWprint(toupper(SWval));
}

Thanks,
Phil

Hello.

You say you know you have more than one mistake; can you elaborate on this? What is the behavior of the micro serial controller when you run your program?

- Ben

Hi Ben,

The servos aren’t moving because I’m not sending the correct commands from the Arduino board. It’s a coding issue and I’m lost.

Here’s a programming error that comes up.

Thanks,
Phil

That looks like a compiler error, right? That would mean that the problem isn’t so much that the Arduino isn’t sending out the correct commands, but that your code isn’t compiling correctly, and the Arduino environment isn’t producing anything to download to the Arduino board.

It looks like your blending code from a few different sources there. I recognize the put command from my serial servo control example program, with the print statement on the last line changed into an Arduino serial print statement. I wrote that example program in C, but its meant to compile and run on a 32 bit Windows computer (not a microcontroller) to control a Pololu serial servo controller directly from a computer serial port.

Not to worry, but I think we need a couple more clarifying questions:
-Which Arduino board are you using?
-Is there a reason you would want to execute the serial protocol in software (which your current code is trying to do), rather than using the hardware serial module built into the Arduino?

There’s a tutorial on using the Arduino serial hardware here. Sending commands to the servo controller on Arduino Pin 1 is just like printing the text “Hello World” back to the Arduino environment running on your computer. Well, except your servo controller won’t do anything if you say “Hello World” to it. But functionally they’re the same thing, we can get into the language of the Pololu serial communication protocol later.

And just for fun, what are your plans for the four servos once you have them up and running?

There are some built in functions in the Arduino environment you can use to control up to 20 servos directly (i.e. without using the serial servo controller). If you’re interested in doing that, you might want to take a look at this tutorial.

Personally, I prefer the external servo controller approach, since it takes care of the entire servo protocol for you (you have to keep calling the Arduino functions to keep the servos where you want them), and the Pololu servo controllers have some nice features that the Arduino servo functions do not (smooth speed control is my favorite). Plus you already have one!

Also, if you just need to control servos with your computer, you could bypass the Arduino all together and connect the servo controller to a serial port on your computer (carefully, the serial connection from your computer has to be made to a different input pin than the one from the Arduino board, or you could destroy the servo controller!) That’s what my example C program is designed to do. If you’re new to programming though, and/or you’ll want to control the servos from the Arduino without a computer hooked up later, the Arduino board is a much better starting platform/interface.

-Adam

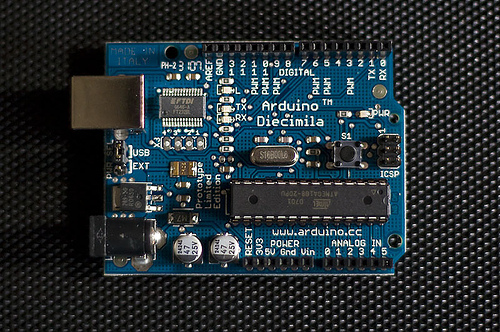
Arduino board is the latest Diecimila version.
I’m trying to write in the Arduino language/environment and don’t know how to get the Arduino to speak to the Pololu. The compiler error is from me trying to get all the code into the Arduino language.

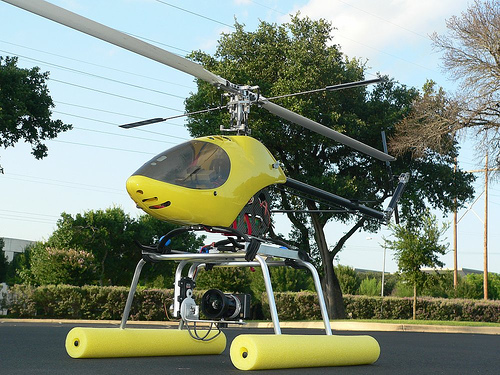
The goal of using the Arduino and Pololu servo controller is to control a pan/tilt camera mount for taking 360 spherical panoramic pictures. To make it more fun it will be hanging it under my rc helicopter 100-200 feet up. Servo 3 will actuate the camera shutter and servo 4 will actuate the air retracts for the retractable landing gear.

Once I get the programming worked out I’ll build the new mount. Here’s picture of the current mount with tilt.

The Arduino will also be receiving signals from the rc receiver, blinking lights and the Pololu servo controller is needed to handle the 4 servo movements.

You are correct that what I have listed above is a blend of different code and I’m trying to get it all into the Arduino language. Once that is done and one servo is moved to center I think I can take it from there. I was surprised that there wasn’t anyone in the Arduino forums that have used your servo controller for multiple servos. The Arduino is really only good for 2.

Let me know if you need more details.

Thanks,
Phil

Really? This Page says you can control up to 20 servos directly with the Arduino. Anyway, once you get it working you should totally post your code on the Arduino forums (and here too).

Looks like a pretty sweet setup you’ve got there! I like the clever use of the ServoCity servo gearbox. If you’re looking to build a new mount anyway, they make some nice compact pan/tilt servo platforms now, with and without downgearing.

I don’t actually have an Arduino board to verify this on, but I can try it out on another ATMega168 board at work. An Arduino program to control the servo controller in Pololu mode should look something more like this:

void setup()// run once, when the sketch starts
{
	Serial.begin(9600);// set up Serial library at 9600 bps
}

void put(int servo, int angle)
{//servo is the servo number (typically 0-7)
//angle is the absoltue position from 500 to 5500

	unsigned char buff[6];

	unsigned int temp;
	unsigned char pos_hi,pos_low;
	
	temp=angle&0x1f80;
	pos_hi=temp>>7;
	pos_low=angle & 0x7f;

	buff[0]=0x80;//start byte
	buff[1]=0x01;//device id
	buff[2]=0x04;//command number
	buff[3]=servo;//servo number
	buff[4]=pos_hi;//data1
	buff[5]=pos_low;//data2

	for(int i=0;i<6;i++){
		Serial.print(buff[i],BYTE);
	}
}

void loop()// run over and over again
{
	put(0,3000);
}

If you have everything powered up, the Arduino and the serial servo controller on a common ground, and Pin1 (TX) of the Arduino connected to the Logic Level Serial Input pin of the serial servo controller, this should send servo 0 to it’s center position.

Any luck?

-Adam

Adam,

Thanks for the code. I’m getting a solid yellow with the blinking red LED with no servo movement.

Is this code for the Pololu mode? I tried it in both modes and had the same results.

Tomorrow I’ll take a closer look at it.

Thanks for the help,
Phil

This code is for Pololu mode. I don’t have a board to test it on at home, but I have a theory about what might be going wrong. The flashing red LED indicates a fatal error, probably unintelligible serial data.

The Arduino boards use a serial bootloader, so you don’t have to buy a separate programmer to download programs to the microcontroller. When you download a program to the Diecimila over the USB connection, the data goes through a USB/serial converter chip and into the serial input pin on the microcontroller (Pin 0 on the Diecimila board). The chip responds with checksum and verification information, which goes back through the USB/serial converter to your computer. Unfortunately, I think this programming response data is also going out Pin 1 of the Diecimila board, and is confusing your servo controller.

Here’s a slightly modified version of the code from before:

void setup()// run once, when the sketch starts
{
   Serial.begin(9600);// set up Serial library at 9600 bps
   delay(100);
}

void put(int servo, int angle)
{//servo is the servo number (typically 0-7)
//angle is the absoltue position from 500 to 5500

   unsigned char buff[6];

   unsigned int temp;
   unsigned char pos_hi,pos_low;
   
   temp=angle&0x1f80;
   pos_hi=temp>>7;
   pos_low=angle & 0x7f;

   buff[0]=0x80;//start byte
   buff[1]=0x01;//device id
   buff[2]=0x04;//command number
   buff[3]=servo;//servo number
   buff[4]=pos_hi;//data1
   buff[5]=pos_low;//data2

   for(int i=0;i<6;i++){
      Serial.print(buff[i],BYTE);
   }
}

void loop()// run over and over again
{
   put(0,3000);
   while(1);
}

I’ve just added a startup delay at the beginning, and an infinite loop after it sends out the first servo command, so it should only send the servo position command once. After downloading this program to the Arduino, try power-cycling the servo controller (so the red LED isn’t blinking any more) then hitting the reset button on the Arduino. It should send just one correctly formatted Pololu mode servo command to the servo controller.

The servo controller takes just a little bit to start up before it’s ready to receive serial data. I’m not sure how that compares to the Arduino’s startup time, but with the startup delay you should be able to power on the Arduino and the servo controller at the same time (like by throwing the same power switch). If everything works, you can try shortening or removing this delay later.

So, any luck now?

-Adam

Adam,

  • Still no servo movement but the red LED is off.
  • Reseting the Arduino will make the green LED blink once.
  • Pressing the reset button again gives me another green LED blink.
  • Removing delay(100);, or changing it doesn’t effect the above results.

I was in San Antonio all day today and will be out again tomorrow until late in the evening. Relatives are visiting and I’m their tour guide. :confused:

Should I post the latest code on the Arduino forum to see if an experienced Arduino user can help out?

Thanks again…we must be getting close,
Phil

I’ve been disconnecting the signal wire going to the Pololu servo controller when uploading the new code. It does error, red LED, if I keep it connected during the upload. Disconnecting it during an upload isn’t a problem.

Phil

Except for the servo not moving that looks like proper behavior. I was able to test the code on a Pololu Orangutan just now (when you hit “Upload” on the Arduino compiler it generates a .hex file you can download to any ATMega168-based microcontroller board). It moved the servo just fine, so I’m wondering if the problem isn’t a hardware one now.

Feel free to post the code on the Arduino forums though, and the Pololu servo controller protocol in absolute mode is explained in a little more depth here.

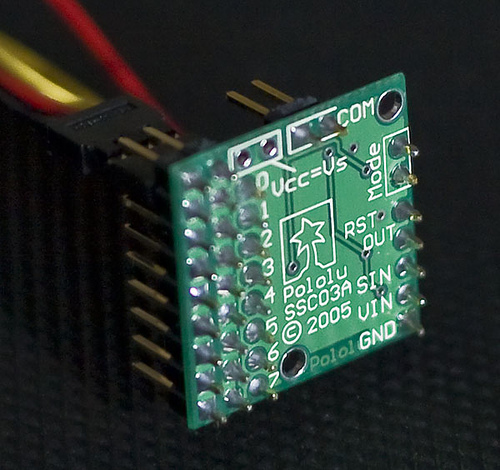
The code I sent you is only trying to move servo 0, corresponding to the numbering on the back of the servo controller board. Also, how are you powering the servos?

-Adam

P.S. I need an excuse to get back down to San Antonio. My lab used to have a project that was tested at SWRI in San Antonio once or twice a year. We would road-trip down from Michigan in like 24 hours (rotating drivers of course). Basically we would break our robots all day and fix them all night, but in between we had a huge daily food budget! I’ve tried to smoke brisket at home, and it’s alright, but not even close.

I just tried this code and it works GREAT! I was banging my head on the desk looking for examples for Arduino. I was also doing something wrong, I was trying to use the RS232 pin, but apparently Arduino uses +5V non-inverted Logic Level Serial. Also make sure to match the servo position! I was using “Slot 7” but I double-zero-based and put “6” as the servo number in the code. I moved the servo to the 1st slot (Slot 0), and it started turning!

For reference I am using Arduino Diecimilla, IDE 0010 Alpha.

You just helped me bring my robot to life again! I was up until 2AM last night. Thanks!

Zagrophyte,

Congratulations on getting it working and confirming that the code is correct!

Now I need to find out what I did wrong. This is how I have mine connected.

  • Arduino USB powered with 3 wires going to the Pololu Micro Serial Servo Controller.
  • Nothing is connected to the Vcc=Vs jumper.
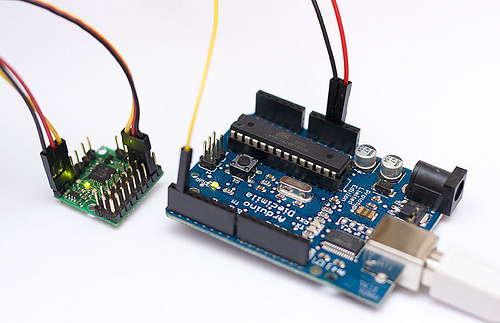
  • Arduino Power Gnd to Pololu GND (Black Wire)
  • Arduino Power 5V to Pololu VIN (Red Wire)
  • Arduino Digital 1(TX) to Pololu SIN (Yellow Wire)

Putting a volt meter on the servo power connections is showing 0v with 4.9v coming into the servo controller board from the Arduino. This must be why my servo isn’t moving.

Any idea what I’m missing?

Thanks,
Phil

You’re missing the servo power! USB ports are limited to 500 mA max per port, and sometimes less than that depending on the hardware and device. A single servo could draw more than that moving a load, or just peak past that when it starts to move with no load.

Since servos take so much more power than the electronics, the servo bus has it’s own separate power line, so you need another power source connected to the Servo Power pins (just above the Servo 0 pins). The circuit board layout looks something like this:

The Vcc=Vs jumper connects the voltage regulator that powers the electronics to the servo power, so both the electronics and the servos can run from one power source, but it only works in that direction. So, your power choices are:

-Adam

P.S. I had these graphics left over from an old post, and honestly those were the most battery-looking batteries I could find on the MS word clipart search. By the way, your pictures look very professional!

Adam,

Nice graphics! I’m going to use the one battery source configuration with the jumper and I’ll get it set up tomorrow and then post my results.

My pictures would be better if I used my tripod but I was in a hurry. Also the white background was an 8.5 x 11 sheet of paper and the black background is the poker chip case. :slight_smile:

Phil

I forgot to mention another handy trick when using Arduino+Pololu. As long as they have a common ground (which they should) you can connect the reset pin of the pololu servo controller to the reset pin of the Arduino, so when you reset the Arduino, it automatically resets the servo controller!

I’ve tested this, and it works great even with the auto-reset when you upload your code from the IDE.

I think we definitely have enough information here to warrant a page on the Arduino Playground, as suggested earlier. This controller makes servo control so much easier and hassle-free (once you find out how to use it), and I’m sure many more people with Arduinos would buy one if they had a good reference at their disposal.

I cleaned up the code and added more comments:

/*
 * Pololu Protocol Example
 * For Pololu Micro Serial Servo Controller
 * by Adam Borrell (http://www-personal.umich.edu/~aborrell/)
 *
 * An example of using the Arduino board to communicate
 * with the Pololu Micro Serial Servo Controller 
 * https://www.pololu.com/products/pololu/0207/
 *
 * This example focuses on the Set Position (absolute) command, but
 * a wide variety of commands can be sent to the controller. 
 * Documentation on the other commands can be found at:
 * https://www.pololu.com/products/pololu/0207/ssc03a_guide.pdf
 * 
 */

void setup()// run once, when the sketch starts
{
  //Set up Serial library at 9600 bps
  //Note: The controller will support any rate between 2000 and 40000 baud
  Serial.begin(9600);
}

void loop() //Main program loop, executes forever after setup()
{
  //Set servo position on port 0 to 3000 (Absolute Position)
  //Note: This function only has to be called once to update the position
  put(0,3000);
  
  //Delay so you can see the servo controller's serial status LED blink
  delay(1000);
}

void put(int servo, int angle)
{
  //servo is the servo number (typically 0-7)
  //angle is the absolute position from 500 to 5500

  unsigned char buff[6];

  unsigned int temp;
  unsigned char pos_hi,pos_low;

  //Convert the angle data into two 7-bit bytes
  temp=angle&0x1f80;
  pos_hi=temp>>7;
  pos_low=angle & 0x7f;

  //Construct a Pololu Protocol command sentence
  buff[0]=0x80; //start byte
  buff[1]=0x01; //device id
  buff[2]=0x04; //command number
  buff[3]=servo; //servo number
  buff[4]=pos_hi; //data1
  buff[5]=pos_low; //data2
  
  //Send the command to the servo controller
  for(int i=0;i<6;i++){
    Serial.print(buff[i],BYTE);
  }
}

Also, to share how I’m using this controller–nice helicopter, by the way!–here is the robot I am building, “Ping”:


(Yes, those are Meccano/Erector Set pieces, I got a great deal at Wal-Mart for $50, can’t be beat for rapid prototyping!)

There’s a ProtoShield kit with optional breadboard stacked on the Arduino, and he is using a Parallax Ultrasonic Rangefinder for his eyes, which he uses to scan 180 degrees and look at the closest object. Soon I will have him seek out nearby objects in the room and perform actions based on various criteria, I’m not sure just what yet.

He currently he has no way to move around, but I hope to fix that soon with some stepper motors or tank treads. It was getting cumbersome controlling everything in one loop, taking (most of) the servo code out of the equation helps a lot!

Nice bot there Zagrophyte! I also really like the reset pin trick, that way it doesn’t matter that the servo controller will be confused by the serial programming, since it gets auto-reset at the end.

Thanks for the nice code presentation too. If you’re going to make a playground page about it, I can pull some other Pololu protocol functions out of my code, and maybe you could Arduino-validate them. Actually, the only other one I really use on the servo controller is speed control. Basically you can set each servo to a slower than max speed, so that when you send a new position command, the servo controller splits it up into smaller steps over time. The servo still moves smoothly, with zero overhead to your MCU!

If you want to drive you robot with DC motors, Pololu also makes a bunch of DC motor controllers. Some are carrier boards for H-bridge chips that you PWM control, but they also make some pretty sweet open loop and even feedback-controlled serial motor controllers. All the serial devices use the same protocol, so you can daisy-chain them on a single serial line.

They don’t make a stepper motor controller, yet…

-Adam

Zagrophyte,

Thanks for sharing your Arduino tips as I’m new to all of this. I agree you about there is enough information here to add a page on the Arduino Playground. I’m going to add a post about my project with pictures and video after I get it completed in the next 4-6 weeks.

I like Ping and he’ll look mean with tank treads. Be sure to post a video when he starts moving. I’d like to get a SRV-1, your Ping reminded me of it, but I don’t have the time to play with it for now.

I’m happy with my toys for now. :slight_smile:

Phil

[/url]

Edit: There are some problems with the code I originally posted here, so I have removed it. Please read the rest of the thread, or jump here for working code!
Here are two more useful Pololu serial servo controller functions pseudo-translated (but untested) into Arduino code. Zagrophyte, if you would like to include these in your playground code, please check them on your Arduino first. I may have the speed limiting function comment backwards.

-Adam