I am working on a small project using the Raspberry Pi and Pololu Qik 2s9v1 Dual Serial Motor Controller.
I made all the cable connections but the qik does not move.
My cable connections are as follow:
GND & VCC -> are connected to 2x1.5 AA batteries (alkaline)
RX -> Raspberry Pi TX
TX -> Raspberry Pi RX
-M1 & +M1 -> first motor
-M2 & +M2 -> second motor
GND & VMOT -> 4 x 1.2V AA rechargeable batteries (NiMH)
I set the A jumper so the bit rate is fixed to 38400 and i re-configure the Pi’s serial port so that it’s not being used for console logins.
This is the small program i am trying to run:
import serial
import time

s = serial.Serial("/dev/ttyAMA0", 38400, timeout=0.5)
s.write( chr(0xAA) + chr(0x09) + chr(0x0A) + chr(0x7F) )    # motor 0 full speed reverse
time.sleep(2)
s.write( chr(0xAA) + chr(0x09) + chr(0x0A) + chr(0x00) )      # motor 0 stop
s.close()
The program was taken from here: ryosprojects.wordpress.com/2013/09/15/37/
When i first power it the Qik’s green led turns on every 2 sec or so and nothing changes when i run the program.
I tested the same code with auto bit rate detection (no A jumper). I also reinstalled the Raspian OS and installed only Python Serial module.
Also in DEMO mode the engines spin without a problem.
Right now i am stuck with this and don’t know what to do.
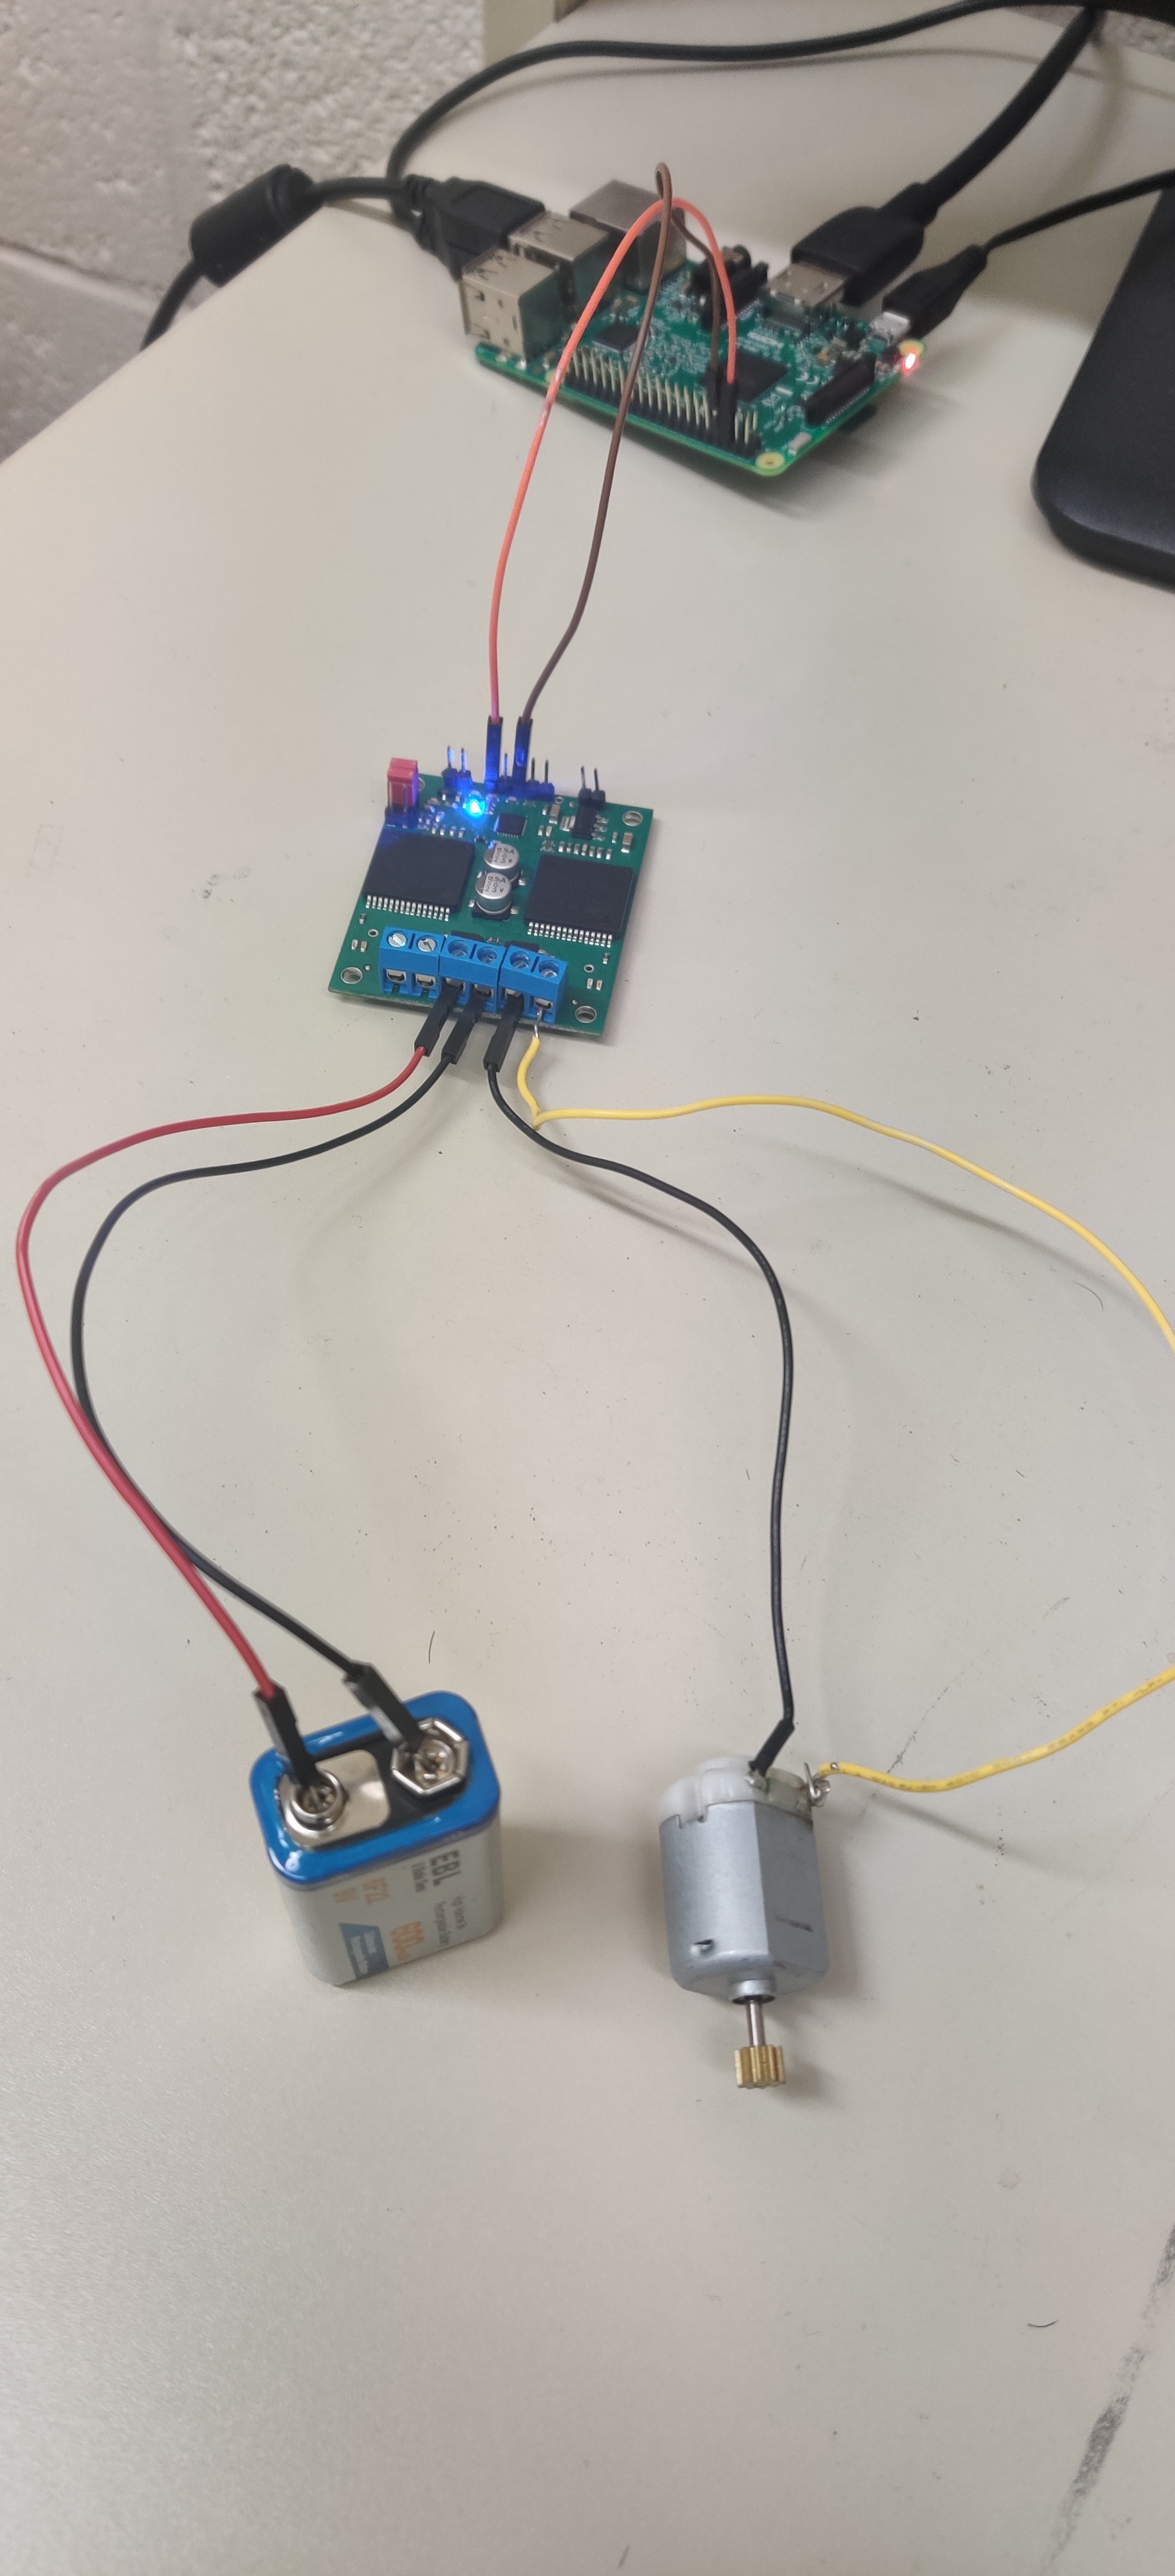
Do you have a common ground connected between your Raspberry Pi and your Qik? Could you post pictures of your setup, including your connections?
Also, I am concerned about your batteries. Your logic and motor supply voltages are very close to the minimum voltage range for the Qik. Could you measure the voltages of your batteries to make sure that they are fresh?
By the way, it looks like you have a typo in your post. You say that the jumper on the Qik fixes the baud rate to 348000; this should be 38400, which is what you have in your code.
I don’t have a common ground with the Raspberry Pi (was i supposed to? there is nothing about this in the qik docs). I tried now connecting the logic GND with a Raspberry PI GND but it still does not move. I also tried fixed and auto band rate.
You should have a common ground between the components in your system. We do not specifically call this out in any of the documentation because it is something that should be common in electronics and independent of which products you are using. Without a common ground, the signals you send to communicate between devices do not have a common reference and might be interpreted incorrectly. I do not see a common ground in the picture that you posted; could you make sure that you have one while you are testing?
Did you do the “Test the Serial Port” step in the link you provided to make sure the serial port is working correctly? Do you have any way of checking the serial signal, like a serial adapter or access to an oscilloscope?
Hello !
I am working on the same project but I am using a qik 2s 12v10 motor driver. I have connected my pi -> tx to my motor controllers rx.
Also, I have a common ground between them.
The input is about 9V which I think is sufficient enough to drive the motor. I went through the documentation on pololu website but they have mentioned an arduino library to make it work. I tried and it worked pretty well. However, I wish to establish a serial connection between my pi and motor driver and want to control it using pi. I tried the code listed above but it didn’t work.
The Arduino library for the Pololu qik dual serial motor controllers is designed specifically to work on Arduino-compatible controllers, which the Raspberry Pi is not. We do not have a library or any code for the qik that works for the Raspberry Pi. You probably would need to write your own or search the Internet to see if someone else has already developed one. You should look at the code in the first post of this thread to help get you started in writing your own code.
Thanks Amanda.
I tried the above code with the connections as suggested by Brandon but it does not work.
I do not want to use arduino library. I wish to drive the motor with the serial connection (RX-TX) using my raspberry pi.
Could you help me out with the command or a sample code that needs to be sent in order to drive the motor or suggest changes to the above listed code?
Did you look at the link in the first post that photonstudio based his small program on and try following the instructions there?
Can you provide more details on what you expect your system to do, what you are actually seeing, and pictures showing how everything is connected in your setup? Also, can you tell me what you have done so far (e.g. installed Python’s Serial library)? If you are receiving any error messages when trying to run your script, can you post them here?
Hi Amanda
I have already followed the steps as suggested by the link. I disabled the serial console login for my raspberry pi too and have successfully installed Python’s Serial library. I basically want to drive the motor in the reverse direction (full speed) and stop.
The connections are as follows -
Raspberry Pi Pololu Qik 2s 12v10 motor driver
TX . -------> RX
GND . -------> GND
Since I am only giving an input and do not want to see the output I haven’t connected the TX of motor driver to my Raspberry Pi RX. Also, I don’t need a logic level shifter since the 3.3V from TX of raspberry pi is treated as high (5V) being received at the RX of motor driver.
The code is as follows:
import serial
import time
s = serial.Serial("/dev/ttyS0", 9600, timeout=0.5)
s.write( chr(0xAA) + chr(0x09) + chr(0x0A) + chr(0x7F) ) # motor 0 full speed reverse
time.sleep(2)
s.write( chr(0xAA) + chr(0x09) + chr(0x0A) + chr(0x00) ) # motor 0 stop
s.close()
NOTE : The code executes fine but I don’t observe anything i.e. the motor doesn’t rotate.
Also, since the baud rate is 9600, I need both the jumpers.
Thank you for answering all my questions. It looks like you might be using a Raspberry Pi 3 in your project. If so, there is a known issue with the Raspberry Pi 3 (and later versions) with using the wrong baud rate when the CPU frequency changed, since the UART baud rate on the Raspberry Pi is directly linked to the CPU clock speed. Also, the UART might be disabled by default and needs to be enabled by editing config.txt. You can find more details on the Raspberry Pi UARTs on the official Raspberry Pi website.
By the way, I also noticed you’re using a standard 9V battery to power your motor. We generally do not recommend 9V batteries for motor applications, since they cannot source much current. I suggested you consider using a different power source for your motors.
If you are still having trouble getting your motor to run, can you post a picture showing the soldering on your board?
Hi Amanda
I checked config.txt and my uart is enabled. Also, I checked the link shared by you but I couldn’t figure out how to resolve the problem of changing baud rate with clock speed. Could you suggest a series of steps which I can follow in order to resolve this issue or its an inbuilt problem of raspberry pi 3. Does it have to do anything with the arm frequency in config.txt file?
I looked at your code and noticed that you are using a device ID of 9. The default device ID of the Qik 2s12v10 is 10. I suggest changing the device ID to 10 and seeing if that fixes the issue. Later on, it would make sense to use the Qik’s Compact Protocol since it uses fewer bytes and there is no device ID to worry about. But for now, I think you should just try changing the second byte in each command from 0x09 to 0x0A.
If that does not fix the problem, please post your updated code along with a description of what happens when you run it. Also, please post updated pictures showing how everything is connected. Please post a close-up picture of the bottom side of the Qik so we can double-check your soldering.