I just got the Maestro Mini and Raspberry Pi 4 and am excited to get this working. Perhaps I’m a bit of a novice in working with these things (more of a software guy), but I can’t seem to find a number of answers I’m looking for to resolve this.
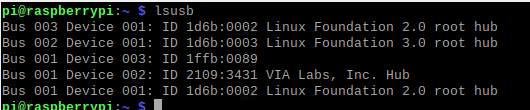
In lsusb - what is Maestro Mini expected to show up as? I see a blank device which I suspect is it.
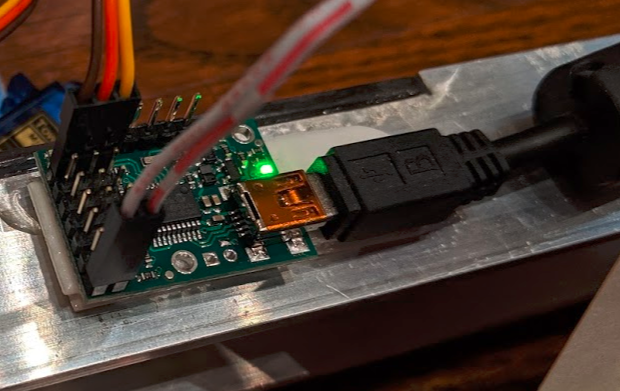
I’d like to power this directly from the Raspberry Pi and believe this should be possible. Right now, I have the 5v power out from the RPi into the Maestro Mini + and the GND into the -. Is this correct?
I’ve tried setting both the serial port disabled and enabled (not quite sure what this actually means/does) but consistently get the same message when testing the code. It hangs on line 6 in the code below.

Any help would be greatly appreciated!
Hello.
The USB device you have with a vendor ID of 0x1FFB and product ID of 0x0089 should be a Micro Maestro 6-Channel USB Servo Controller (not a Mini Maestro).
It might be OK to power your one servo from the Raspberry Pi’s 5V power pin as you are doing, but it is hard to be certain since we do not know how you are powering the Raspberry Pi, how much current the Rasbperry Pi is designed to allow on that pin, or how much current your servo will try to draw. Also, electrical noise from the servo might affect the Raspberry Pi. It would be safer to find another way to power your servo.
From your code, it looks like you might be using this Python class for the Maestro, which controls the Maestro over its serial interface. Did you configure the Maestro’s serial mode to “USB Dual Port”? The “USB Dual Port” serial mode tells the Maestro to listen for serial commands coming to its Command Port (one of the Maestro’s USB virtual COM ports). By default, the Maestro’s serial mode is set to “UART, detect baud rate”, which won’t work with the code you are using. In that serial mode, the Maestro will only react to serial signals received though its TX and RX pins (UART interface).
- Amanda
Amanda, thank you for such a detailed response.
You are absolutely correct - it’s the Maestro Micro. Good to know it’s being recognized.
Noted on the power. Let’s please circle back to this as soon as we know the signals are being received by the Maestro.
Indeed, I am using that library. I have not configured the Maestro serial mode to USB Dual Port. Do you have a link to a walkthrough for how to do that? I would note that the Pololu configuration utility doesn’t work with Raspberry Pi as mono won’t run on ARM. Might be worth porting it to .net core so it can run anywhere.
Hello.
To change the serial mode, you can select “USB Dual Port” under “Serial mode:” in the “Serial Settings” tab of the Maestro Control Center to change to USB dual port mode. Then click “Apply Settings” to save the mode to your Maestro.
The Maestro’s command-line utility (UscCmd) should work with Mono on a Raspberry Pi. However, the Maestro Control Center does not work on ARM processors due to bugs in Mono’s implementation of Windows Forms.
-Derrill
Thank you @Derrill and @AmandaS. The servos are now successfully powered with this wiring and after enabling dual port mode. You guys have been super helpful.
The last question I have is on servo positions. I’ve read the docs but this is still a bit unclear to me. Are there any other resources you could point me to that may be helpful?
What specifically about the servo positions are you having trouble understanding? If you are not familiar with using servos, you can learn more by reading these blog posts on hobby servos.
- Amanda

