Help with Maestro scripting (Updated)

Hello,

#UPDATE: Read my replies to this thread. I think I have things working as hoped for.

I need some help taking my fishing kayak propulsion project to the next level. I have been using Pololu controllers for several years now and have been extremely happy with the results.

My initial designs used off the shelf brushed motor trolling motors but I am now using BlueRobotics T200 thrusters. with their “Basic ESC”.

I have been using a Pololu Micro Maestro 6-channel to control the thrusters. I have the Micro Maestro configured with three inputs from 10k Ω potentiometers. Two of the pots control two thrusters and the third pots controls a servo for steering.

I have two setups for my propulsion systems.
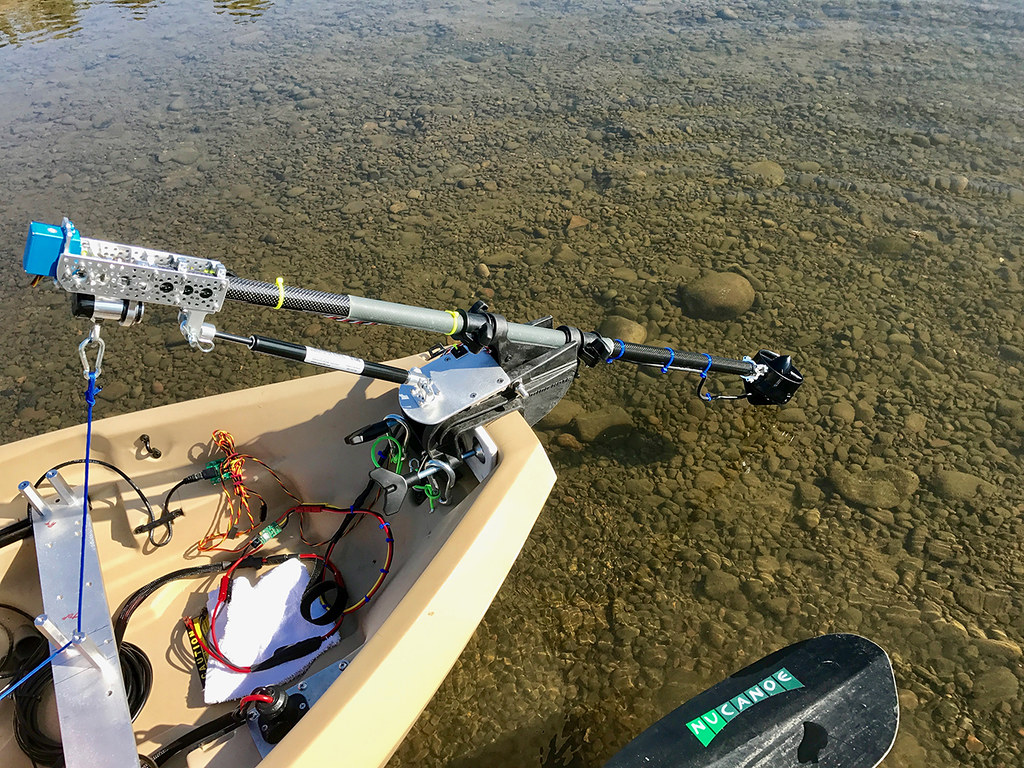
One is transom mounted like a standard transom mounted trolling motor, where the thruster(s) are controlled by one or two channels from the Mini Maestro and steering, is accomplished via a servo connected to the thrusters via a shaft through the tiller. I call this active vectored steering.

Imgur

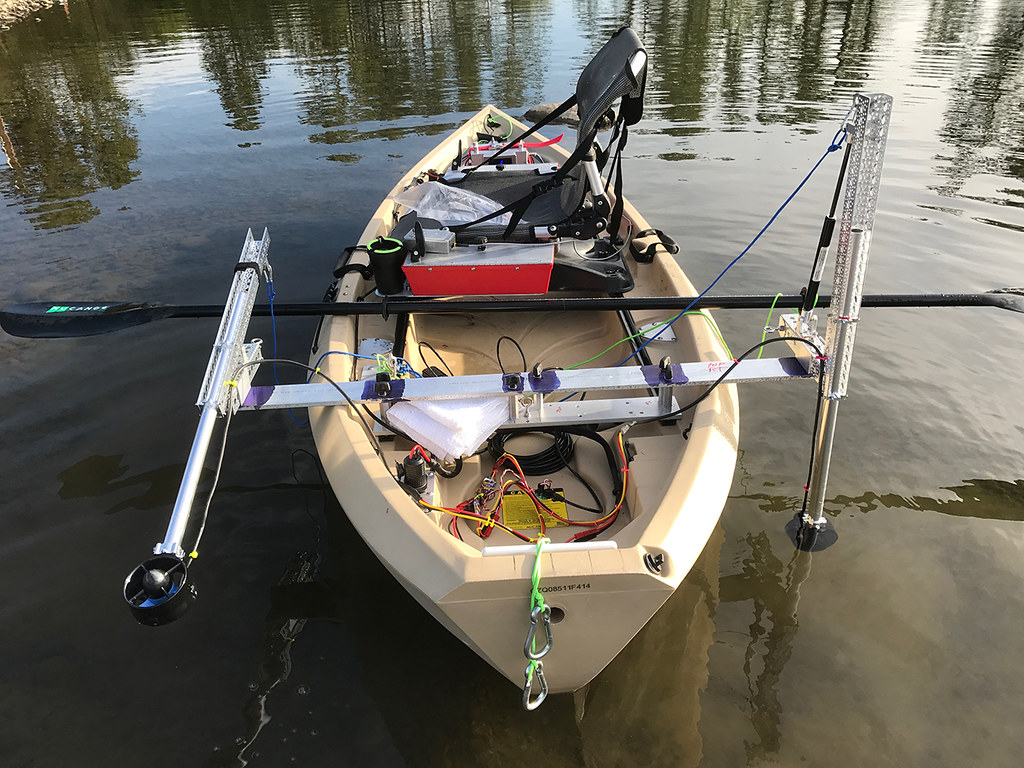
The other is a “skid steer” setup where the thrusters are mounted “outrigger” style. The thrusters are fixed and steering is accomplished by varying the speed and direction of each thruster. I call this passive vectored steering.

Imgur

Here is my current settings file:
Please note: I am now using a Pololu Mini Maestro 12-channel controller
I switched from the Micro to Mini because I thought I might need some of the additional scripting commands on the Mini.

maestro_settings 07222017 mini12 joystick001.txt (3.3 KB)

This current setup is very basic and works well.

I am now testing out using a joystick setup to do the same thing but there are some obvious differences between using individual pots and a joystick setup.

The joystick I am testing is more or less a standard configuration. It is a 4-function joystick I picked up from ServoCity.
It has an X, Y & Z axis. All axis are connected to 5k pots and are “return to center”.
There is also a N.O. push button switch on the top of the joystick lever.

This joystick setup works just like my individual potentiometers setup.

Here is what I am trying to accomplish.

I want to be able to set the speed and direction of my two thrusters with the joystick AND then have the have controller hold those values. My thinking was that the push button on the joystick could be used to tell the Mini Maestro to hold/release the values.

Real world description: I want to be able to set the direction and speed of my kayak with this controller via the joystick and then be able to take my hand off the joystick and have the speed and direction “hold” until I want to make changes.

I could use some help with the scripting. Hopefully someone has already done some like this.

I am also willing to “hire” someone to do this for me.

Thanks in advance for any help and/or advice.

Phil

Scripting flow ideas for Mini Maestro 12-Channel USB Servo Controller

“Live Inputs”

Sets Servo 3 to a position based on an analog input

begin
		0 get_position	# get the value of the pot, 0-1023
		4 times 3900 plus	# scale it to 4000-8092, approximately 1-2 ms
		6 servo 		#set servo 6 based on the value

Sets Servo 4 to a position based on an analog input

		1 get_position	# get the value of the pot, 0-1023
		4 times 3900 plus	# scale it to 4000-8092, approximately 1-2 ms
		7 servo		#set servo 7 based on the value

Sets Servo 5 to a position based on an analog input

		2 get_position	# get the value of the pot, 0-1023
		4 times 3900 plus	# scale it to 4000-8092, approximately 1-2 ms
		8 servo		#set servo 8 based on the value

“Stored Values"
Store values for “Live Inputs” - Channels 0, 1, 2

If push button switch is closed use “Stored Values” and loop on “Stored Values" until push button switch is closed again.

May want to add some delay at this point if button switch was detected as closed prior to continuing. Just enough time to get thumb off the push button :wink:

If push button switch is closed again, goto “Live Values”

Repeat

Got it to work… more or less :wink:

 # Maestro 12 channel controller script. Inputs 0,1,3 5K pots - joystick. Input 4 push button on joystick

begin

 # Sets Servo 6 to a position based on an analog input via Z axis on joystick

		0 get_position	# get the value of the pot, 0-1023
		4 times 3900 plus	# scale it to 4000-8092, approximately 1-2 ms
		6 servo 		#set servo 6 based on the value

 # Sets Servo 7 to a position based on an analog input via X axis on joystick

		1 get_position	# get the value of the pot, 0-1023
		4 times 3900 plus	# scale it to 4000-8092, approximately 1-2 ms
		7 servo		#set servo 7 based on the value

 # Sets Servo 8 to a position based on an analog input via Y axis on joystick

		2 get_position	# get the value of the pot, 0-1023
		4 times 3900 plus	# scale it to 4000-8092, approximately 1-2 ms
		8 servo		#set servo 8 based on the value


 # Check to see if push button is pressed and if it is goto "hold:"

3 get_position
512 less_than
10 delay
if
goto hold
else
goto continue
endif

 # Check to see if push button is pressed and if it is, goto "continue:"

hold:
3 get_position
512 less_than
10 delay
if
goto continue
else
goto hold
endif

 # still fiddling with delay 07/23/2017

continue:

repeat

Complete Settings File
maestro_settings 07222017 mini12 joystick002.txt (3.8 KB)

Hello.

I am glad you were able to get it working how you wanted; your project looks really neat! You might consider posting more about it on the “Share your projects” section of the forum. I am sure people would be interested in seeing more about it.

By the way, I noticed your script is using a few GOTO statements to decide when to continue and when to hold. While what you have right now should work fine, you could do it more efficiently by using a WHILE loop instead. For example, you could replace all of the logic checking the push button with the lines of code below:

begin
  3 get_position 512 less_than
  10 delay
  while
repeat

Brandon

Hi Brandon,

The logic for checking the push button is my attempt to create “latching relay” logic. It is what we called a “flip-flop”.

When the program is in the “RUN” mode the inputs of the controller, pins 0,1,2 are being translated to the servo pins 6,7,8 of the controller.

When I push the push button momentarily, the program goes into the “hold” loop and stays there. The values on the servo pins 6,7,8 remain at what ever value they were prior to this initial momentary button push. This is the “HOLD” mode.

If I want to go back to the “RUN” mode again, I momentarily push the push button.

I tried your code but the hold mode only works as long as I depress the button.

You might get a better Idea of how this needs to work from the first couple of minutes of this YouTube Video

Thanks
Phil

You are correct; the code I posted would require holding down the push button. I did not realize your code was latching with a momentary input.

Thanks for sharing that video. I noticed that you had to press the button more than one time on occasion for it to change “modes”. Right now it looks like your script will switch modes every 10ms until the button is released, so you could probably increase the delay to make it work more reliably, but a more elegant solution would probably be to add a check after each if statement in your flip-flop code that waits for the button to be released before continuing. You might consider looking at the wait_for_button_open_10ms subroutine in the “Using a button or switch to control servos” example under the “Example scripts” section of the Maestro user’s guide. You could probably just use that subroutine if you just change the call to button with 3 get_position 512 less_than.

Brandon

Hi Brandon,
Thanks for the suggestion (s)
Works great!
I have also wired up a LED to pin 8 (Output) that will tell me when I am in the RUN mode. I ordered one of your Basic SPDT Relay Carrier with 5VDC Relay kits so I can have two LEDs. One for RUN and one for HOLD. I am sure I could have done this via scripting but for me, this was easier. :wink:

Thanks for all your help
Phil

1 Like