
Hello,
How can i connect a smart servo A1-16 to a MacBook and use the Editor software to configure it? I guess the servo needs a TTL connection while only USB ports are available. On the picture shown on the “https://www.pololu.com/product/3400/pictures” page i see a card between the PC and the servo, which one is it?
Thank you,
Richard
Hello, Richard.
The MCU board shown in that picture from the XYZrobot Smart Servo A1-16 product page with the Mac laptop is the Bolide Y-01 used in the XYZrobot Bolide Y-01 Advanced Humanoid Robot DIY Kit. We do not sell that board separately from the XYZrobot robot kit.
The Motor Editor software (called Servo Tool) only works with that Bolide board. However, you could communicate directly with the servo from your own program using a USB-to-TTL Serial Adapter cable or from an Arduino or Arduino-compatible board (like the A-Star programmable controllers) with our Arduino library for the Smart Servos. The servo’s communication protocol is documented in its datasheet, which is linked under the “Resources” tab on its product page.
- Amanda
Thank you Amanda.
If i may ask you one more question: how can i connect the A1-16 connection cable to an Arduino? Is there a male connector available (as those on the servo) with connections for the USB-to-TTL cable? I also wonder whether i need to mix TTL communication wires (Rx/Tx/GND) and power wires for the A1-16 (12V/GND for example).
Thank you for your help,
Richard
The connectors on the ends of the XYZrobot Smart Servo cable have four circular holes above the main connection port as shown in the picture below:
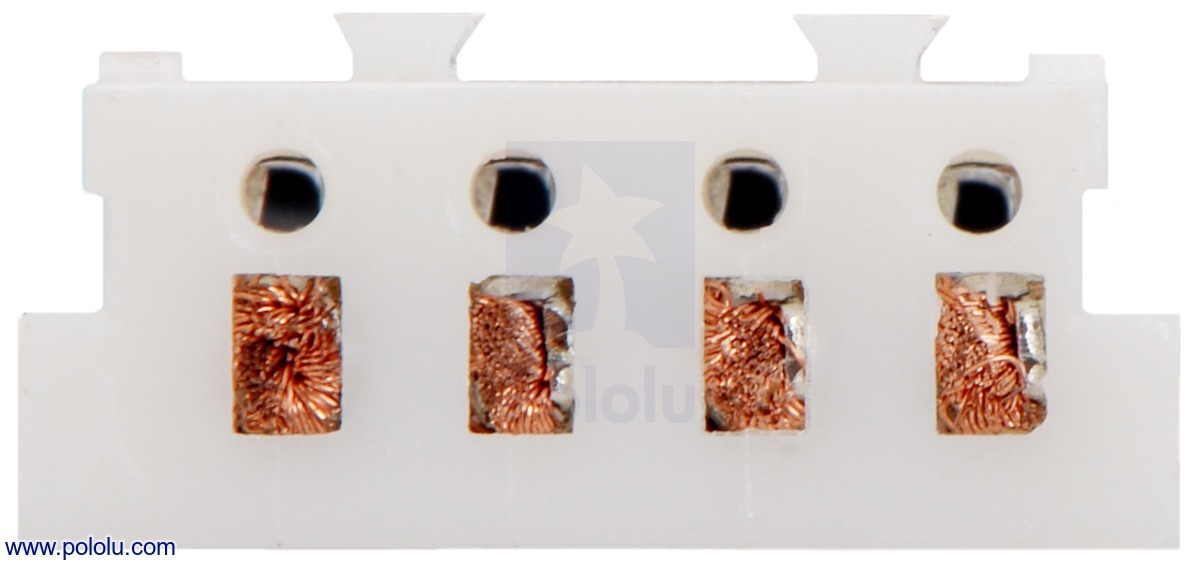
You can use jumper wires to connect the Smart Servo from those openings to the Arduino. The diameter of those holes can be found in the dimension diagram for the female connector, which is linked under the “Resources” tab on any of the XYZrobot Smart Servo Cable product pages. If you have not already done so, I suggest reading the XYZrobotServo library’s GitHub page, specifically the README.md file, to understand how to connect the servo to the Arduino and to use the library.
We do not have any male connectors for the Smart Servos. Just to be absolutely clear, if you are planning to use an Arduino to communicate with the servo, you do not need to use a USB-to-TTL Serial adapter cable. If you do not want to use an Arduino and want to communicate directly with the servo using a computer, then you would need to use a USB-to-TTL Serial adapter cable and write your own computer software to interface with it.
Yes, you probably would need to supply power to the servo directly from your power source. Please be sure you have a common ground between all your devices.
- Amanda
Hi Amanda,
The “inter-axis” distance between two holes in the smart servo cable connector is 2mm whereas the size of the Arduino jumper header is 2,7mm and it is impossible to insert four jumper wires into that connector. The jumper wire itself is made of multiple smaller wires and it too flexible to be inserted in the connector either. I may get rid of the wire plastic headers but is it then safe to have two non-isolated wires so close together?
I did not find the A1-16 max current, could you provide this value?
Thanks a lot,
Richard
Hi Amanda,
Sorry for my question about the A1-16 current, i found the answer.
Richard
Hello, Richard.
It is generally good practice to avoid exposed wires so close together like that; using heat shrink tubing or electrical tape would be a good idea if you want to remove the plastic headers. However, in my experience, you can typically force 0.1" pitch headers to work as a sort of temporary solution. If you want something more permanent, you might consider cutting the 2mm pitch connector off of one of the included cables and splicing on your own 0.1" connector.
Alternatively, you could probably use something like these 2.54mm (0.1") to 2.0mm jumper wires from Adafruit to make that connection easier. They only have them in the female-female variety, but as noted on Adafruit’s product page, you could use some double-sided male headers to make a connection to something like a breadboard or Arduino.
Brandon