I’m working on a ~1/4 scale R/C Tachikoma from the Ghost in the Shell: Stand Alone Complex anime tv series.
The adapter is for the new, larger version that I’m working on now, using the info I gained from my first version from a year or so ago.
This newer version is going to be about 30" tall, compared to the older one which was 18" tall.
That’s really awesome! I would very much like to see the Tachikoma when it is complete (some of the engineers here are GITS fans). In the meantime, I would like to post on our blog about the adapter. Is it okay if we use some of your pictures from Flickr and Thingiverse?
Sure, go ahead and use the photos for your blog post. Are there any more pics you would want/need?
I’m aiming to have Sapporo (the Tachikoma) ready to be shown at Anime Expo this year in July, so I will have
photos of the finished project along with in-progess build photos. In addition to the Universal Hubs, I’m using
four Pololu Simple High-Power Motor Controllers (18v15) and the 37Dx52L mm 29:1 Metal Gearmotors.
The smaller scale version in the Flickr video was using the 37D motors, but only 2 of the motor controllers in
a tank drive setup using the 2" Fingertech mecanum wheels.
Thanks, I don’t need any additional photos, but feel free to share them. I have made a post about your project on our blog. Please keep us updated on the progress of Sapporo!
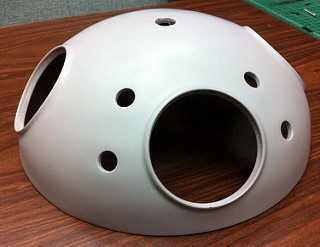
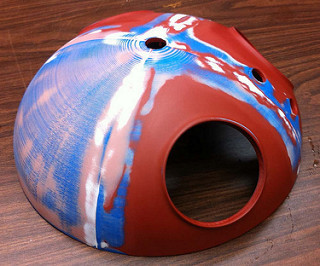
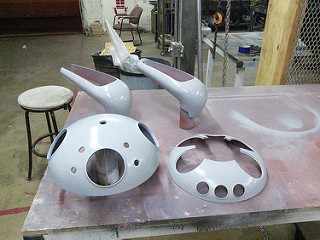
Small update on the project progress. I have the upper dome for Sapporo’s body now printed, primed, and sanded.
Looking good, if I do say so myself… The dome is assembled from four 3d printed pieces, and after assembly
measures 13" in diameter, and 5" tall.
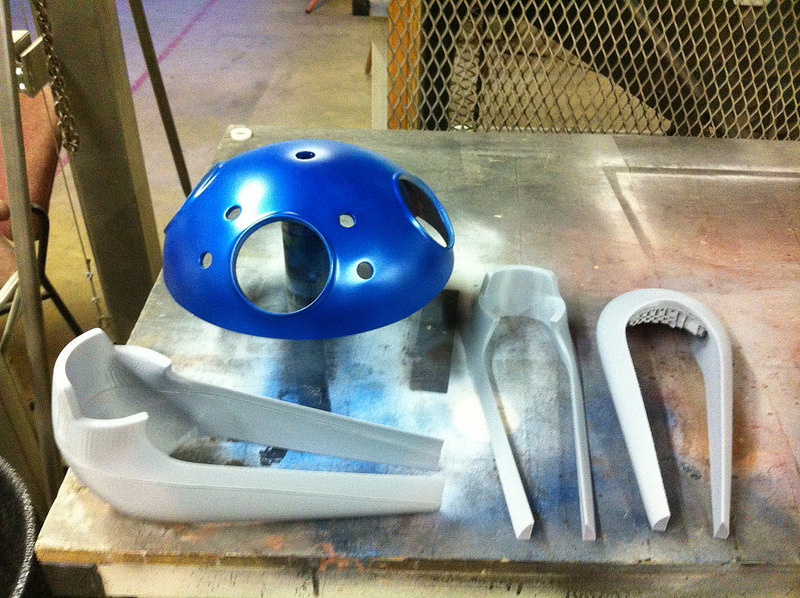
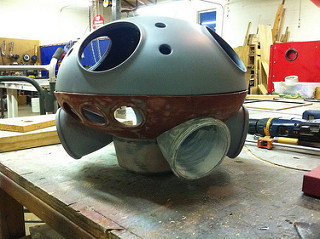
Minor update on the Tachikoma:
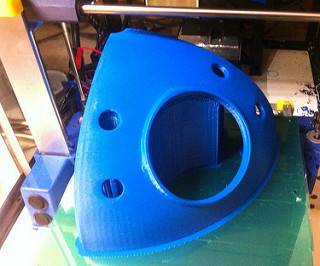
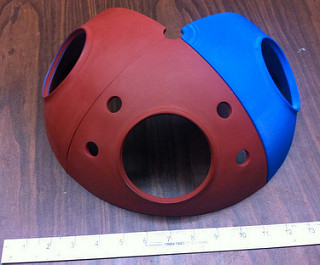
New parts arrival fresh from the 3d printer (Shoutout to the PolyPrinter folks for using the legs as one of their prototyping shapes as they do beta testing on their new double-wide printers), and paint color test on the upper dome body
For now, one servo hinge point at the top of the legs. With individual control of each servo I should be able to have him
lean side to side, bow, rear back, and twist slightly.
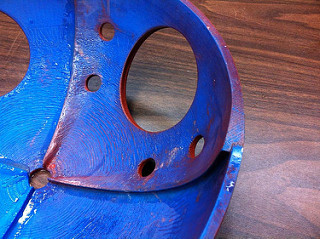
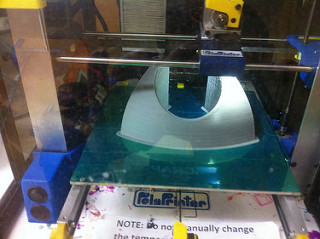
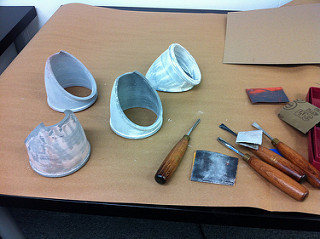
Not really a part of the Tachikoma build, but a useful demo piece for when I do a panel or have a table at a con or Maker Faire.
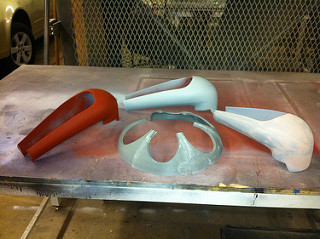
I used a failed print from the upper dome to have a visual explanation of my finishing process for the 3d prints.
Starting on the left:
Raw print - Sanded raw print - Bondo - Sanded Bondo - Primer - Rough sanded primer - 600 grit wet sanded primer - Final finish color
It includes a bunch of pics of the latest printed parts, the pile of new electronics that will be the guts of Sapporo, and
an explanation of some of the assembly process.
No booth at AX, I’m just one of the staff who work the con who has other semi-related hobbies I can show off at con.
Color paint pass on the sensor “eyeballs” for the upper dome. I also have the swash plates and mounting supports that the sensor balls attach to allow for them to move completed, and will be mounting all of that over the weekend, along with the related servos and control cables.
Also, my “How to Build a Tachikoma 2.0” panel also got approved for Anime Expo. It is on Thursday, July 3rd, at 8:15pm in Room 501 (as of the current posted Programming Schedule at the time of this post…)