My 8x2 LCD panel with 3pi doesn’t seem to be working. I am not sure whether its a problem with the LCD or 3pi itself.
Plugging in the LCD seems to interrupt the LED functionality. I am not sure how to debug LCD problem.
Any help would be useful.
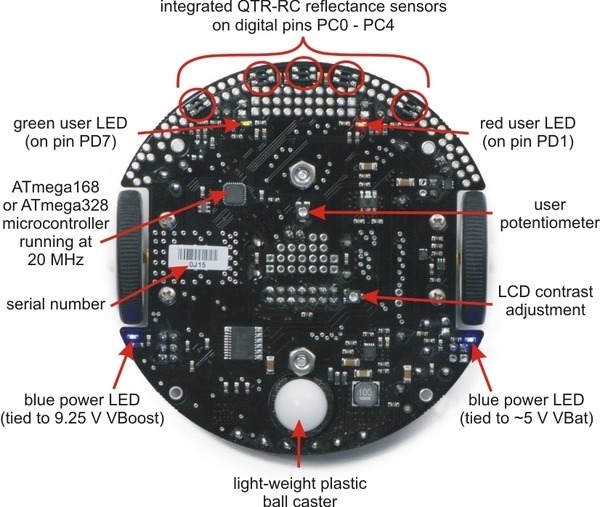
The most common explanation for what you are describing is accidentally plugging the LCD in backwards. Is it possible this happened after you took it off to add batteries? Can you post a picture of the LCD installed on your 3pi? Have you tried adjusting the contrast potentiometer shown in the picture below to see of that helps?
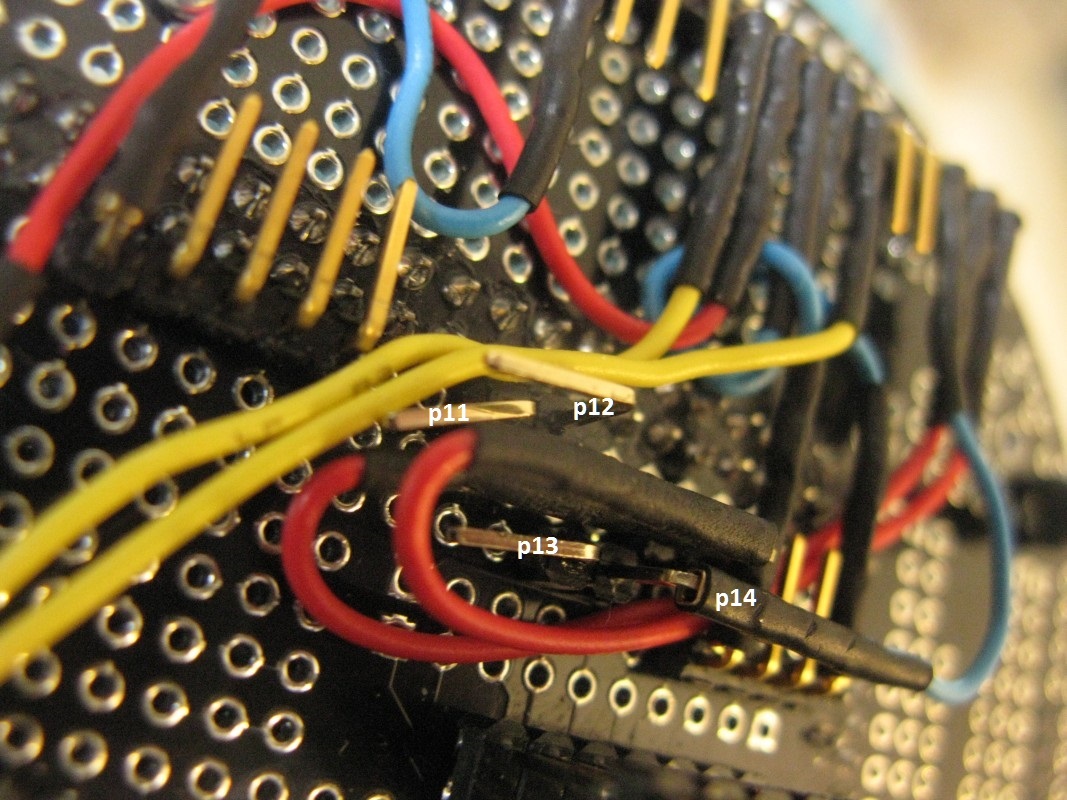
You’re welcome. For entertainment value, I attached a photo of my newly-added mbed access pins, that are on the bottom of the mbed Expansion Board. I’ll migrate my Sensor’s signal from the mbed’s p8 to p14. In the photo, you can see the blue wire now attached to p14 (scroll the photo down to see its lower half).
Alas, while my banging away on mbed’s p8 may have contributed to the 3pi’s Display not working, the Display still shows nothing, even when sitting by itself, completely stock, with nothing plugged into it at all.
Does the 3pi’s Display have its own Pololu product page, where I can learn how to test the Display sitting by itself on a breadboard, i.e., while connected to an Arduino Nano?
We do sell the LCD separately. Our 8×2 LCD is a generic equivalent of the Optrex DMC50448N-AAE-AD LCD, so the specifications and characteristics listed in the Optrex’s datasheet under the “Resources” tab of the 8x2 Character LCD product page apply.
Alternatively, you could remove the m3pi expansion board and load the demo program on the 3pi base to see if the LCD works. The source code for the demo program is included with the Pololu AVR C/C++ Library described in the “Programming Your 3pi” section of the “Pololu 3pi Robot User’s Guide”, in the folder “libpololu-avr\examples\atmega328p\3pi-demo-program”.
can support the 4D Systems’ small Capacitive Touch Displays, of which I have been lusting to add this one to my Robot’s JoyStick, to drive it around by dragging my finger on this display …

 …
…